AX10 Palletizing Solution
4. Screw or unscrew the nuts so that they come flush with the end of the threaded anchor body.
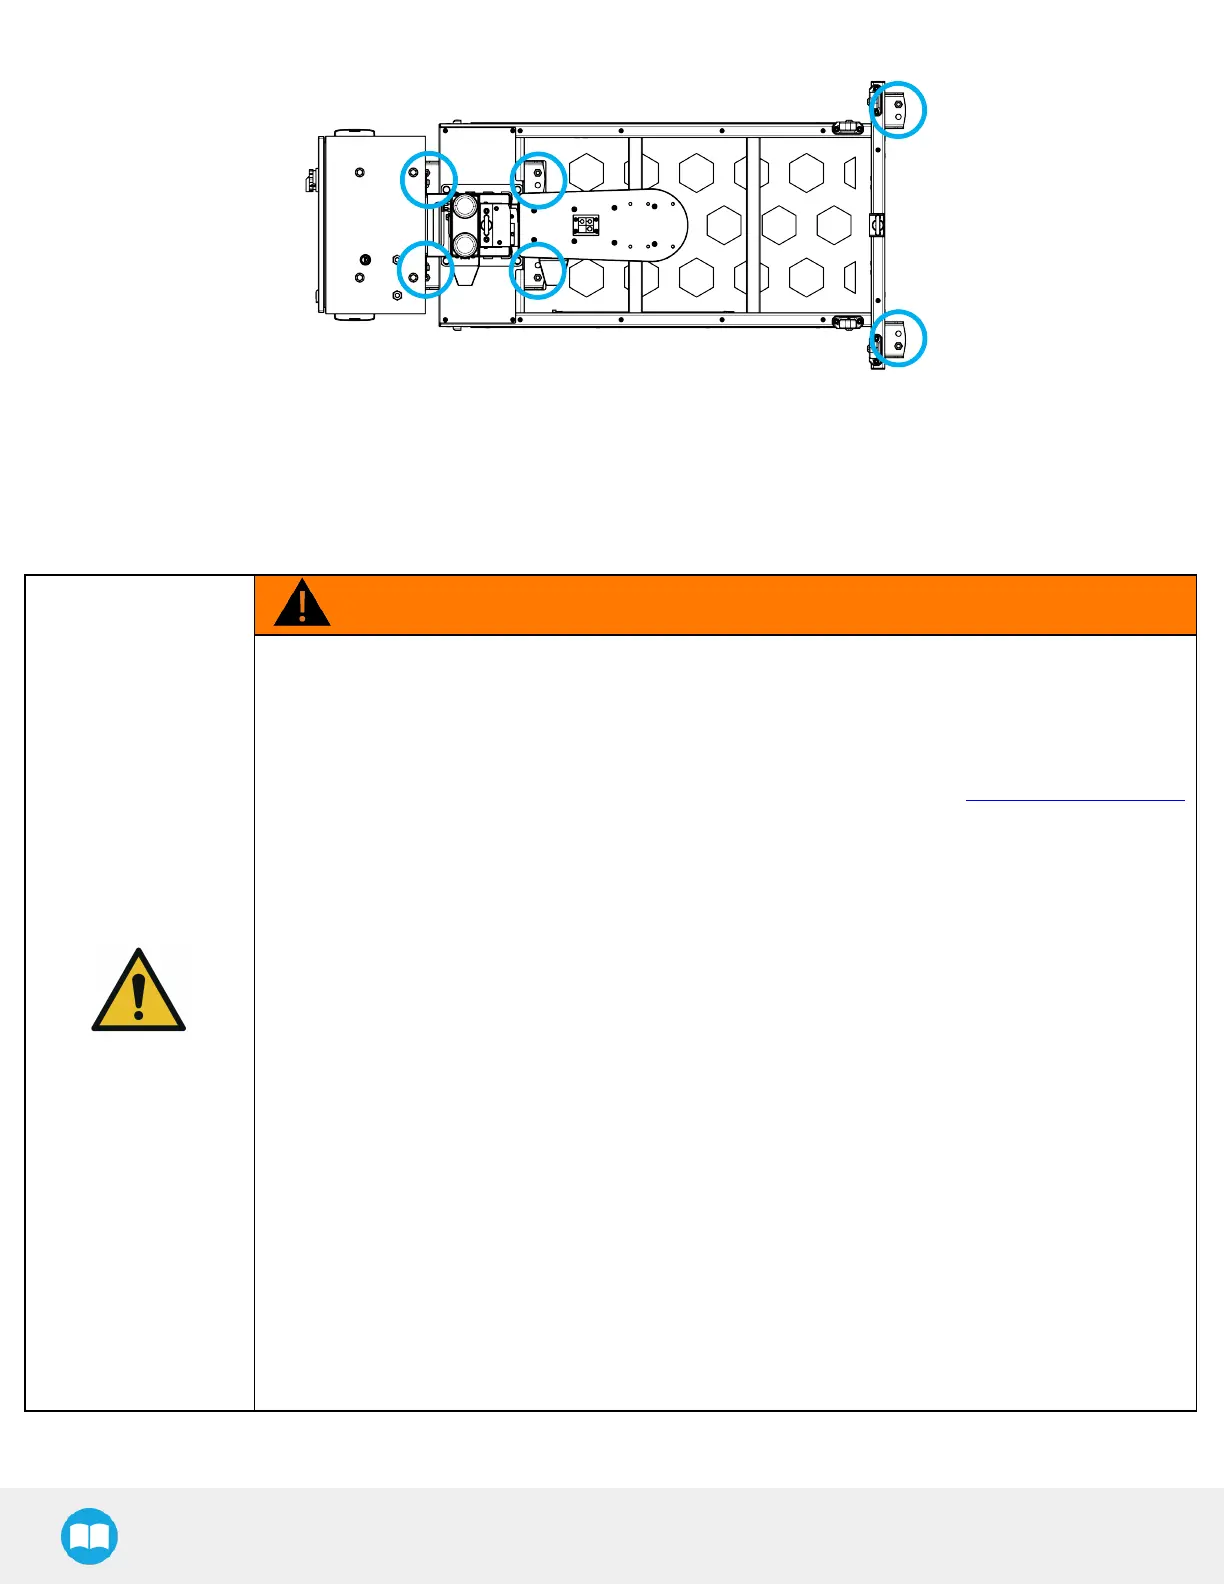
5. Make the anchors go through the holes of the Solution's base and into the drilled holes in the concrete floor.
6. Use a tool to hammer the anchors in.
7. Secure the Solution by screwing the nut of each anchor with a torque of 54 Nm.
WARNING
Tip Over Hazard
l
The solution must be anchored at all corners.
l
The anchors provided with the Solution are Wej-It Ankr-TITE® Wedge Anchors model ATG1233 (1/2 x
3-3/4), but they may not be in compliance with the local rules, regulations and standards in force
where the Solution is installed (the technical data sheet can be found on the Robotiq support website,
in the Palletizing Solution section). A qualified engineer should measure the anchoring resistance of
the anchors and confirm they can resist the following loads, or select alternative anchors designed to
resist the following loads.
o
Operational load (per anchor): 1,200 N tensile resistance and 80 N shear resistance
o
Load at emergency stop (per anchor): 2,640 N tensile resistance and 279 N shear resistance
o
Design load (per anchor): 6,200 N tensile resistance and 2,350 N shear resistance
l
If the anchors provided with the Solution comply with the local rules, regulations and standards in
force where the Solution is installed, use them in compliance with the following installation
requirements.
o
Anchors must be installed in concrete with a minimum strength of 17 MPa (2,500 psi).
o
Anchors must penetrate at least 65 mm (2-1/2 in) into the concrete.
o
Anchors must be located at least 200 mm (8 in) from any edge of a concrete slab.
o
Anchors must be installed at least 150 mm (6 in) from one another.
o
Anchors must be installed in conjunction with the provided serrated flange locknuts.
o
Anchor nuts must be tightened to a torque ranging between 68 Nm and 74 Nm (50-54 lb-ft).
Failure to account for these factors may result in material damage, bodily injury or death.
62
 Loading...


