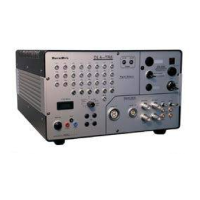
Figure 3.8: Rear panel of the ATR19 (for ATR19-2 see Chapter 3.6)
Before connecting the input cables to the LEMO connectors on the ATR19 front panel make sure that the detector voltages
are switched off and that you are aware of the input jumper settings for the respective channels and the active input connectors
(see Chapter 3.1).
In the default versions of the ATR19 (not ATR19-2) ch1 and ch2 (inverting) are reserved for the (positive) MCP signal input
via the “In-” LEMO connector, while the other channels are non-inverting for signals from the delay line ends which shall be
supplied through the “In+” LEMO connectors. The delay-line signals are negative if the U
ref
and U
sig
voltages are provided to
the corresponding connectors on FT12(16)-TP as described in the detector manual. If these voltage inputs are interchanged,
the signals from the delay-line will become positive and require connection via the “In-“ inputs and changing the input jumpers
inside the ATR19 from their default settings (see Chapter 3.1).
In case of DET40/75 and ATR19-2(b): the signal from the MCP front or back contact (positive) has to be connected to ch1
In- and/or the signal from the timing anode (negative) has to be connected to ch2 In+.
Now you may also connect the “Mon”, “ECL” and “NIM” outputs for signal verification and/or data acquisition with a TDC,
depending on the ATR19 version that you have obtained (see also Chapter 3.1).
If you operate the threshold and width controls of the DLATR boards via the potis (JP11, JP12, JP13 set) you may now connect
the threshold and width LEMO connectors to an Ohm-meter for verification.
If you operate the threshold and/or signal width DC levels with external voltages (JP11, JP12, JP13 off) you must now connect
the corresponding LEMO inputs. Before you can obtain output signals from the CFD output (ECL and/or NIM) these voltages
must be set from your external DC source. The default values are 2V and have to be finally adjusted during detector operation.
3.5 Opening the ATR19 module
You need to open the lid of the ATR19 module only if
- you want to change the input impedance or inversion of an amplifier channel
- exchange a DLATR board
- switch between mains power supply to external DC power
- change the setting method for CFD signal width or threshold levels
- modify the CFD output level (ECL or NIM)
To open the top lid please follow these steps and for ATR19-2 refer also to Chapter 3.6:
I. ATR19-6/8-channel version:
Switch off the ATR19 main power and retract any cables from the module.
Remove the 4 screws on the rear panel and the two screws on the top lid. Now the back panel is not fixed anymore
to the rest of the housing but connectors in the rear panel are still wired to the main AC adapter board inside the
ATR19.
Without pulling too much on the cables it is possible to retract the rear panel carefully for about 2 cm. Now the top
lid can be retracted from its guide slots.
Retract the top lid
Fix the rear panel to the housing again. It is sufficient to fix the rear panel only provisionally by a couple of screws.
When reinserting the screws make sure that they are entering the thread correctly.
Warning: when the lid is open you should not connect the mains cable to the socket. There is a severe
risk of electroshock which might be fatal. The ATR19 shall not be operated with the lid open
II. All ATR19 versions
Now you may change settings and jumper positions or exchange DLATR boards. For removing a DLATR board
pull gently (simultaneously) on the upper and lower edges of the board. When you insert a board again first mate it to
the input pins near the front panel then press the 25pin connector gently into the socket and insure that the
MCP Delay Line Detector Manual (11.0.1304.1) Page 41 of 83