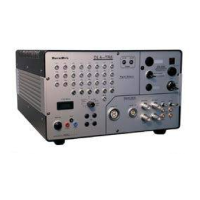
(You should have installed the TDC card already in the PC)
Connect via the short LEMO coax cable the TDC8HP channel 8 (in case of TDC8 input “C”) with the timing (CFD) output
(NIM signal only) used for the MCP signal. Likewise connect the outputs of the delay line anode timing signals to the channels
1 to 4(6) according to Chapter 0 of the manual.
For
only: If you have received cables of different lengths use the four or six long cables for that. For coincidence experiments it is often of
advantage to operate in “common stop” mode and supply a delayed trigger signal to the common input (to arrive after the last significant signal in
channels TDC1-8. Such a signal can be a coincidence trigger, to collect only selected events.
Note that this is only the standard connection scheme, for other connecting schemes the software must be adapted. Additional
channels can be used for other signals to be correlated (i.e. from a second detector or a TOF trigger).
Operating two or more TDC modules:
If you operate two TDC8HP modules only channel 8 of the first TDC8HP board (lowest TDC ID) have to receive the trigger
signal. Additionally connect the “External Clock” Module with each TDC8HP channel “C”. Also apply the flat ribbon cable
to the two TDC8HPs (on top of the card). The two TDC8HP board will now operate as a virtual “TDC16HP” board with
doubled input channels. The TDC with the lowest TDC ID provides channels 1-9 (1-8 and T on the board) and the other
board the channels 10-17 (1-8 on the board). A third TDC8HP can also be linked in the same way.
For operation of two TDC8 modules: both common inputs must receive the same (trigger) signal. Additionally one TDC channel in each module
must receive the same signal to ensure correlation between the modules (by software).
Note, that the TDC8 needs a minimum time difference of about 10ns between start and stop signals in case of “common start” operation. It is then
advisable to use cable sets so that the common input cable is at least 3m shorter than the other input cables.
Connect the TDC start via the short two-pin cable with the timing (CFD) output (ECL signal only) used for the MCP signal.
Use the four long cables to connect the (stop) channels x1, x2, y1 and y2 for the delay-line CFD timing output channels 3, 4, 5
and 6 according to Chapter 0 of the manual. If a NIM2ECL converter is used, it is placed between the CFD NIM output
sockets and the HM1 inputs.
If you operate two HM1 / HM1-B as a double unit, the “start” needs to be supplied to both modules (ISA version only).
4.4 Starting the CoboldPC 2011 R3 Software:
Once the software is successfully installed you are ready to run a
session from a pre-acquired list-mode file to make
you acquainted with the software (found on the CD in folder CoboldPC2011SampleFiles). For this it is not necessary to install or
operate any hardware but you have to have all drivers installed. We have provided you with a sample file (list-mode file) that
was acquired with the hardware that you have received (or similar hardware) on the CD
*
. From now on you may also refer to
the
help file (this has replaced the
manual) as this small section can give only a very brief overview
how to get started.
loads the DAq (Data Acquisition module) and DAn (Data Analysis module) dynamically. After starting the
program the first time you have to specify the right DAq and DAn modules. This can be accomplished in either the About-
Box or in the File-Menu. DAq modules are normally named like DAq_*.dll and DAn modules as DAn_*.dll. 64-Bit modules
contains “x64” in the filename. For the DAq module please select the one with the appropriate hardware that you have
purchased that will support the readout of your hardware. These files can be found in the main
installation
directory.
If you have purchased the HM1 with histogramming option please refer also to the HM1-TDC manual. The following
procedure is mainly describing the start-up in the standard (transparent mode), which is recommended for first use of the
detector system.
After starting the
program and selecting the appropriate DAq and DAn modules (there is a flag to load the
last selected DAq and DAn modules at start time) the program has linked the proper program parts and waits for input from
the command line (type the command text and “enter”) or the tool bar buttons. With the command “exe filename.ccf” or
from the drop down menu you can start a “batch-file”, i.e. a series of commands as written in the file (new line = next
command). For example any “Startup.ccf” file (see below) defines a set of parameters, coordinates, conditions, and spectra
necessary for a
session. A dialogue box will ask you to define the type of session, hardware acquisition or re-sorting
of a previously acquired listmode-file.
*
If you should not find the file corresponding to your hardware please contact
Page 58 of 83 MCP Delay Line Detector Manual (11.0.1304.1)