CMU Manual Adjustment
1100.4903.82 2.3 E-4
Adjusting the 10 MHz Reference Frequency
Preparation:
Note:
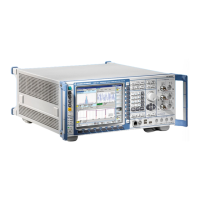
The measurement can be performed either at connector REFOUT1
(rear of CMU) at 10 MHz or at connector RF3OUT (front) at 1 GHz
using a frequency counter.
½ For the measurement at connector RF3OUT set the generator to
1 GHz and 13 dBm without modulation in the RF menu.
For the adjustment, the CMU must be set to internal reference
source.
½ This setting is to be selected in the sync menu of the respective
application.
The measurement at 1 GHz can be performed with a lower frequency
counter resolution (1 Hz) in order to achieve a faster adjustment.
TCXO
Adjustment:
Note:
½ Use potentiometer R121 on the REFERENCE BOARD to adjust
the measured value at the frequency counter to
10.000 000 0 MHz ± 0.5 Hz (at REFOUT1) or
1.000 000 000 GHz ± 50 Hz (at RF3OUT).
This adjustment is only required if none of the options CMU-B11 or
B12 is installed.
OCXO REFERENCE OSC. CMU-B11
(if option is installed)
Adjustment:
Note:
½ Use potentiometer R5 on the OCXO REFERENCE OSC.
BOARD to adjust the measured value at the frequency counter to
10.000 000 00 MHz –0.1/ +0.05 Hz (at REFOUT1) or
1.000 000 000 GHz –10 Hz/ +5 Hz (at RF3OUT)
(a lead of at least –2 to –5 Hz at 1 GHz is desired because of
aging).
The CMU must have been switched on for at least 5 minutes so that
the OCXO has warmed up.
OCXO REFERENCE OSC. CMU-B12
(if the option is installed)
Adjustment:
Notes:
½ Use potentiometer R5 on the OCXO REFERENCE OSC.
BOARD to adjust the measured value at the frequency counter to
10.000 000 00 MHz –0.1/ +0.05 Hz or (at REFOUT1) or
1.000 000 000 GHz –10 Hz/ +5 Hz (at RF3OUT)
(a lead of at least –2 to –5 Hz at 1 GHz is desired because of
aging).
The CMU must have been switched on for at least 10 minutes so that
the OCXO has warmed up.
During the adjustment, operate the CMU in the horizontal position!
 Loading...
