56
Reference Manual
00809-0100-4809, Rev DA
Section 2: Installation
September 2015
Installation
3. After the hole is drilled, deburr the hole on the inside of the pipe.
4. A second identically sized hole must be drilled opposite the first hole so that the sensor
can pass completely through the pipe. To drill the second hole, follow these steps:
a. Measure the pipe circumference with a pipe tape, soft wire, or string. (For the most
accurate measurement the pipe tape needs to be perpendicular to the axis of flow.)
b. Divide the measured circumference by two to determine the location of the second
hole.
c. Re-wrap the pipe tape, soft wire, or string from the center of the first hole. Then,
using the number calculated in the preceding step, mark the center of what will
become the second hole.
d. Using the diameter determined in Step 3, drill the hole into the pipe with a hole saw
or drill. Do not torch cut the hole.
5. Deburr the drilled holes on the inside of the pipe.
Step 3: Weld the mounting hardware
An alignment bar is needed during the welding of the heavy wall weldolets to the steam
pipeline. The alignment bar can be ordered from Emerson
™
Process Management.
1. Weld the heavy wall weldolet to the packing gland assembly with a full
penetration-groove weld.
a. Place the alignment bar through the packing gland and the weldolet. The weldolet
will also have a bearing sleeve in it and it should be near the radius end of the
weldolet which will be the end welded to the pipe. Ensure the support plate is
attached to the packing gland before making the weld.
b. Tack weld the weldolet to the packing gland. Remove the alignment bar.
c. Weld the first pass. Recheck alignment with the alignment bar. Adjust alignment as
necessary. Do not allow the alignment bar to get too hot, as it will be difficult to
remove. Use it only briefly to check alignment between weld passes.
d. Complete remaining weld passes, using alignment bar to verify alignment several
times during the process. Emerson Process Management recommends the weld
thickness is equal to the base metal thickness.
2. Weld the weldolet and packing gland assembly to the pipe.
a. Place alignment bar back into the pipe, slide the weldolet and packing gland
assembly down the alignment bar, and let it rest on the pipe.
b. Ensure the 1
1
/8-in. (29 mm) holes in the support plate are perpendicular to the pipe
centerline within ± 3° for horizontal lines and parallel to the pipe centerline within ±
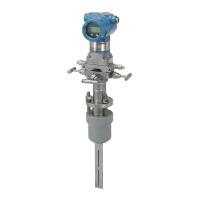
3° for vertical lines. This will ensure the impact and static holes will be in line with
the flow stream. See Figure 2-5 on page 10.
c. Tack weld the weldolet to the pipe. Check alignment. Remove the alignment bar
and weld the first pass. Emerson Process Management recommends using TIG
welding for the first two passes as a minimum. Experience has shown that welding
about
1
/2 to
2
/3 of the weld using GTAW (TIG) and then using other weld processes
(GMAW, SMAW, FCAW) leads to lower chances of movement of the weldment
during welding.