17
Russound MCA-C3 User and Installation Manual
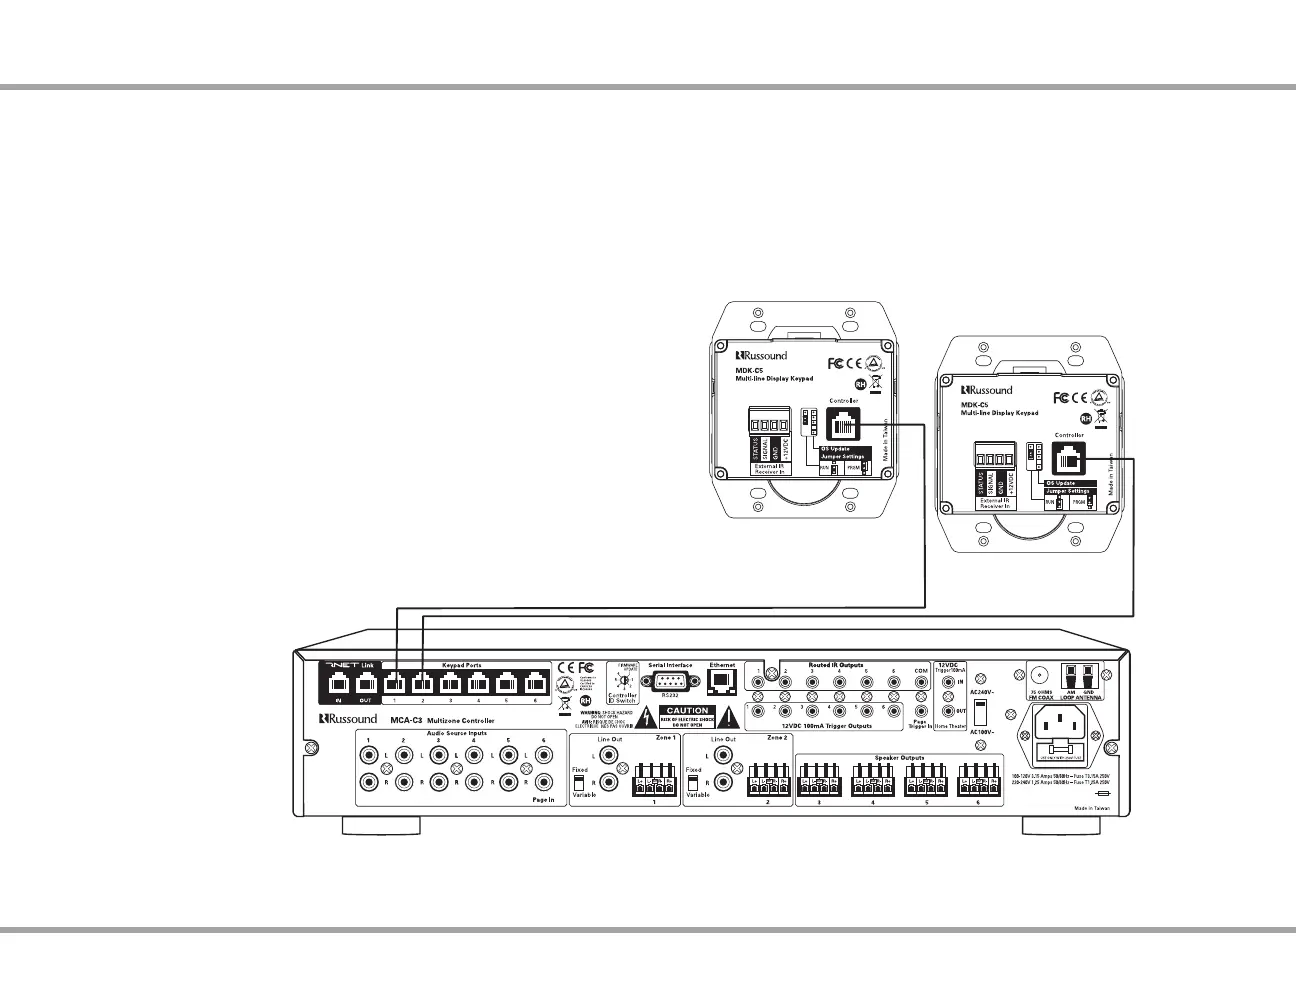
Controller / Keypad Connection
NOTE: EU Standby Power Requirements are met when the MCA-C3 controller is
congured with six (6) MDK-C5 keypads attached.
The MDK-C5 keypad is designed for use with the C-Series controllers, and
connects to a keypad port near the top left on the rear of the controller. These
RJ45 ports support MDK-C5 keypads and UNO-TS2 touchscreens .
The six keypad ports correspond to the six zones supported by the MCA-C3.
When a connected keypad is powered on, the zone becomes active and the
corresponding zone LED lights up on the front of the MCA-C3 controller.
Connections are made using CAT-5e with RJ45 connectors using T568A wire
conguration. For a clean installation when wiring from a keypad port use
a CAT-5e patch cable to connect from the keypad port to a RJ45 wall plate
(optional). Using the same T568A RJ45 wiring conguration, use CAT-5e cable
from the wall plate to the keypad. Maximum CAT-5e cable length is 250 feet
between the controller and the keypad. The OS Update jumper should be in
the RUN position on the lower two pins.
Keypad connection to the MCA-C3
MDK-C5
CAT-5e Cables
MDK-C5
CONTROLLER / KEYPAD CONNECTION
If more keypads are desired for a zone, use an optional SA-ZX3 keypad
splitter with a Russound 1201A (12VDC 1A) power supply at the controller end.
All keypads on an SA-ZX3 control the same zone. More detailed information
regarding SA-ZX3 installation and operation can be found in its installation
manual.
 Loading...