Chapter 5 Dismantling components
SMSO-2-02.05- 15.07.03 137
5.4.6 Booster
For safety information see the section entitled
“Safety Regulations”
Preparations
Dismantle the bean container
Dismantle the cup plate
Move the dispenser carriage fully upwards
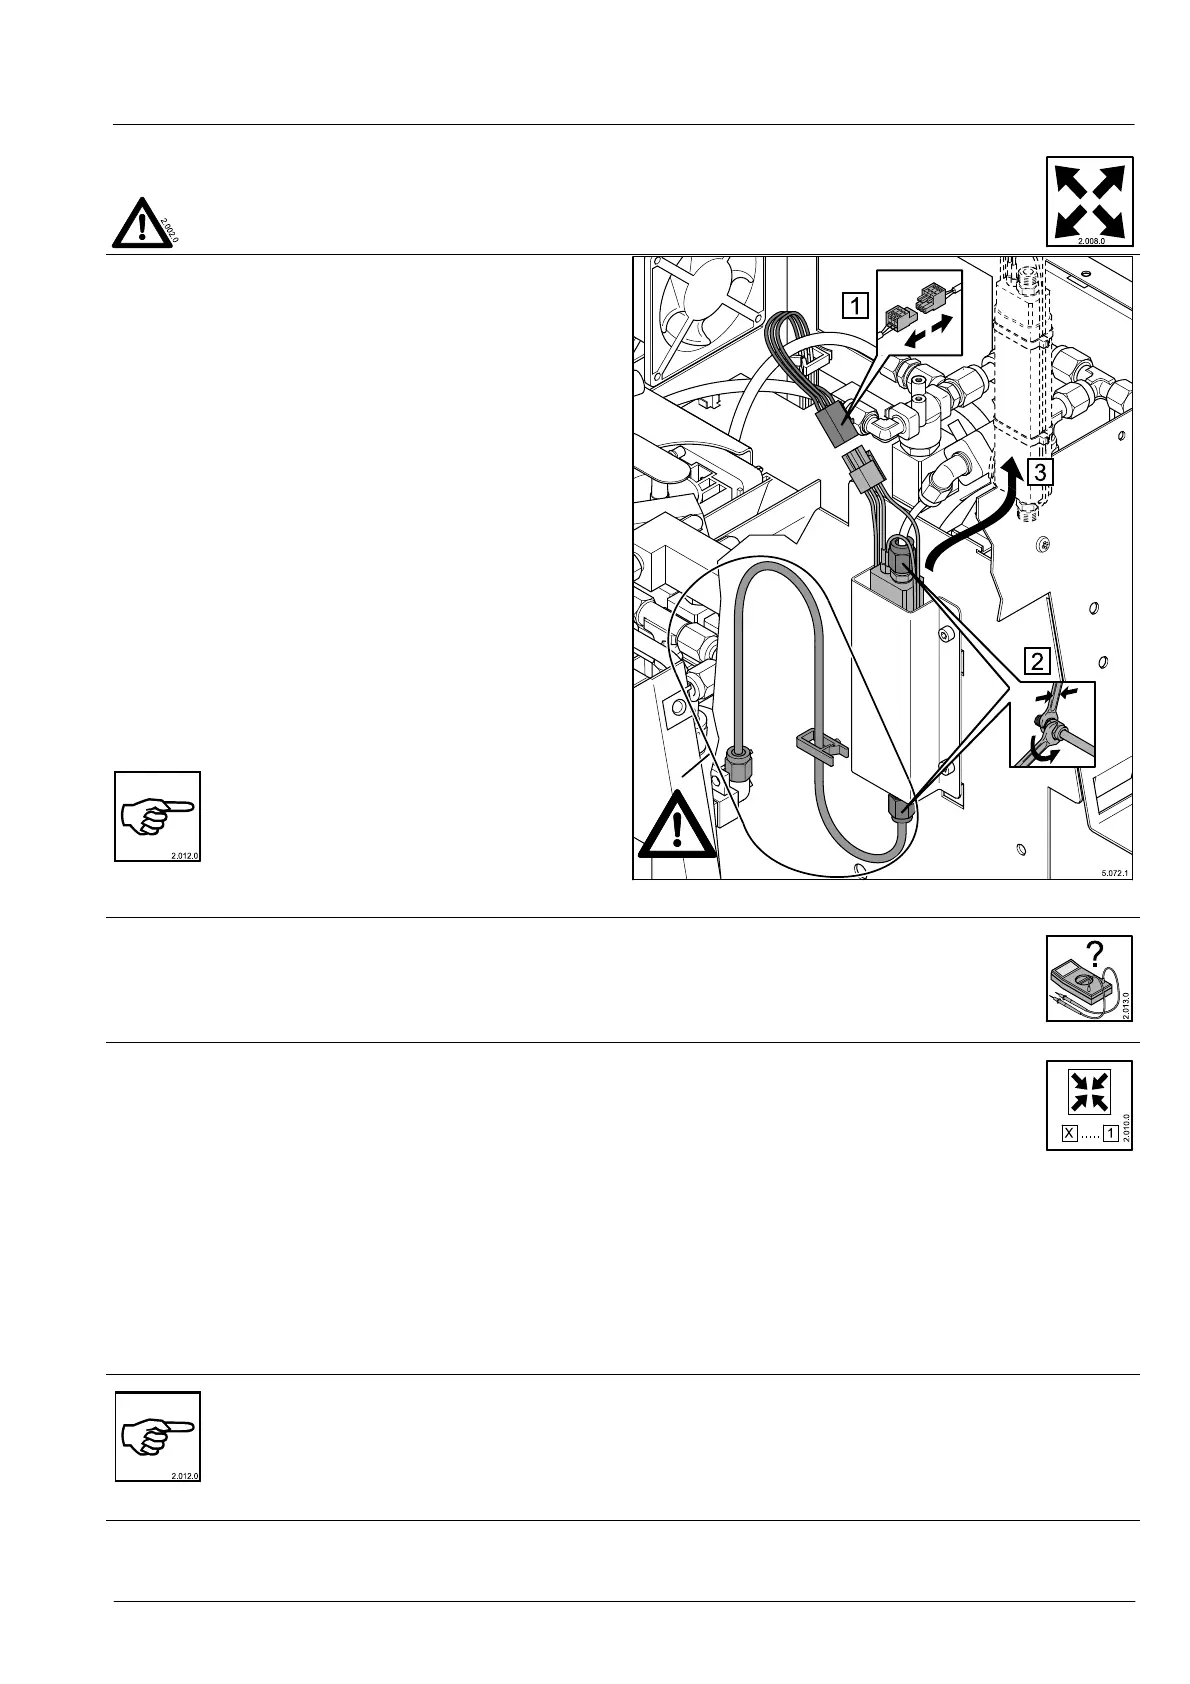
Dismantling
1. Disconnect the plug-in connection
2. Loosen the union nuts on the brewing pipes. Keep a
steady hold on the plastic screw connections on the
booster.
Caution! do not bend the short tube.
3. Pull the booster out of the holder
Service
Carefully clean the water flow hole of contamination (use
a suitable brush; BE CAREFUL, do not scratch the
hole!)
If it is heavily soiled, the booster must be completely
replaced.
In the event of a fault, the booster must al-
ways be replaced as a complete unit. No
components of the unit (heating / over-
temperature fuse etc.) should be replaced
separately.
Electrical check
See section entitled “Control system diagram, Booster”
Installation
Carry out assembly in reverse order to the dismantling
procedure.
Assembling the brewing pipe between booster and
brewing unit
Connect the tube to the booster
Move the brewing piston to the uppermost position
(system test, move brewing piston…)
Check both bends on the brewing pipe (no kinks);
and then
Introduce the brewing pipe into the plastic holder
Move the brewing piston to the uppermost and bot-
tommost positions and again check that the brew-
ing pipe has no sign of any kinking.
The two brewing pipes must be connected very carefully. The booster-brewing unit pipe must lie cleanly on the
supporting wall and it must not prevent any movement of the brewing unit.
Be sure that you do not bend the pipes. Before assembly, submerge the brew pipe for 2 to 3 minutes in 50 to
60°C hot water until it can be shaped more easily.