Chapter 5 Dismantling components
SMSO-2-02.05- 15.07.03 167
5.5.3 Brewing unit
For safety information see the section
entitled “Safety Regulations”
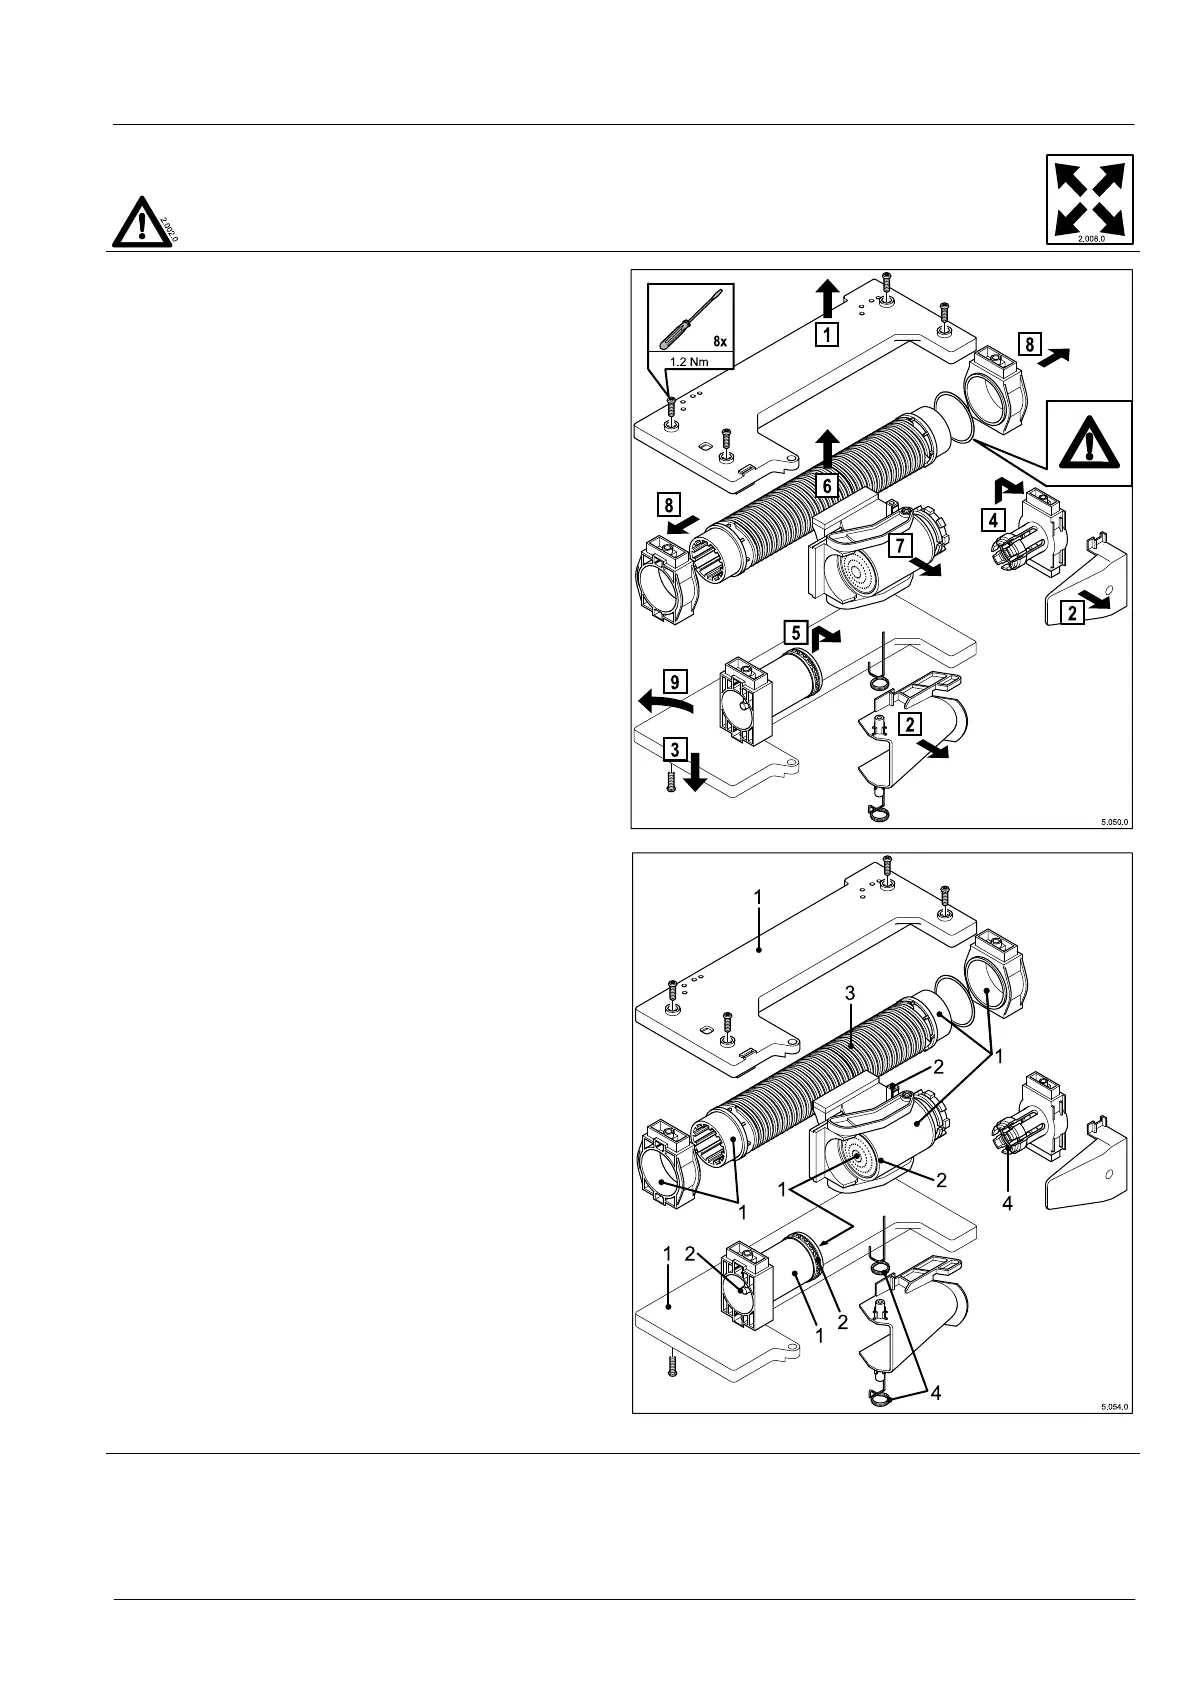
Disassemble the brewing unit
Preparation
Dismantle the brewing unit
1. Screw out the screws on the side panel ; lift off the side
panel, hold down the spring on the funnel.
2. Pull out the funnel with the two springs and the protec-
tion for friction plunger out of the bearings.
3. Unscrew the screws on the left-hand side panel; place
the entire brewing unit on the left-hand side panel, and
then remove the individual components.
4. Take the friction plunger out of the bearing on the side
panel
5. Take the outlet piston out of the bearing on the side
panel
6. Take the spindle with bearings and brewing cylinder /
lower piston out of the bearings on the side panel.
7. Pull the lower piston / brewing cylinder with stripper off
the spindle.
8. Take the upper and lower spindle bearings off the spin-
dle; gentle remove the lower start-up disk
9. Place the left-hand side panel to one side
Checks:
All the components of the dismantled brewing unit must be
subjected to a thorough inspection:
1. Plastic parts: for cracks, broken (off) parts, traces of
wear (scoring, marks, the effects of heat and/or chemi-
cals) surface roughness on bearings
2. Lower piston / outlet piston Sieve / baffles with calcium
deposits or clogged with coffee extracts
3. Spindle: Eruptions, damage to bearings, start-up disk
4. Funnel, friction piston: Springs deformed or weak
This intensive check will indicate whether the brewing unit
should be replaced as a complete unit, or whether individual
parts need to be replaced.
Exchanging / repairing sub-assemblies
Lower piston Replace the O-ring
Outlet piston Replace the O-ring
Brewing cylinder Replace the stripper