Chapter 5 Dismantling components
168 SMSO-2-02.05- 15.07.03
Assembly
Before starting to reassemble, make sure you are happy
that
all the components are clean, purified and dry
all worn parts have been replaced
faulty components have been replaced with new
ones
all the specified bearing and guiding surfaces have
been greased with the correct lubricating grease
(see functional descriptions, brewing unit, lubrica-
tion chart).
that the individual sub-assemblies have been cor-
rectly pre-assembled
To reassemble the brewing unit the sequence of work
steps is as follows: 9...8...7...6...5...4...3, then: Insert the
protection for the friction plunger and set up the right-
hand side panel. Fasten the screws on the right hand
and left hand side panels to a torque of 1.2 Nm.
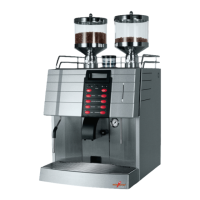
Fitting the funnel
Place the brewing unit upright
1. Insert the cranked leg of both springs into the side wall
bearings.
2. Push the funnel together with your hand and insert the
left-hand bearing necks through the leg spring into the
bearing on the side wall.
3. Adjust the right-hand spring to the bearing hole and
insert the right-hand bearing neck through the leg spring
in the bearing on the side wall.
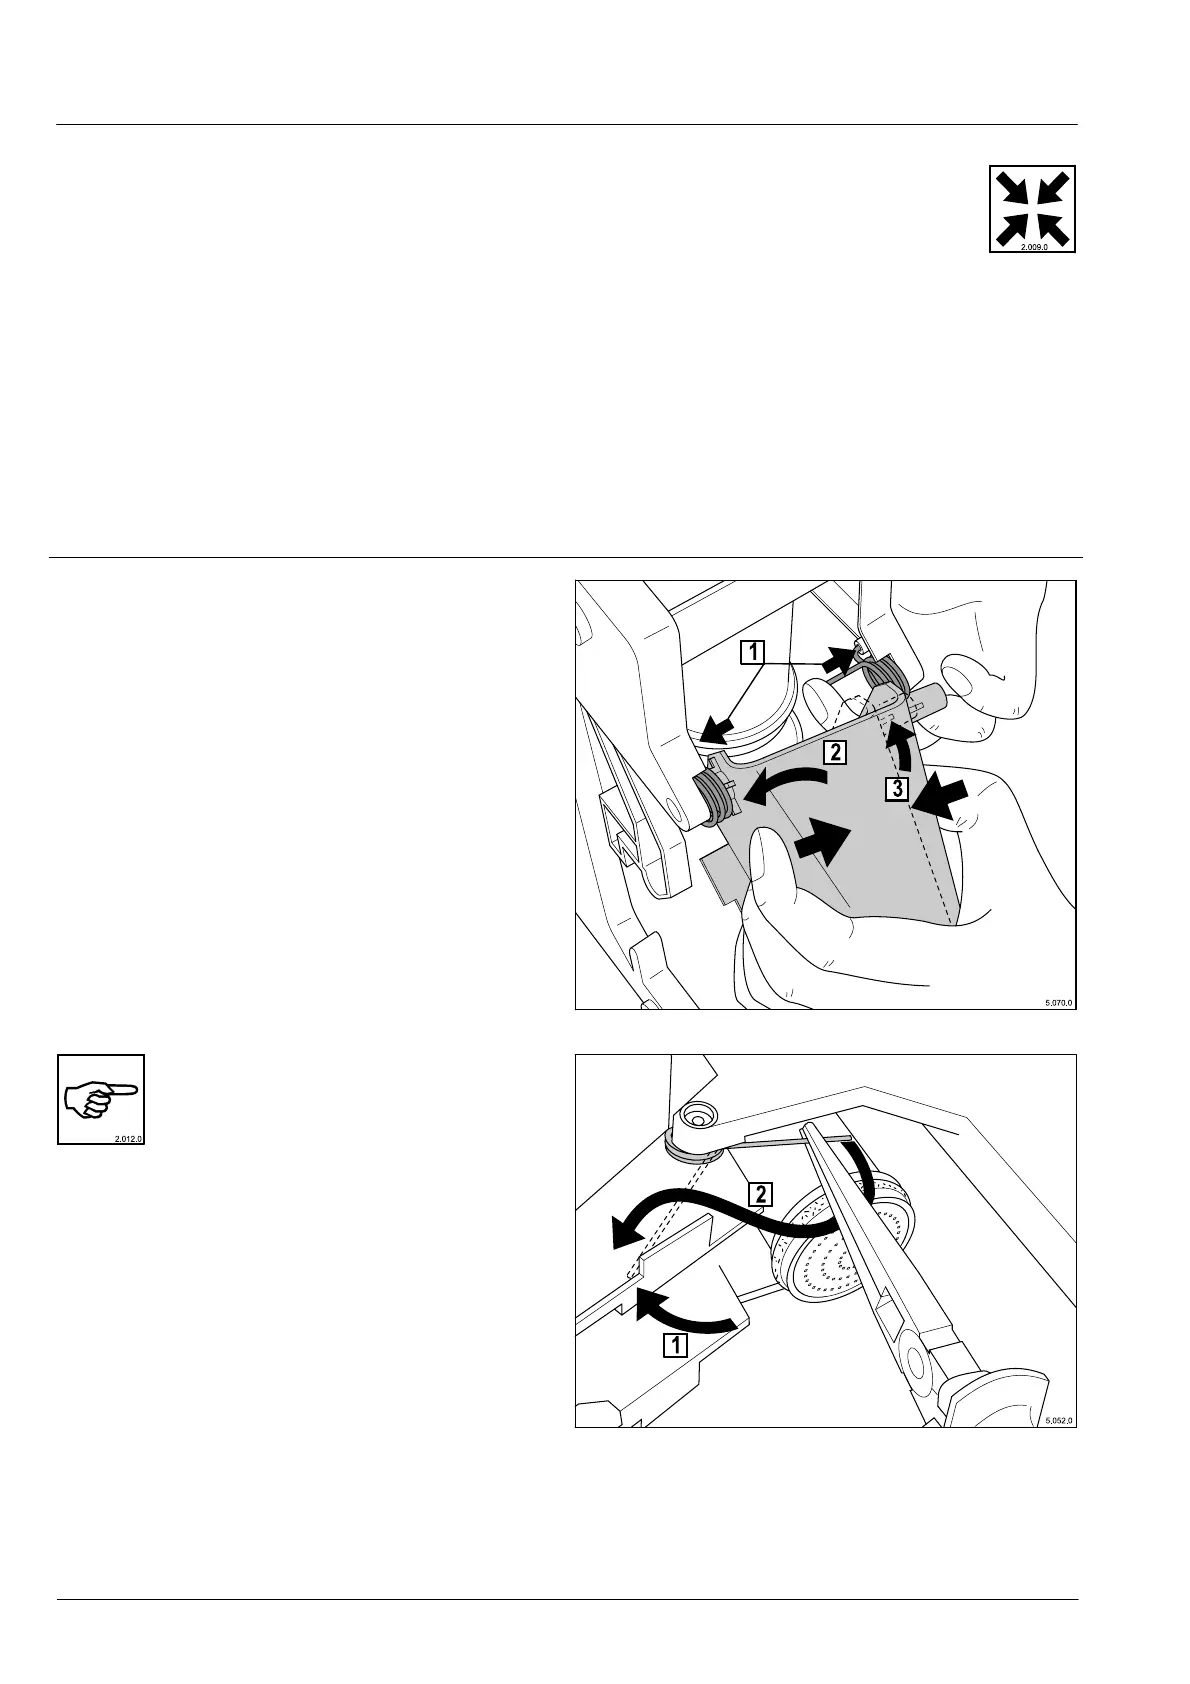
Tension both funnel springs: Swivel the funnel
outwards and with a pair of pliers place the leg
of the springs outwards behind the spring pad
stems. Carefully swivel the funnel back and
check the seating of the springs.