2.19
2. The power supply unit is held in place by four screws, two located at the front and two at
the rear of the assembly. Remove the two screws located in the front. Loosen the two
screws located at the rear of the assembly.
Slots in the power supply bracket allow the assembly to be manipulated and removed
without removing the rear screws. Take care to avoid damaging wires with the screwdriver.
3. Sufficient wire is attached to the assembly to allow limited manipulation necessary to
remove the voltage tapping cover on the left hand side of the power supply unit. Lift out the
power supply unit taking care not to impose a strain on the wires. Remove the screw
attaching the cover protecting the terminals and remove the cover.
4. Unsolder the grey wire (brown/blue on earlier models) and resolder to the terminal marked
with the required voltage. Do not move the yellow (red/brown on earlier models) or blue
wires.
5. If necessary change fuse F1. 2A for 110V, 1A for 220V nominal.
6. Refit cover and screw then replace the power supply unit, ensuring that the slot in the
bracket at the rear of the assembly locates correctly on the screw.
NOTE: When manipulating the power supply unit into position
ensure that wires are not trapped.
7. Tighten the screws at the rear of the assembly. Insert and tighten screws at the front using
thread sealant. Replace the voltage label on the front of the unit with a new label showing
new voltage.
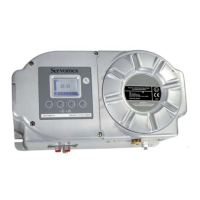
8. The power supply in the interface unit is identical to that in the Control unit.
2.6.2 Connection to Power Supplies
Specific installation requirements vary widely, therefore cable and entry glands are not provided with
the instrument and are not available as a standard option.
Power cable rating, insulation protection and overall installation should conform to the National
Wiring Regulations, Hazardous Area Codes of Practice, Local Authority Regulations and conditions
of use detailed in the certification relevant to each individual installation.
The minimum requirements of the power cable are as follows:
1. 3-core cable (L.N.E)
2. Voltage rating should conform to the supply voltage; 100 to 120V a.c., or 200 to 240V a.c.
3. Current rating of the conductors should not be less than the fuse rating (1A or 2A).
4. The cross-sectional area of the conductors should be within the range 0.5 to 2.5 mm
2
. (20
to 14 AWG).