5.34
5.3.5 Replacement of Heaters and Thermal Fuse
5.3.5.1 1132 and 1133 Transducers.
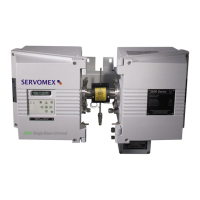
See Figure 5.4.
1. Remove Cover of junction box on left hand side of the transducer by removing 4 x M6
socket head screws. (5mm A/F allen key).
2. Remove split pin (1).
3. Remove Heater wires from terminal block (2).
4. Release M3 pan head screw (3) and push terminal block down out of the way.
5. Pull out heater assembly (4).
6. Reassembly is the reverse of this process.
7. Restore power connections, allow the analyser to warm up for 12 hours and recalibrate.
5.3.5.2 1131 Transducers
See Figure 5.5
1. Release the transducer unit from the sampling system and corrosive purge lines (if fitted)
2. Remove the nuts (29) and bottom sealing plate (30) under the transducer.
3. Slide the ‘O’ rings (18) off the pipes.
4. Prise the top sealing plate (32) off the box with a screwdriver or similar implement.
5. Disconnect the signal wires at TB-D in the Control (1101) or Interface (1102) unit.
6. Disconnect the heater and earth wires.
7. Undo and remove the two nuts (33) on the wire feedthroughs (26mm AF spanner) inside
the control or interface unit.
8. Unbolt the transducer from the rear mounting bars and separate it from the other unit,
pulling the wires through the couplings carefully.
9. Remove the front cover of the transducer unit and pull out the front insulation by the
corners.
10. Unscrew and remove the top hexagon spacer (34).
 Loading...
