2.34
2.11.3 Alarm Relay Board
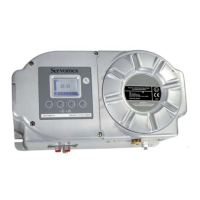
The alarm relay board (01100936) is normally installed in the Control unit in the first slot on the
left hand side of the module rack (Figure 2.12) and its associated terminal block is fixed to the
upper left hand side of the enclosure. (NB: Terminal positions 4, 8, 12 and 16 are disabled.)
Before installation check that the link to the rear of the board is fitted between 'SC2' and
'SEL2'. This link selects whether the board is being used for alarm relays or auto-calibration.
Relay contacts are rated at:
Max Power - 20VA
Max Voltage - 240V ) Max power should
Max Current - 0.5A ) not be exceeded
The maximum switching power of the relays should not be exceeded. This is important if an
inductive load or an incandescent lamp, with low resistance when cold, is connected to the
relays.
The four relays have change-over contacts and are energised in the non-alarmed state. The
schematic adjacent to the terminal block shows the position of the contacts in the de-energised
(i.e. alarmed) condition. The top relay is number 1; the bottom, number 4.
The cable must not be installed close to other equipment likely to generate severe levels of
electromagnetic interference. Where this is unavoidable, a shielded cable should be used and
the screen terminated at the 1101 or 1102 enclosure. Screen terminating connections must be
kept as short as practical (less than 40mm).
Intrinsically safe circuits can be connected to the relays, but they should not be mixed with
non-intrinsically safe circuits on the terminal block in the analyser.
Allocating alarm functions to relays is described in Section 3.9.1 and setting oxygen alarm
levels in Section 3.8.3.
The memory corrupted alarm (Code 67) is permanently allocated to relay 4 (not 01100651,
01100652 and 01100699 software).
2.11.4 Auto-Calibration Board
The auto-calibration relay board (01100936) is normally installed in the second slot from the
left in the module rack (Figure 2.12) and its associated terminal block is fixed to the lower left
hand side of the enclosure. (NB: Terminal positions 4, 8, 12 and 16 are disabled and relay 4
(terminals 13, 14 and 15) is not used.) With analyser Codes 03, 06, 16, 23 and 26, it may be
fitted to the control unit or the interface unit.
Before installation check that the link to the rear of the board is fitted between 'SC2' and
'SEL3'. This link selects whether the board is being used for auto-calibration or alarm relays.
The top three relays are used to drive solenoid valves to switch gas streams.