Doc# E166703 3-2
3: Mechanical Installation and Maintenance
Electro Industries/GaugeTech
The Leader In Power Monitoring and Smart Grid Solutions
Electro Industries/GaugeTech
The Leader In Power Monitoring and Smart Grid Solutions
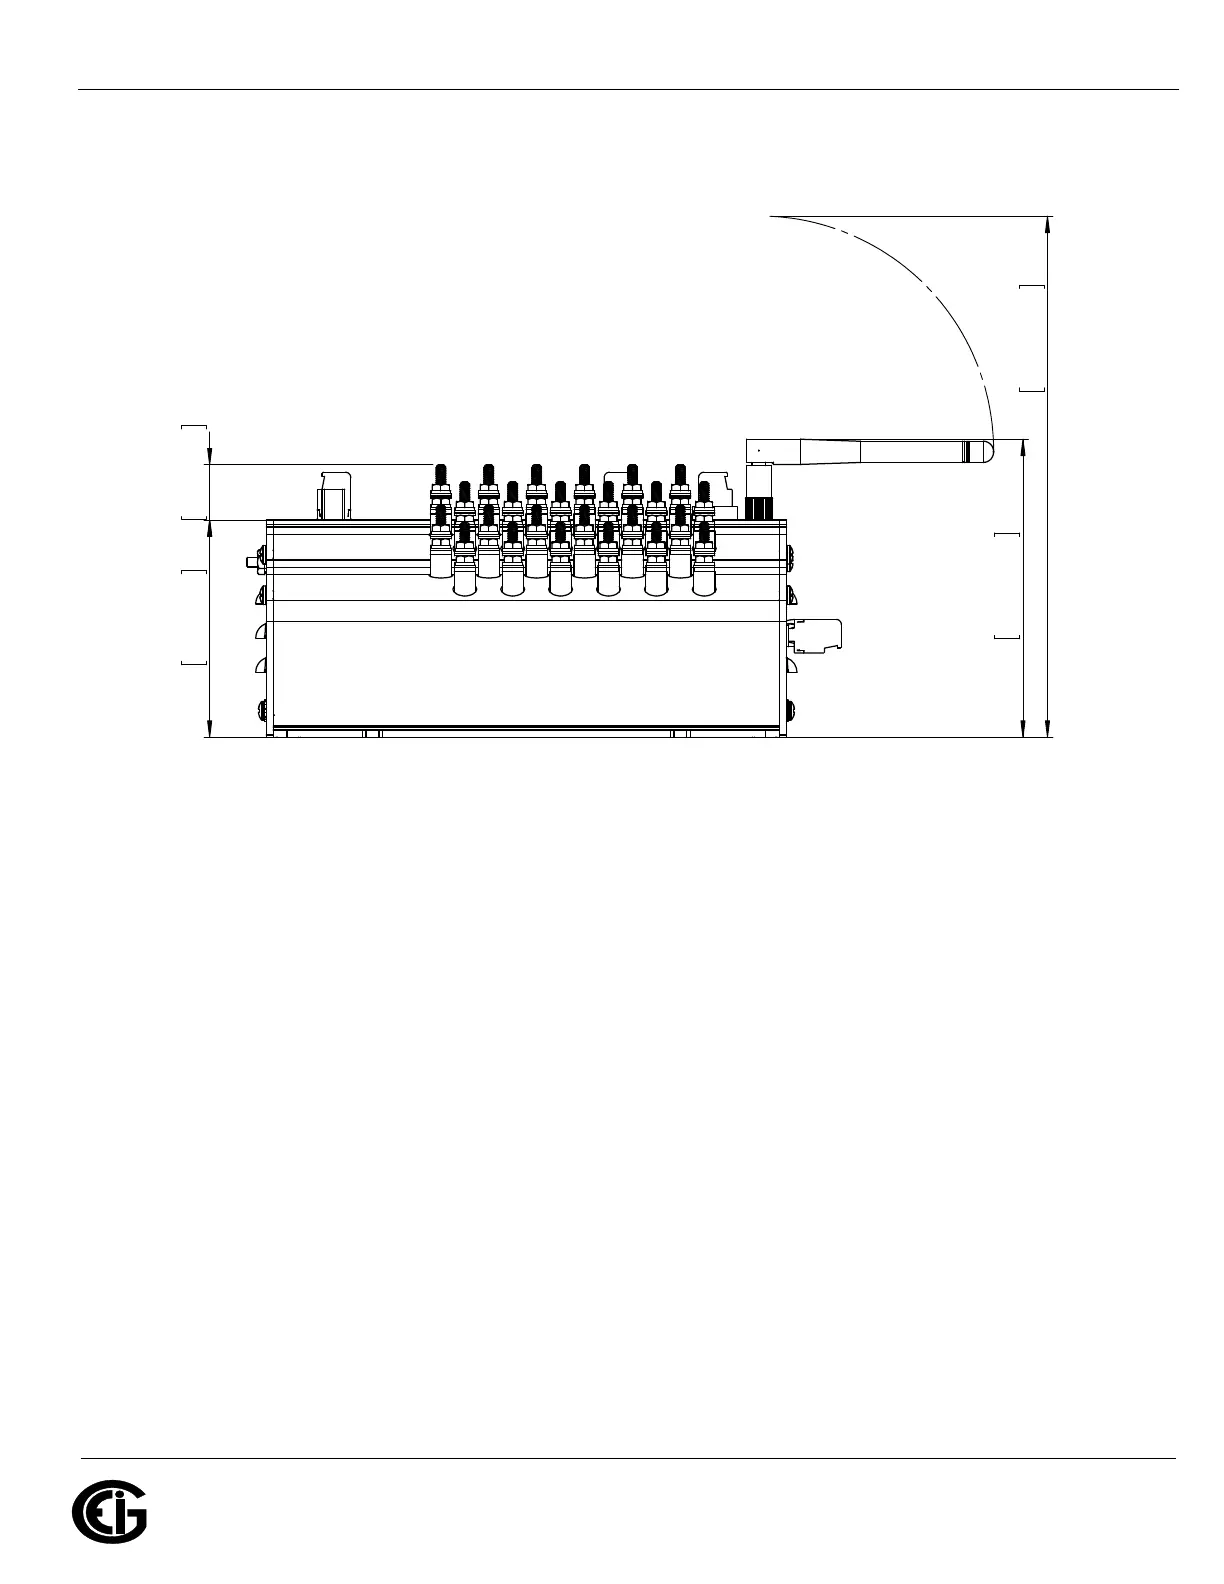
Figure 3.2: MP200 Unit Side Dimensions
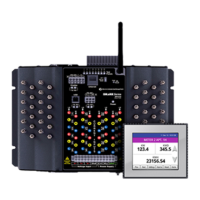
3.2: Mounting the MP200 Unit
The MP200 unit is designed to mount against any firm, flat surface. Use a #8 screw in
each of the four slots on the flange to ensure that the MP200 unit is installed securely.
For safety reasons, mount the MP200 unit in an enclosed and protected environment,
such as in a switchgear cabinet. Install a switch or circuit breaker nearby; label it
clearly as the MP200 unit’s disconnecting mechanism.
Recommended tools for MP200 unit installation:
• #2 Phillips screwdriver
• 1/4-inch (0.25”) nut driver, socket, box, or open-end wrench
• Wire cutters
The MP200 unit is designed to withstand harsh environmental conditions; however it
is recommended you install it in a dry location, free from dirt and corrosive sub-
stances. See Chapter 4 for electrical installation instructions.
7.62in
193.5mm
4.36in
80.6mm
3.18in
110.6mm
0.81in
20.5mm