Configuration and setup
20221560E 83
4 CONFIGURATION AND SETUP
4.1 First time turn on
Before attempting to turn on the AP16 and perform an
Installation Setup, the hardware installation and electrical
connections must be completed in accordance with the
installation instructions.
The design of the AP16 includes advanced features that have
simplified the installation and setup of an autopilot.
Note ! If the autopilot is going to use Virtual feedback (page 55) you
must first go to page 95.
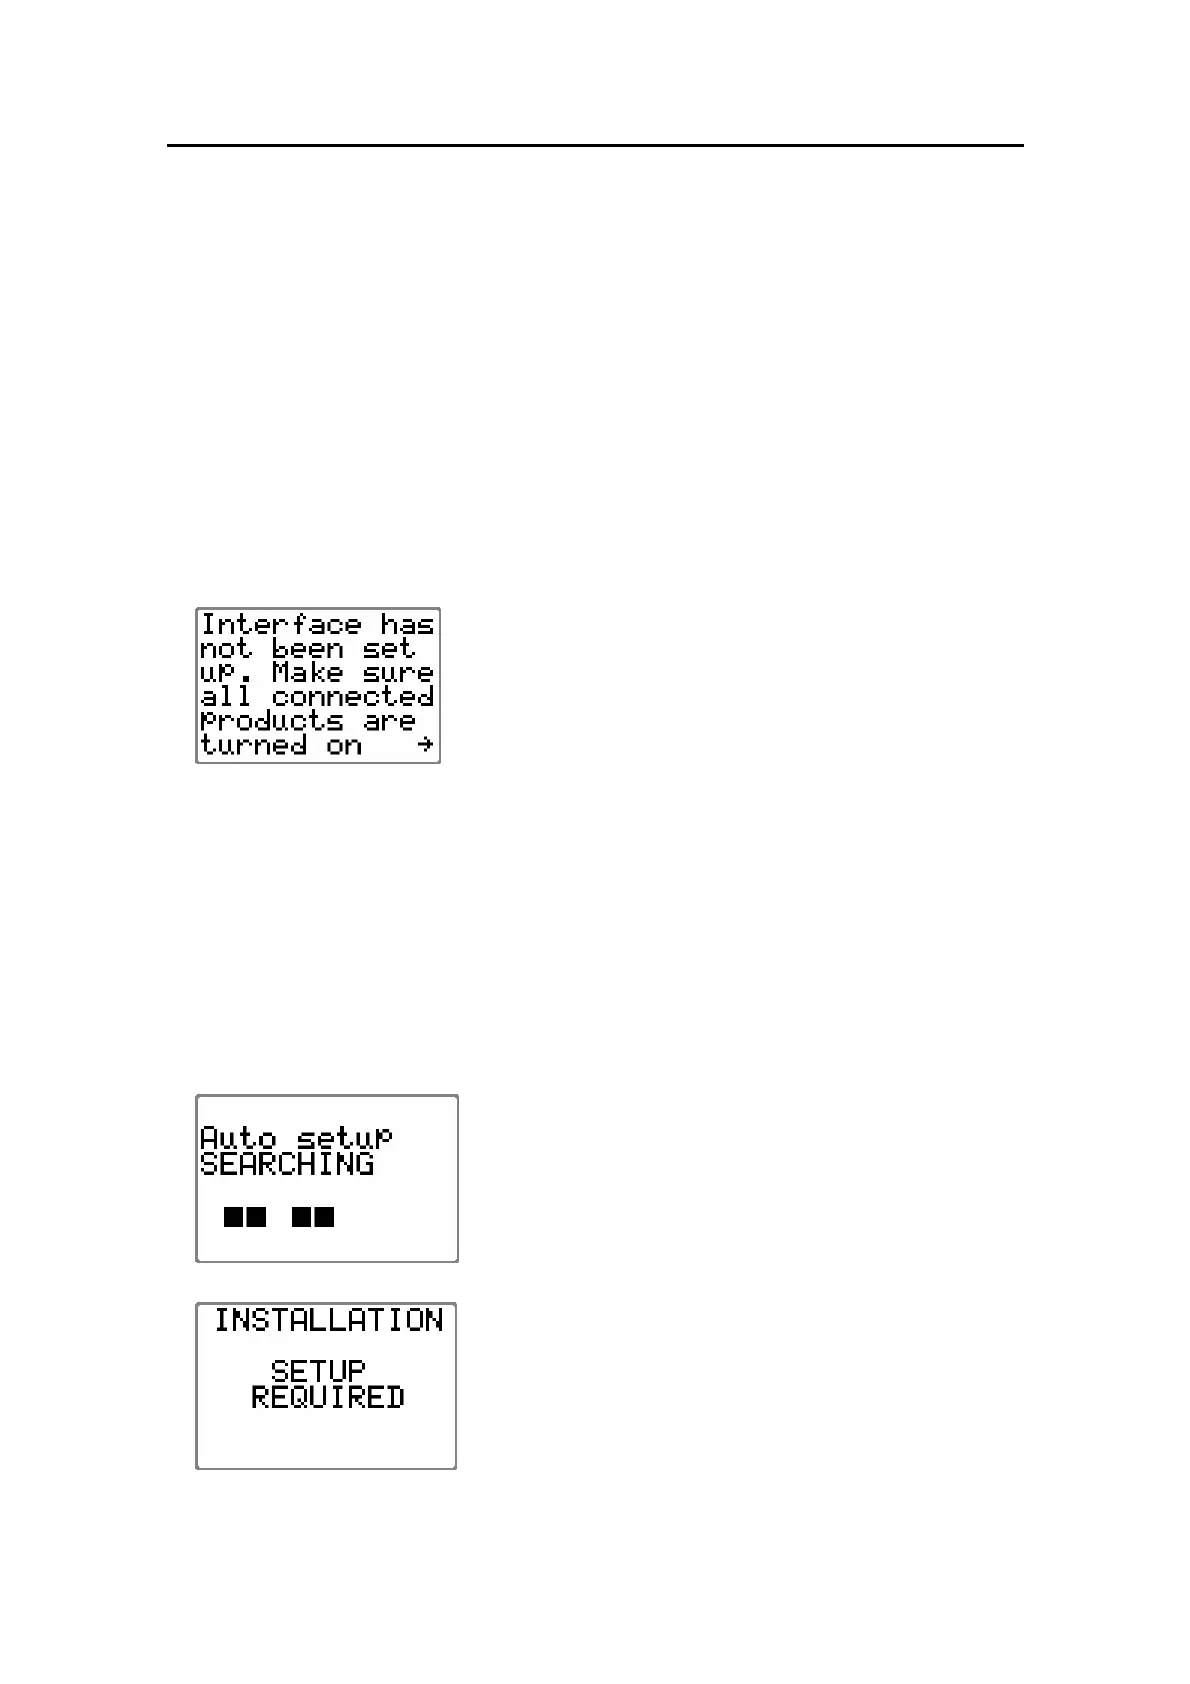
This is the start-up screen that is presented the first
time you turn on your autopilot by pressing the
STBY/PWR button.
Notes !
1. You can postpone the automatic interface by going directly to
the Installation/Dockside setup. Any time the STBY button is
pressed the interface prompt will reappear until the
automatic interface has been performed.
2. Be aware that you will have no compass reading before the
automatic interface is completed.
Continue by pressing the STBD 1 button to start the automatic
interface set up.
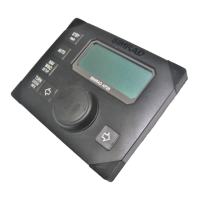
The autopilot will search for connected sources,
and as the sources are detected a black square
appears on the screen.
“SEARCHING” is flashing as long as the autopilot
is searching for data. When the automatic interface
setup is finished, “Done Press →” is displayed.
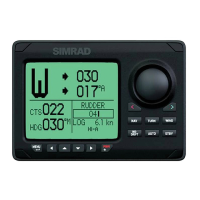
Press the STBD 1 button and the display will read:
“SETUP REQUIRED”.
Continue with the installation setup according to
the next chapters. If you already have completed
the installation settings, the autopilot will enter
STBY mode.