Commissioning SMA Solar Technology AG
20 SWebBox-BEN111033 User Manual
6 Commissioning
6.1 Information on Starting up the Device
Starting up the Sunny WebBox entails the following steps:
• Connect the Sunny WebBox directly to the computer (see page 21).
• Configure network settings on the computer (see page 22).
• Configure Sunny WebBox for the local network (see page 27) and/or configure Sunny
WebBox for modem operation (see page 29).
• Connect the Sunny WebBox to the inverter (see page 36).
• Set the PV plant communication mode (see page 60) and detect the PV plant devices
(see page 48).
6.2 Mounting / Installation Location Requirements
Please note the following information on the mounting / installation location of the Sunny WebBox:
• The Sunny WebBox is suited only for mounting indoors.
• The ambient temperature must be between -20 °C and +65 °C.
• The maximum cable length of the entire RS485 communication bus is 1,200 m.
• The maximum permitted network cable length is 100 m per segment.
• The maximum permitted telephone cable length is 200 m.
• The Sunny WebBox requires an outlet with a grid voltage of 100 V ... 200 V.
• Protect the Sunny WebBox from dust, wet conditions, corrosive substances and vapors.
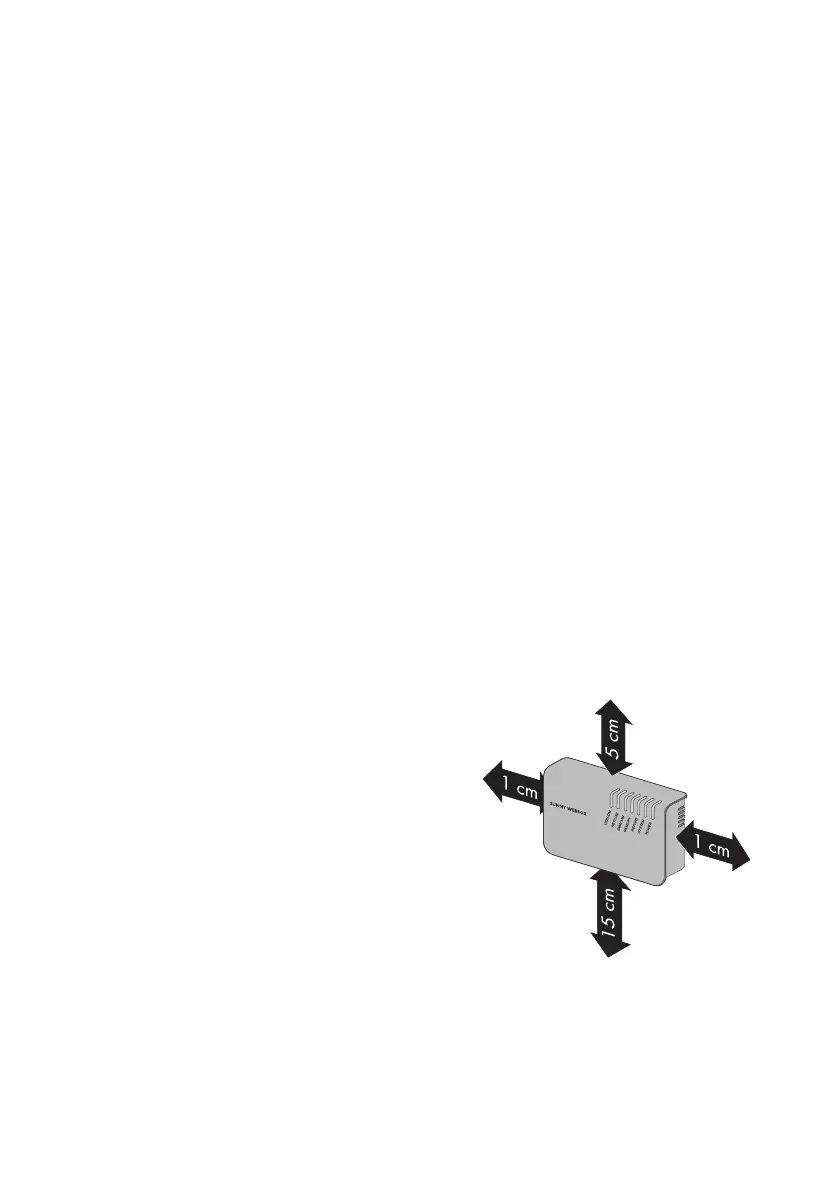
• Observe the minimum clearances to walls, other
devices or objects as shown in the diagram in order
to guarantee sufficient heat dissipation.
• Do not cover the Sunny WebBox.
• The distance from the Sunny WebBox to the inverters
may not be greater than the maximum permitted
distance of the selected communication type. Please
note the specifications in the respective sections.
• During installation, make sure there is optimal
reception for the transmission paths. Please note the
specifications in the respective sections.