SMARTRG INC. PROPRIETARY AND CONFIDENTIAL. ALL RIGHTS RESERVED. COPYRIGHT © 2016 138
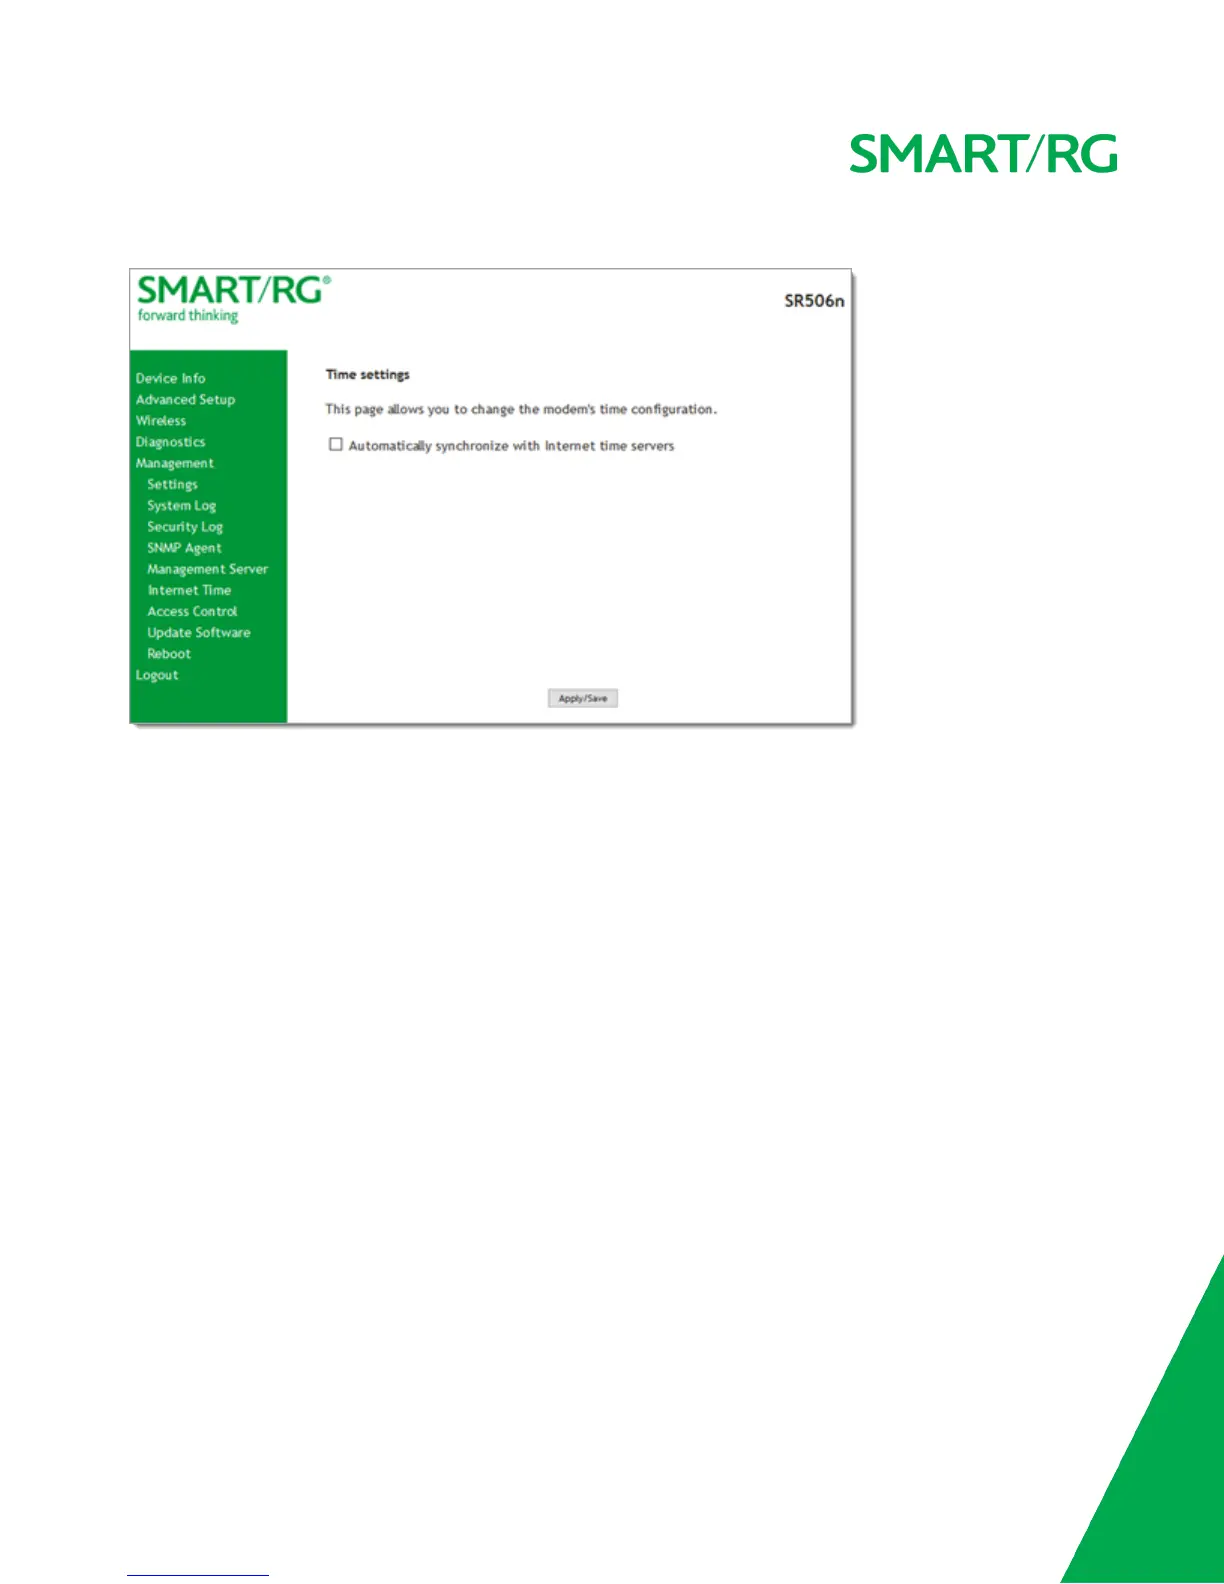
1. In the left navigation bar, click Management > Internet Time. The following page appears.
2. Click Automatically synchronize with Internet time servers. Additional fields appears.
3. Select the desired time servers.
4. Select the Time zone offset.
5. Click Apply/Save to save and apply your settings.
6. To disable this feature, click the Automatically synchronize with Internet time servers check box to clear it.
7. Click Apply/Save.
Access Control
In this section, you can manage access to your gateway and network. You can configure passwords, accounts, services, the logout
timer, and access lists.
Accounts
On this page, you can create and manage user accounts for your gateway. Your gateway can support multiple login accounts for its
on-board user interface. Each account can be customized to grant access privileges to specific pages in the interface. This is par-
ticularly useful when an ISP wishes to limit access for subscribers, yet grant full access for technical support and on-site installation
personnel.
Note: This feature requires firmware v2.5.0.7 or later.
Add an Account
 Loading...