User Manual |
153
CNC Carving - 04 How to CNC Carve
Caution the sharp bits and keep them beyond the reach of children.
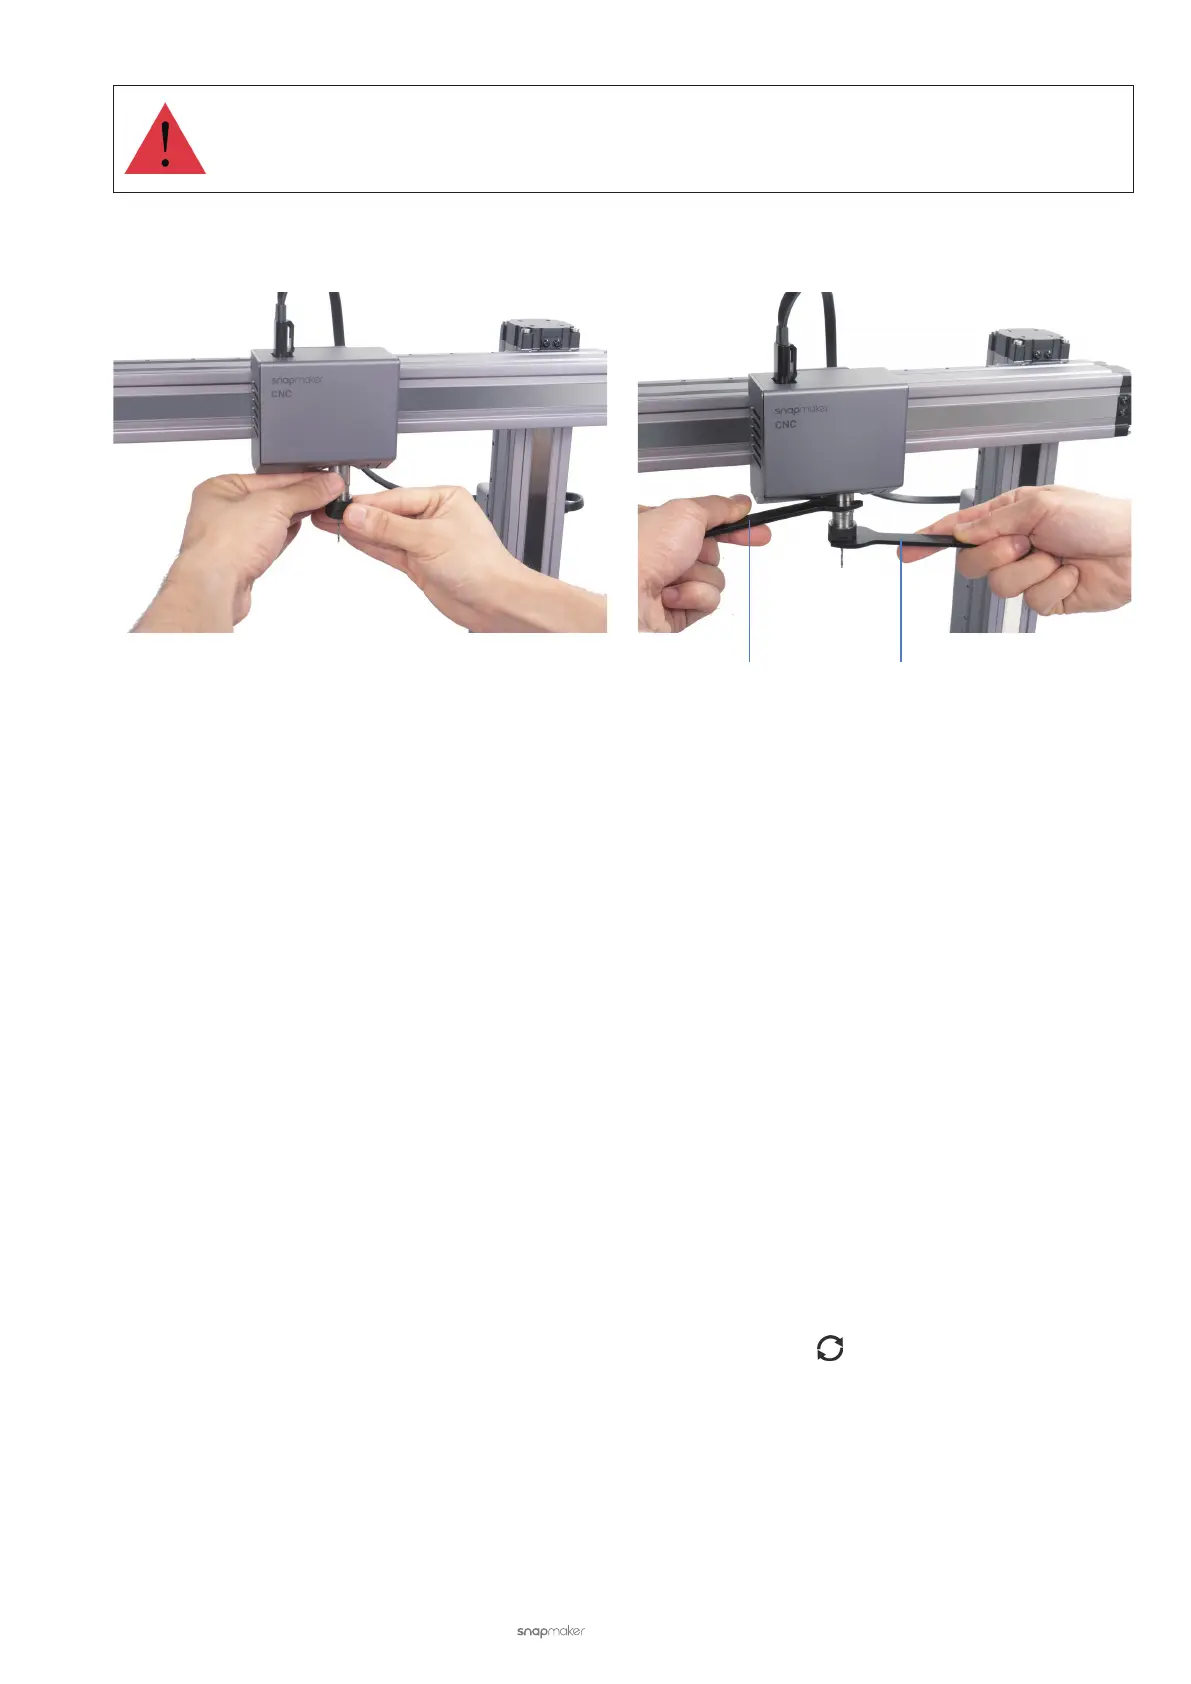
(2) Twist the ER11 nut onto the CNC Carving Module, and secure the nut using the open-end wrenches.
4.4 Prepare the G-code File
Prepare the Model File
Before generating the G-code le on Luban, you should prepare a model le. Here are a few options for preparing the
model le:
• Use provided models in the Case Library of Luban.
• Design 2D images or 3D models using the design or modeling software.
• Take photos with your smart phone to get 2D images.
• Download free CAD les from the website, like grabcad.com/library.
As a reminder, Luban supports these design le formats: .svg, .dxf, .png, .jpeg, .bmp, .stl, more to be added.
Generate the G-code File
Open Luban and follow the Snapmaker 2.0 Quick Start Guide to generate the G-code le.
4.5 Transfer the G-code File
You can transfer the G-code le to Touchscreen or keep it on Luban for carving.
Start Carving on the Touchscreen via Wi-Fi
(1) On Luban, click Workspace. In the Connection panel, click Wi-Fi > Refresh > Select your CNC Carver in the
drop-down list > Connect Luban to your CNC carver.
(2) On the Touchscreen, tap Yes to grant Wi-Fi connection.
14mm Open-end Wrench 17mm Open-end Wrench