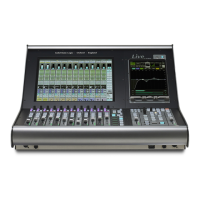
DDAAWW CCoonnttrrooll
DDuuaalliittyy SSEE OOppeerraattoorr’’ss MMaannuuaall33--3344
SSeelleeccttiinngg aa DDAAWW CChhaannnneell ffoorr PPlluugg--IInn CCoonnttrrooll
Select EDIT mode on the Master Control Panel then use the channel SEL buttons to choose the channel you wish
to edit. The EDIT flag in the channel meter will light. The DAW will highlight the selected channel and the currently
selected plug-in. Press ALT to display the plug-in window.
Alternatively, select a channel by double clicking on one of the insert points in the Mix window. Note that on some
versions of Pro Tools this is the only way to change between blocks of channels (1-8, 9-16, 17-24).
Note: Bank switching channels leaves the Plug-In Editor with the channel assigned to it. The channel
EDIT tally will show this.
TTiimmeeccooddee//BBaarrss && BBeeaattss//SSaammpplleess DDiissppllaayy
The on-screen timecode readout can be assigned to display either timecode (SMPTE/EBU), Feet/Frames, Bars/Beats
or samples. This display will follow the setting selection made within your DAW. Please refer to your DAW manual
for further details.
PPlluugg--IInn DDiissppllaayy MMooddeess
There are three display modes, Insert, Parameter and Assign, all of which are selected using the soft button
ASSIGN and INSERT/PARAM buttons below the D-pots.
VViieewwiinngg CCuurrrreenntt IInnsseerrttss ((IInnsseerrtt MMooddee))
Press the INSERT/PARAM button till the INSERT/PARAM box reads INSERT; the Plug-in Editor is now
in Insert mode. In this mode, the four D-pots represent four insert points on the selected channel. The currently
assigned plug-ins are displayed above each D-pot. The name of the currently active plug-in will flash. Additional insert
points can be displayed using the paging buttons.
The four D-pot push switches can be used to select an insert slot for editing or for plug-in assignment — see below.