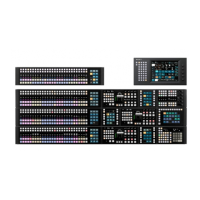
ICP-X7000
2-12 (E)
4. Mounting to Rack (Square Holes)
Tighten the screws at the tightening torque below.
Tightening torque: 120 x 10
_2
N.m {12.2 kgf.cm}
1. Attach the rack brackets in the side panels of the unit
with the specified six screws (B4 x 6).
Rack bracket
Rack bracket
B4 ) 6
B4 ) 6
2. Remove the release paper of the plate nut (M5) and
stick the plate nut to the front of the adaptor.
n
. Align the adaptor with the plate nut (M5) at the top
edges and at the lateral edges.
. Make sure that the centers of holes of the adaptor
and the plate nut (M5) are aligned.
(The following figure shows the left adaptor.)
Adaptor
Release paper
Plate nut (M5)
Plate nut (M5)
Adaptor
Holes
Plate nut (M5)
3. Loosen the screws at the rear of the each adaptor, and
then adjust each adaptor length to the rack depth.
(The illustration below shows the left adaptor.)
Adaptor
Portion of
the rail
B4 ) 6
(Length adjustment
screws)
t
Maximum depth of adaptor: 750 mm
Minimum depth of adaptor: 600 mm
4. Mount four positioning plates and the right and left
adaptors with the specified six screws (B4 x 10).
(The following figure shows the left adaptor.)
n
Insert the four bosses on each positioning plate into the
square holes of the rack.
31.75
1U
31.75
Unit: mm
Positioning plate
Front
Positioning plate
Bosses
Bosses
Square
Holes
B4 ) 10
B4 ) 10
Positioning plate
Viewed from inside
the rack angle
Rear

 Loading...