Operation Instruction
48
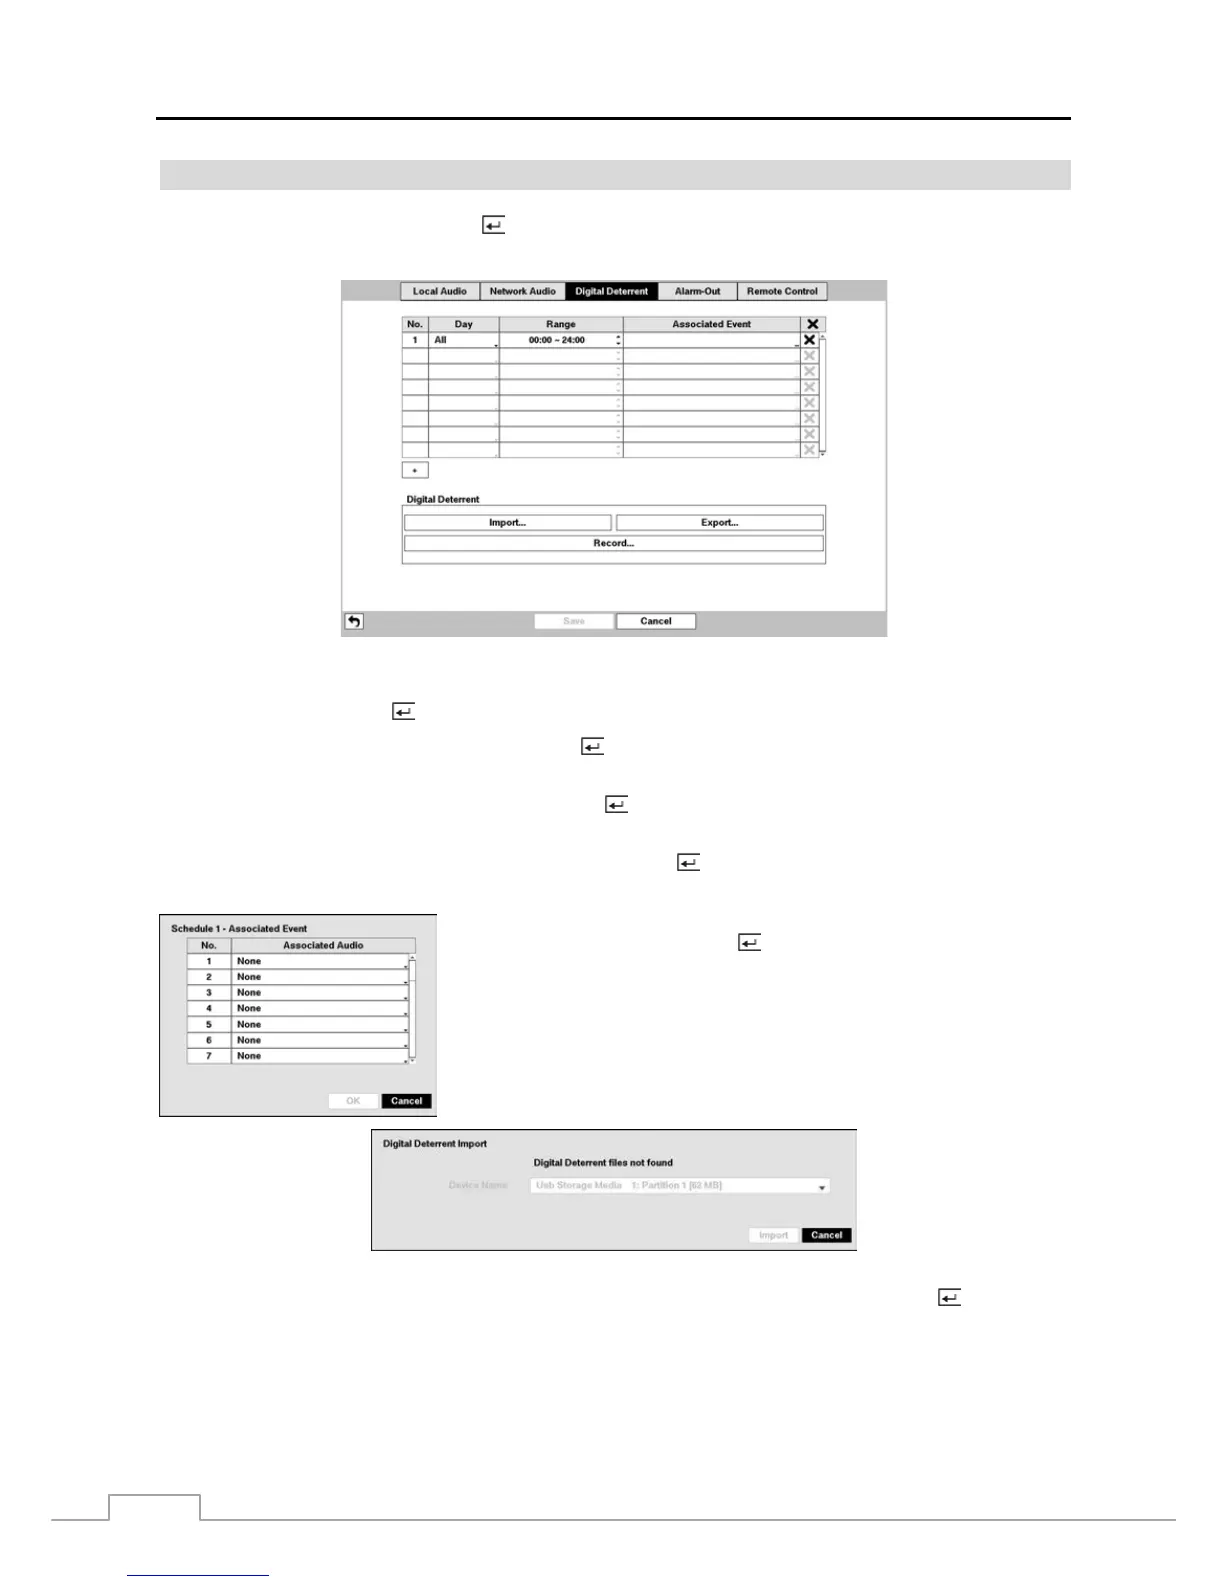
Digital Deterrent
Highlight Digital Deterrent and press the
button. The Digital Deterrent setup screen allows you to set up the DVR
to sound when events are detected.
Figure 33 : Device – Digital Deterrent setup screen.
Highlight the + and press the
button to add a digital deterrent schedule item.
Highlight the box under the Day heading and press the
button to change the days that the scheduled digital deterrent
will take place. Choose from: Sun, Mon, Tue, Wed, Thu, Fri, Sat, M~F, Hol and All.
Highlight the box under the Range heading and press the
button to change the time range that the scheduled digital
deterrent will take place. The smallest time segment you can use is 15 minutes.
Highlight the box under the Associated Event heading and press the
button to select which events you want associated
with each digital deterrent.
You can select the audio files associate with each event. Highlight the box under
the Associated Audio and press the
button. A list of audio file name appears,
and you can select which audio file you want to associated with that event.
You can import saved audio files or export the current audio files. To import saved audio files, connect the USB device
containing the audio file (.aaf or .wav) to the DVR. Highlight Digital Deterrent – Import… and press the button. Select
the desired audio file and press the Import button to import the selected audio file and change the audio file accordingly.