Installation Waukesha Cherry-Burrell
®
Brand Universal 3 Pump
Page 20 95-03103 11/2018
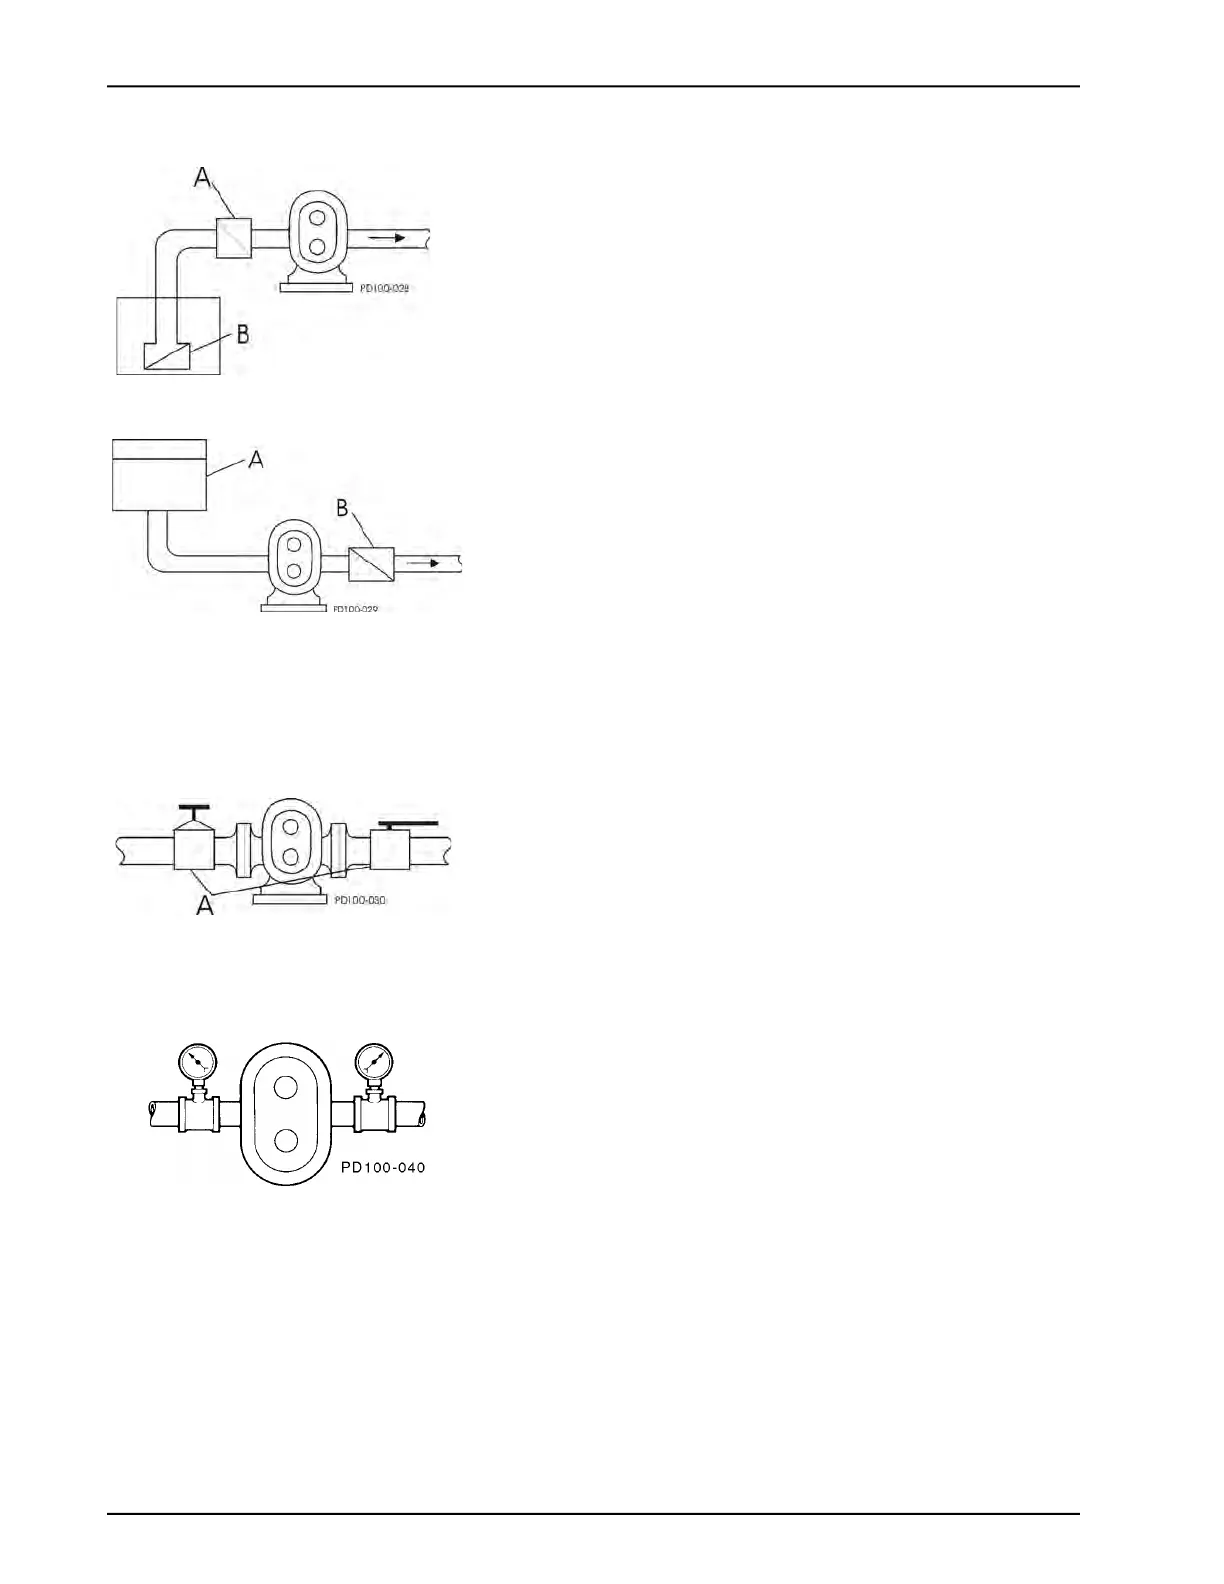
Install Check Valves Inlet Side on Lift Applications
Use check valves to keep the inlet line full, particularly with low-
viscosity fluids (Figure 12).
Discharge Side
For systems with liquid under a vacuum, install a check valve on
the discharge side of the pump. The check valve prevents back-
flow (air or fluid) to aid in the initial start-up by minimizing the
required differential pressure supplied by the pump to start the
flow (Figure 13).
Install Isolation Valves
Isolation valves permit pump maintenance and safe pump
removal without draining the system (Figure 14, item A).
NOTE: Make sure the inlet flow is not restricted. Don’t start the
pump deadheaded, e.g., operated with no flow through it.
Install Pressure Gauges
Pressure and vacuum gauges provide valuable information about
pump operation (Figure 15). Wherever possible, install the
gauges to help provide information on the following:
• Normal or abnormal pressures
• Indication of flow
• Changes in pump condition
• Changes in system conditions
• Changes in fluid viscosity
Figure 12 - Inlet Check Valve
A. Inlet Check Valve
B. Foot Check Valve
A. Closed Tank - produces vacuum on
liquid (Low Absolute Pressure)
B. Check Valve (outlet)
Figure 13 - Discharge Check Valve
Figure 14 - Isolation Valves
Figure 15 - Pressure and Vacuum
Gauges