How to use and customize the library
(Raisonance), TASKING or TrueSTUDIO (Atollic). Just check that the version you are
using supports STM32F30/31xx devices (see section Section 1.4.2: "Supported
development tools and compilers"
2.4.2 Run your first example
This section describes how to load and execute the template example provided within the
Library. This example configures the system clock to 72 MHz, initializes the evaluation
board LEDs, LCD and USART communication interface, then displays a welcome message
on the LCD, and finally toggles four LEDs in an infinite loop.
To achieve this goal you have to proceed as described below:
1. Download and unzip the STM32F30xx_dsp_stderiph_Lib_VX.Y.Z.zip in the folder of
your choice
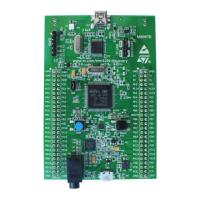
2. Power-up the STM32303C-EVAL board
3. Connect your JTAG probe to the JTAG connector (CN10) of the EVAL board and to
the USB port of your PC. The STM32303C-EVAL features a build-in ST-Link/V2
debugger and programmer which makes the external hardware debuggers useless to
load and debug your program. Simply select ST-Link/V2 as your debugger in your
Development Tool configuration menu and connect the CN5 to your host PC through
an USB cable. Refer to your development tool documentation to know if it supports the
ST-Link/V2 debugger.
4. Run the template example: go to
STM32F30xx_StdPeriph_Lib_VX.Y.Z\Project\STM32F30xx_StdPeriph_Templates
folder, and proceed as follows depending on the development tool you are using:
a. EWARM
a. Open the EWARM\Project.eww workspace
b. Rebuild all files: Project->Rebuild all
c. Load project image: Project->Debug
d. Run program: Debug->Go(F5)
b. MDK-ARM
a. Open the MDK-ARM\Project.uvproj project
b. Rebuild all files: Project->Rebuild all target files
c. Load project image: Debug->Start/Stop Debug Session
d. Run program: Debug->Run (F5)
c. TrueSTUDIO
a. Open the TrueSTUDIO development tool.
b. Click File->Switch Workspace->Other and browse to TrueSTUDIO
workspace directory.
c. Click File->Import, select General->Existing Projects into Workspace and
then click Next.
d. Browse to the TrueSTUDIO workspace directory and select the
STM32303C-EVAL project
e. Rebuild all project files: Select the project in the "Project explorer" window
then click on Project->build project menu.
f. Run program: Select the project in the "Project explorer" window then click
Run->Debug (F11)
d. RIDE
a. Open the Project.rprj project
b. Rebuild all files: Project->build project
c. Load project image: Debug->start(ctrl+D)
d. Run program: Debug->Run(ctrl+F9)
e. TASKING
a. Open the TASKING toolchain.
b. Click on File->Import, select General->'Existing Projects into Workspace'
and click Next
 Loading...