How to use and customize the library
b. USB FS: in STM32F30/31xx devices, the USB FS requires a frequency equal to
48MHz to work correctly.
c. 12-bit ADC: STM32F30/31xx12-bit ADC features two clock schemes:
Clock for the analog circuitry (ADCCLK). This clock is generated from the
PLL output. It can reach 72 MHz and can be divided by 1, 2, 4, 6, 8, 10, 12,
16, 32, 64, 128 or 256. The ADCCLK clock can be configured through RCC
registers. The AHB clock divided by a programmable prescaler can also be
generated. This clock allows the ADC to work at fHCLK/1, /2 or /8. ADCCLK
maximum value is 72 MHz when the AHB clock is 72 MHz. ADCCLK is
configure through the ADC registers.
Clock for the digital interface (used for register read/write access). This clock
is equal to the AHB clock. The digital interface clock can be
enabled/disabled individually for the ADC through the RCC AHB peripheral
clock enable register (RCC_AHBENR).
For more details, refer to Section 3: "Analog-to-digital converter (ADC)"
d. Configure the peripheral GPIOs: Whatever the peripheral mode, the I/Os
should be configured as alternate function, before being used as input or output.
To configure the I/Os, follow the steps below:
a. Connect the pin to the desired peripheral alternate function (AF) using
GPIO_PinAFConfig() function
b. Use GPIO_Init() function to configure the I/O pin
Configure the desired pin in alternate function mode using
GPIO_InitStructure->GPIO_Mode = GPIO_Mode_AF;
Select the type, pull-up/pull-down and output speed via GPIO_PuPd,
GPIO_OType and GPIO_Speed members For more details, refer to
Section 12: "General-purpose I/Os (GPIO)"
4. Configure the peripheral in the desired mode: refer to the peripheral firmware
driver section for details on the initialization procedure and how to use the available
API. Other modules need to be configured when using interrupt and DMA:
a. Using the interrupts: after enabling the interrupt source(s) in the peripheral
registers, enable the peripheral interrupt line and configure its priority in the
NVIC. For more details, refer to Section 15: "Miscellaneous add-on to CMSIS
functions(misc)"
b. Using the DMA: after enabling the DMA source(s) in the peripheral registers,
configure and enable the peripheral DMA channel in the DMA controller. For
more details, refer to Section 9: "DMA controller (DMA)"
2.6 How to develop your first application
This section describes all steps required for using and customizing the library to build an
application from scratch. It gives a real example based on the requirements described
below:
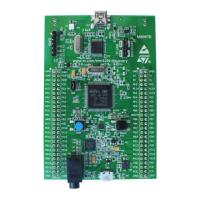
STM32303C-EVAL board used as reference hardware
System clock configured to 72 MHz, with 2 Flash wait state, Flash prefetch enabled.
PE6 pin used as EXTI Line6. This pin is connected externally to a pushbutton.
PE8 and PE9 pins used in output mode to drive LED1 and LED2, respectively.
2.6.1 Starting point
The typical starting point is the template project provided within the library package
(Project\STM32F30x_StdPeriph_Templates). This folder contains all the required template
files as well as the project files for different development tools.
Reuse the template files as follow:
 Loading...