QA BEAMCHECKER™ PLUS 33
Orientation may differ depending on room type or energy selected
8. Deliver the plan selected on the front panel of the unit. Measurement will start
automatically as indicated by spinning lines displayed on the front panel.
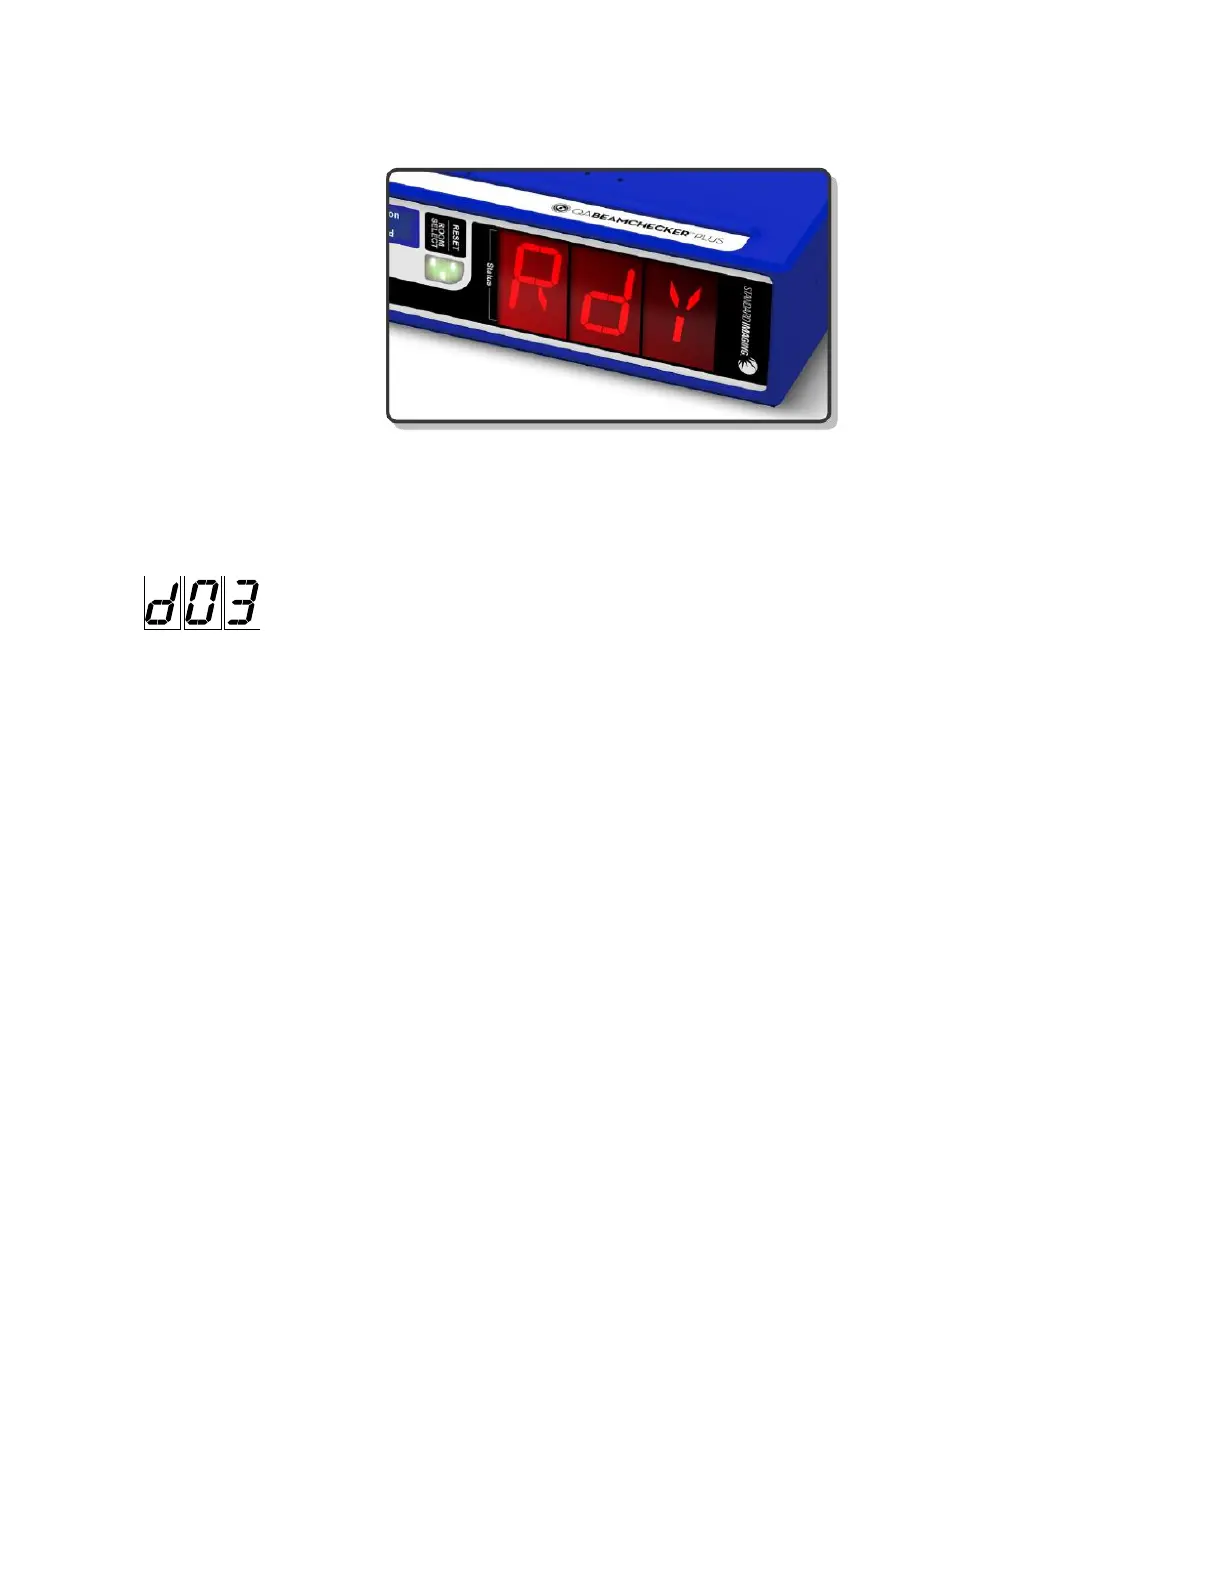
9. Check the patient monitor to verify the plan was successfully delivered. For
example, if D03 (label selected at time of baseline) was administered, d03 will be
displayed, and the measurement will be saved. If the beam parameters fall below action level 1
(set at time of baseline), the unit will reset in roughly ten seconds, re-arm, and display Rdy. If
the unit beeps repeatedly and a fault message is displayed, see the following section of the
manual: Wire-Free Measurement Fault.
10. Repeat steps 8-9 to test the same plan again, otherwise enter the vault and use the MODE /
PLAN button to select a new plan from the QA BeamChecker Plus front panel.
11. Once completed, the acquired measurements can be transferred to the PC for analysis. For
instructions, see the Data View and Downloading Measurements section of this manual.
TomoTherapy System Room
1. Place the Precision TomoTherapy Leveling Platform (or other leveling device) onto the
treatment couch, and place the QA BeamChecker Plus onto it ensuring the Photon side is
facing up as indicated by the large white field labels on both sides of the device.
2. Level the top of the QA BeamChecker Plus by placing the precision bubble level at the
center of the top surface, and adjusting the three leveling screws on the leveling platform as
needed.
3. Adjust the vertical height using the treatment couch until the horizontal side lasers line up
to the fiducial alignment mark on the top end of the QA BeamChecker Plus facing the bore of
the TomoTherapy unit. After the couch height is correct, align the lasers to the crosshair on the
top surface of the unit.
4. Exit the vault and position the patient monitor to view the front panel of the QA
BeamChecker Plus so its display is readable.