QA BEAMCHECKER™ PLUS 39
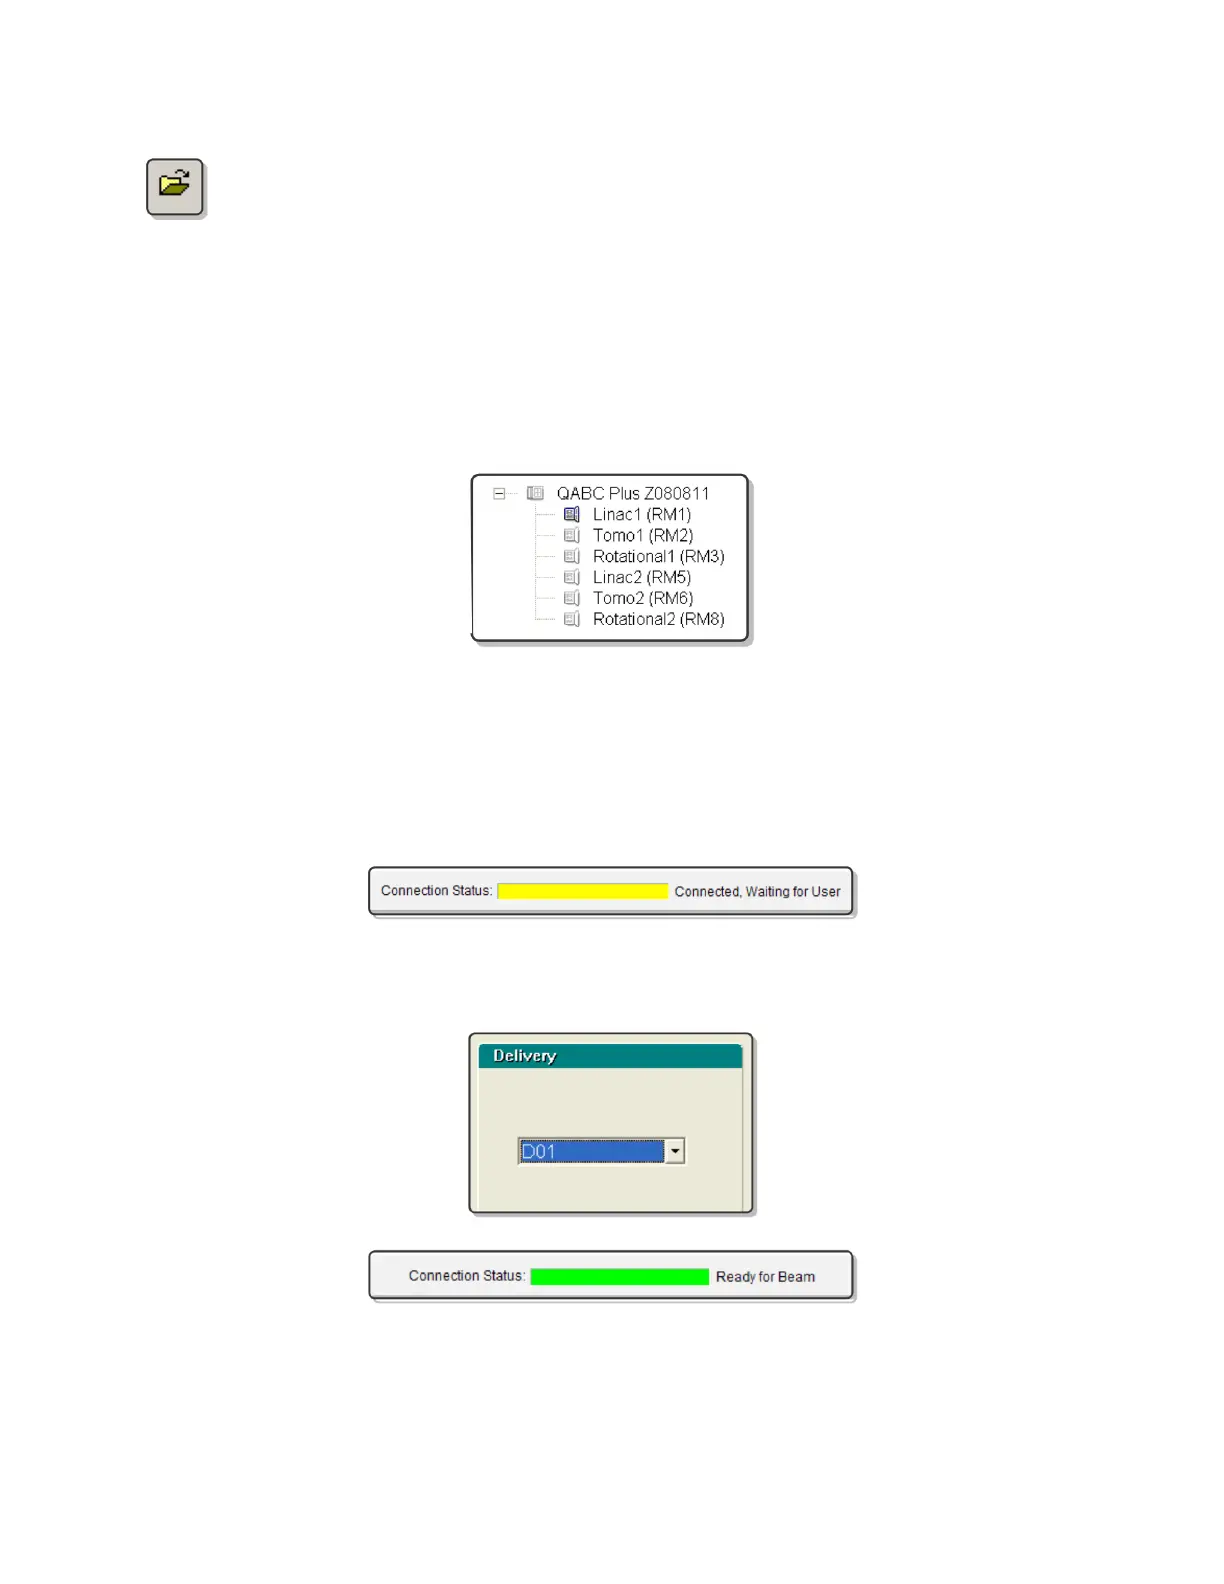
5. If the database file associated with the QA BeamChecker Plus connected to the PC
is not already open, open it by clicking the open icon on the toolbar or navigating to
File > Database > Open and browse for the correct file.
6. Depending on the tab being viewed, the Connection Status shown at the top of the screen
should read “Connected, Waiting for User” (yellow) or “Ready for Beam” (green). If the
Connection Status shows as red, see the Troubleshooting section of this manual for more
information.
7. If connection is verified, select the appropriate treatment room (RM1, RM2, etc) from the left
side of the screen.
NOTE: Ensure the proper room is selected to avoid overwriting or adding new data to the
wrong room.
8. Select the Real-Time Operation tab at the bottom of the screen. At this point, the
Connection Status shown at the top of the screen should be shown as “Connected, Waiting for
User” (yellow).
9. Select the desired plan to test (D01-D25) from the Delivery area on the upper right of the
screen. The Connection Status should now be shown as “Ready for Beam” (green).
10. Deliver the selected plan to the QA BeamChecker Plus. Upon detecting signal, the QA
BeamChecker Plus will begin measurement, and the Connection Status bar will alternate
between green and yellow. Once exposure is completed, raw measured values will appear on