7-6
764333-766
6. Carefully slide power supply away from table
frame and gently lift to remove from table taking
care not to damage LED display.
7. Disconnect four cables from rear of power supply.
8. Reverse procedure to install new power supply.
Figure 7-14. Replace Power Supply
7.8 FLOOR LOCK CYLINDER
REPLACEMENT
1. Unlock floor locks (ensure table rests on casters).
2. Remove Table Column Cover (see S
ECTION 7.3,
T
ABLE COLUMN COVER ASSEMBLY).
3. Remove appropriate Table Base Cover (see
S
ECTION 7.4, TABLE BASE COVER ASSEMBLY) to gain
access to floor lock assembly needing service.
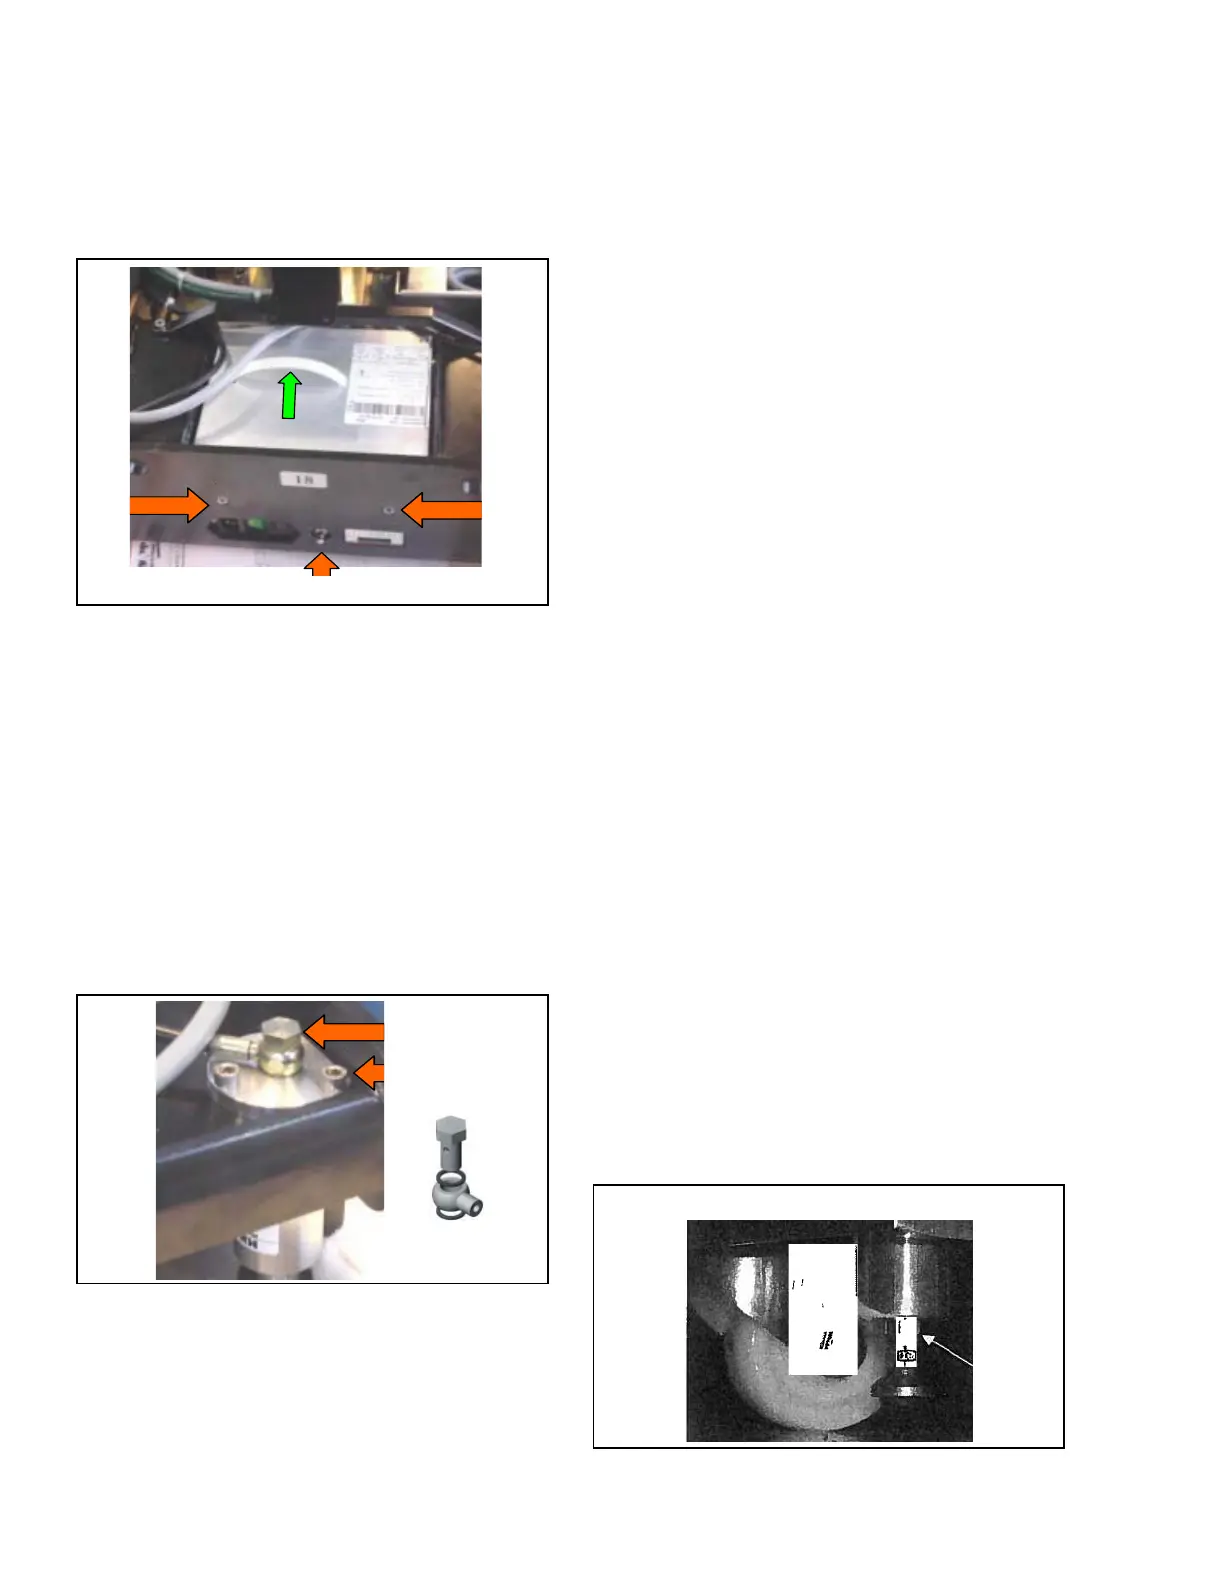
4. Remove and discard hydraulic screw and sealing
washers from top of cylinder (see Figure 7-15).
5. Remove and discard three mounting screws.
Figure 7-15. Replace Floor Lock Cylinder
6. Carefully lift cylinder (and spacer if equipped) from
table base. Ensure not to crimp hydraulic cable.
7. Remove foot (leveling mount) from cylinder and
attach to new cylinder. Ensure not to damage
cylinder shaft.
NOTE: For swivel foot, use thin wrench (P764330-220)
to carefully remove foot.
8. Install new hydraulic screw and sealing washers to
new cylinder. Torque screw to 12 N•m (106 lbf•in).
NOTE: Replace (do not reuse) hydraulic screws and
sealing washers (see Figure 7-15). Ensure bolt threads,
manifold threads and hose connectors are free of rubber
seal particles.
9. Carefully return cylinder to table base and fasten
with three new mounting screws. Ensure not to
crimp hydraulic cable.
10. Operate floor lock several times to ensure proper
operation. Inspect for leaks as follows:
a. Fully extend floor locks.
b. Visually check for signs of dripping oil from
cylinder.
c. Run finger along cylinder shaft to check for
hydraulic fluid. A slight film is normal and is
required to lubricate seals.
d. If oil is excessive enough to form a drip, replace
cylinder.
7.9 FLOOR LOCK FOOT (LEVELING
MOUNT) REPLACEMENT
Replace floor lock foot or leveling mount as follows:
1. Remove Floor Lock Cylinder (see S
ECTION 7.8,
F
LOOR LOCK CYLINDER REPLACEMENT).
2. Ensuring not to damage cylinder shaft, carefully
remove swivel foot or leveling mount.
3. Screw on new foot or mount.
4. Insert spacer over cylinder and position between
cylinder and table base.
5. Return Floor Lock Cylinder assembly to table and
secure with three mounting screws.
6. Adjust foot or leveling mount as necessary and use
locknut to secure (see Figure 7-16).
NOTE: Move table to known level floor. Total mechanical
adjustment for the swivel foot is 1/4" (6.4 mm) starting
from full in position.
Figure 7-16. Adjust Floor Lock
Screw
Ground Equalization Terminal
Screw
Hydraulic Screw
Mounting Screw
Hydraulic Screw and
Sealing Washers