16
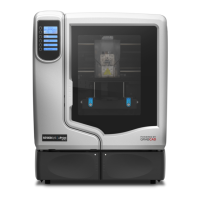
Figure 9 Positioning material bays
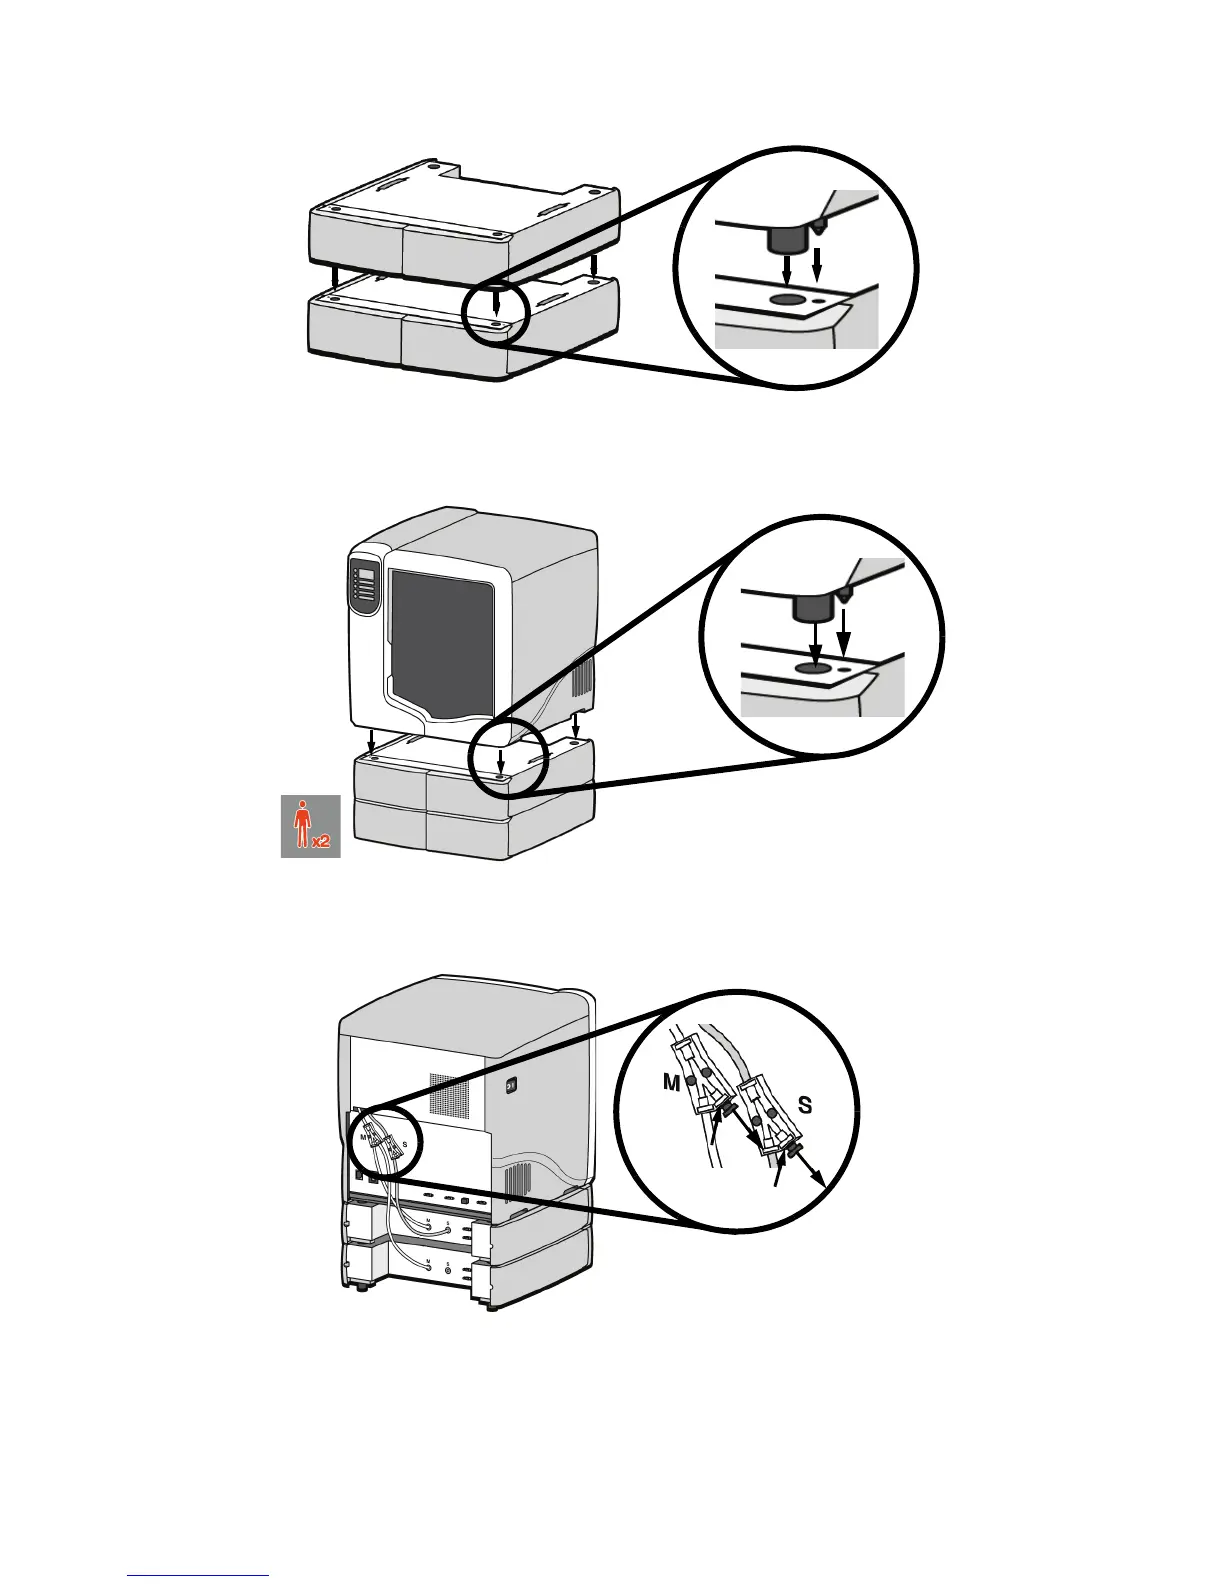
15. With 2 people, position the printer on to the top of the material bays. Be sure the feet and pins
are properly aligned. See Figure 10.
Figure 10 Positioning printer
16. Remove the black plugs from the model and support Y blocks by pushing in on the coupler
rings and pulling outward.
Figure 11 Removing the Y block plugs
17. Connect the short red striped material tube (M1) from model (M) coupler of upper material bay
to left side of model Y block by inserting firmly into red couplers. Gently pull the tube to
ensure it is properly inserted.
18. Repeat with the short black striped (S1) material tube for support side. See Figure 12.