42 6086-009-001 REV B www.stryker.com
Return To Table of Contents
Operation Guide
USING RESTRAINT STRAPS (CONTINUED)
CAUTION
Ensure that the restraints are not entangled in the base frame when raising and lowering the cot.
When the cot is put into service, open the restraints and place them at either side of the cot until the patient is
positioned on the cot mattress. Lengthen the restraints, buckle them around the patient and shorten them until the
required tightness is achieved.
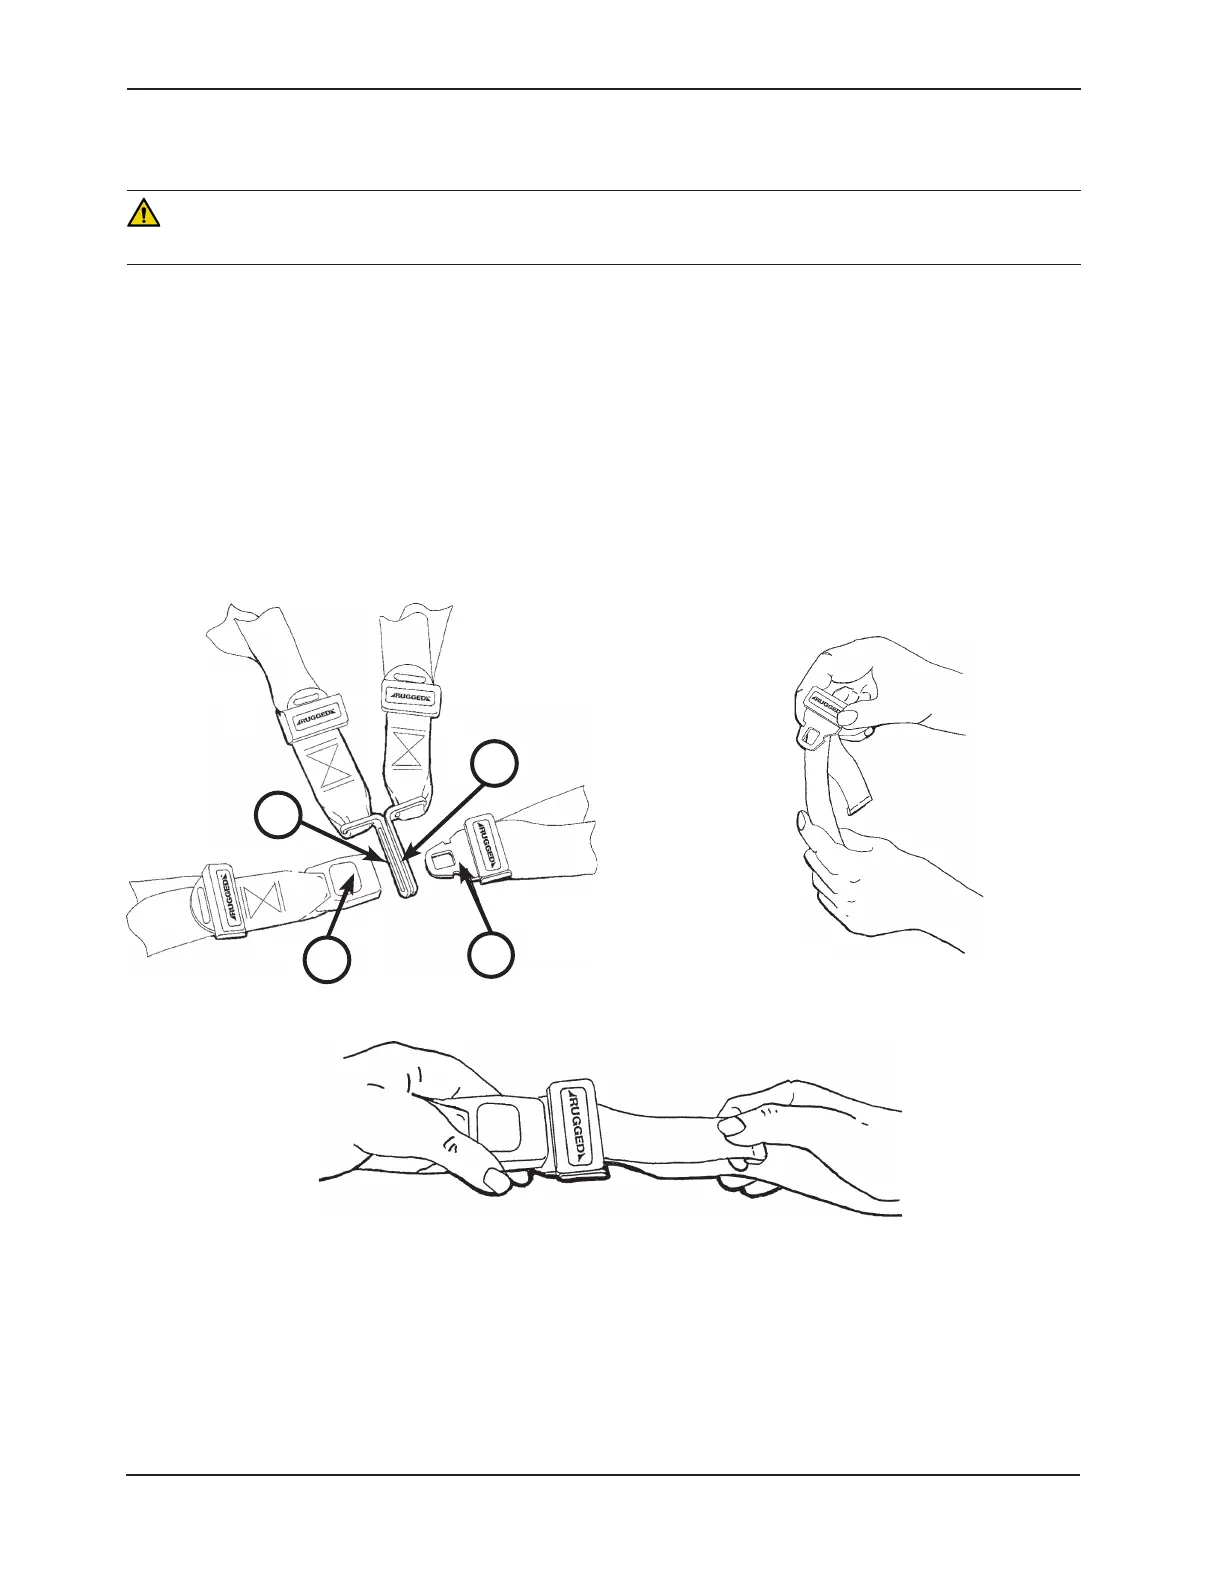
• To open the restraint, press the red button (A) on the front of the buckle “receiver”. This releases the buckle latch
plate (B) which can then be pulled out of the receiver (Figure 42).
• To close the restraint, push the latch plate into the receiver until a “click” is heard. When fastening the chest
restraint ensure that the latch plate passes through both links (C) on the shoulder strap (Figure 42).
• To lengthen the restraint, grasp the buckle latch plate, turn it at an angle to the webbing, then pull it out (Figure
43). A hemmed tab at the end of the webbing prevents the latch plate from coming off of the strap.
• To shorten the restraint, grasp the hemmed tab and pull the webbing back through the latch plate until the
required tightness is achieved (Figure 44).
Whenever a restraint is buckled on a patient, verify that the latch plate is fully engaged and any extra webbing is not
tangled in the cot or hanging loose.
Inspect the restraints at least once a month (more frequently if used heavily). Inspection should include checking for a
bent or broken receiver or latch plate, torn or frayed webbing, etc. Any restraint showing wear or not operating properly
must be replaced immediately.
Figure 42: Buckling the Safety Restraints
Figure 44: Shortening the Safety Restraint
Figure 43: Lengthening the Safety Restraint
A
B
C
C