www.stryker.com 6086-009-001 REV B 21
Return To Table of Contents
Vehicle Safety Hook Installation
Note: These installation instructions are intended for cots that you will NOT use with Power-LOAD. For Model 6086
cots with the Power-LOAD option, see the Power-LOAD Operations/Maintenance Manual for installation instructions.
WARNING
• Have the vehicle safety hook installed by a certified mechanic. Improper safety hook installation can cause injury
to the patient or operator and/or damage to the cot.
• Failure to install the safety hook can cause injury to the patient or operator.
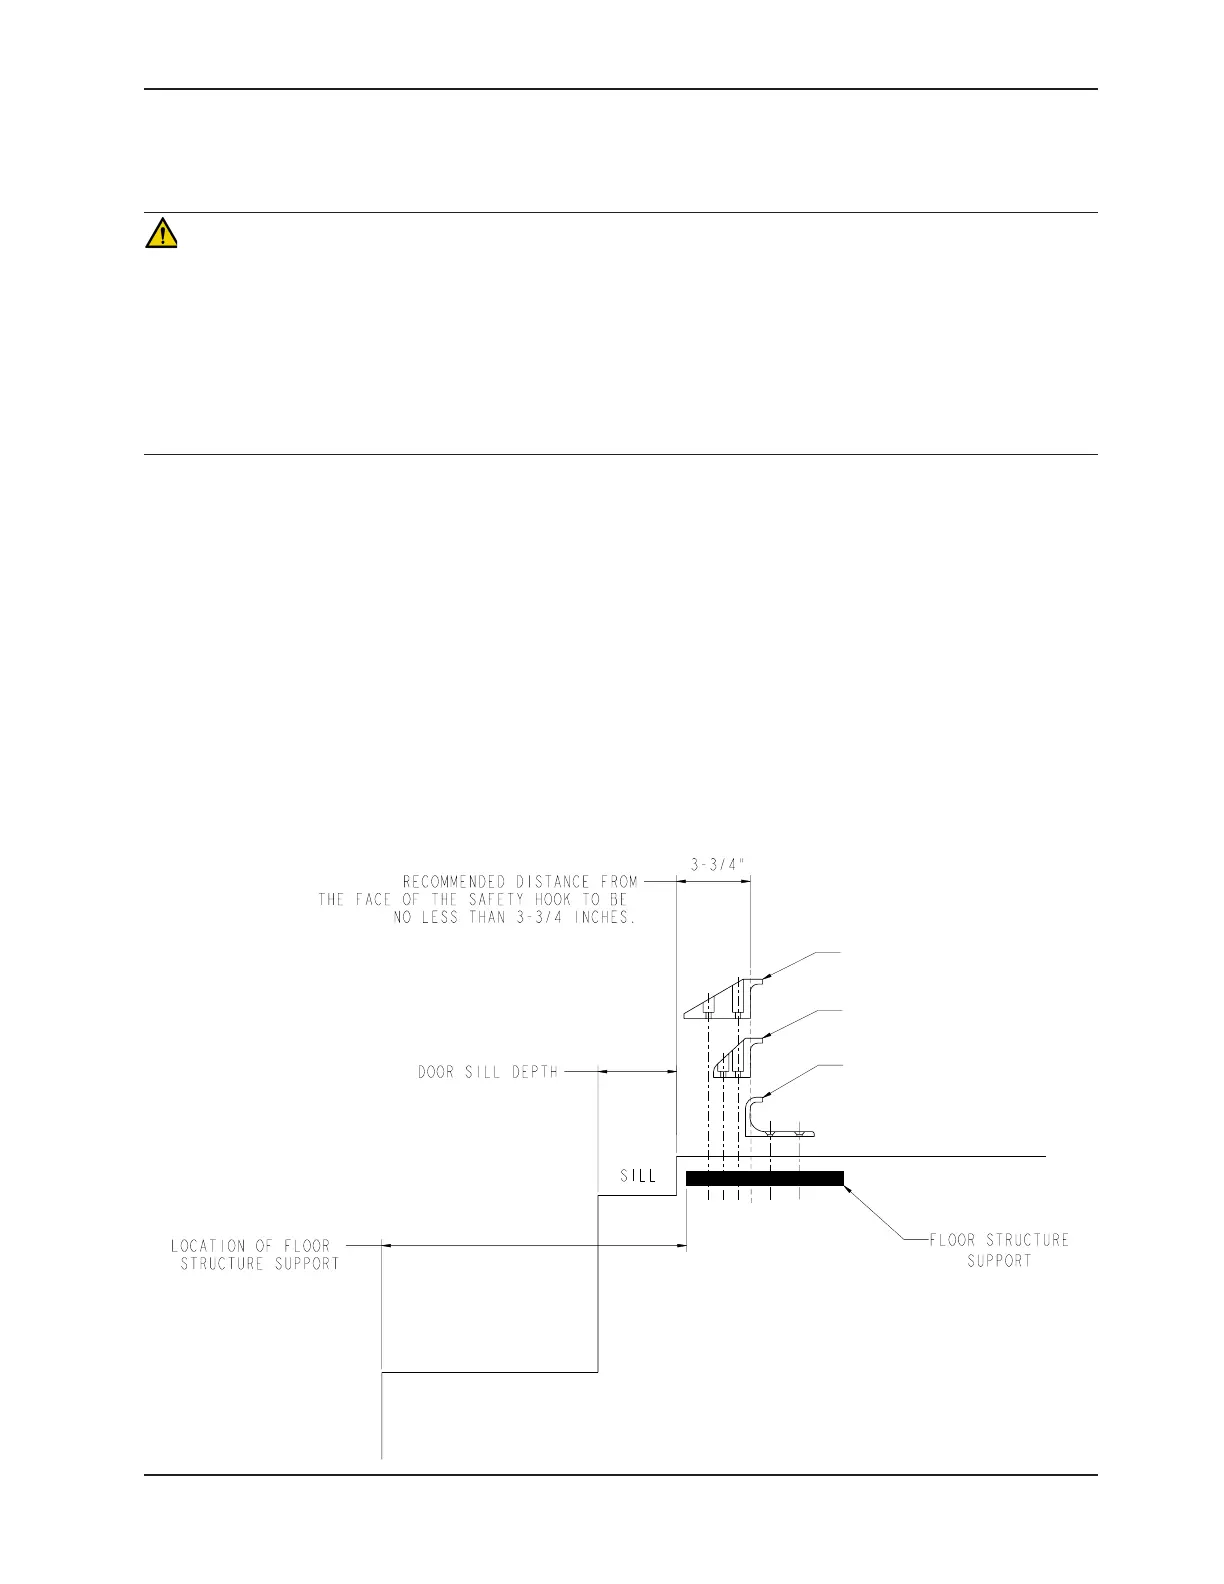
• The face of the safety hook that engages the safety bar should be located at least 3-3/4” from the leading edge
of the door sill. After installation, verify that the cot legs lock into the load position without contacting the vehicle
bumper.
• To avoid injury, verify that the safety bar has engaged the safety hook before removing the cot from the patient
compartment.
Note: Stryker recommends that, prior to installation, the certified mechanic plan the placement of the safety hook in
the rear of the vehicle.
Before installing the safety hook into your vehicle, check the front to back and side to side positioning when unloading
and loading the cot to ensure that the safety hook will be installed properly. The cot safety bar must engage the safety
hook every time, regardless of cot position.
FRONT TO BACK POSITIONING OF THE SAFETY HOOK
1. Select the appropriate safety hook for your vehicle configuration.
2. Position the safety hook at least 3-3/4” from the leading edge of the door sill.
3. Ensure that the safety hook can be securely mounted into the back of the vehicle while providing adequate bumper
clearance to allow the cot to be loaded and unloaded from the vehicle.
4. See “Side to Side Positioning of the Safety Hook” to confirm the side to side placement.
Long Safety Hook
6060-036-018
Short Safety Hook
6060-036-017
J-Style Safety Hook
6092-036-018
Figure 9: Safety Hook Placement