Studer Innotec SA
next3
20 V 1.3 © Studer-Innotec SA next3 Tech manual
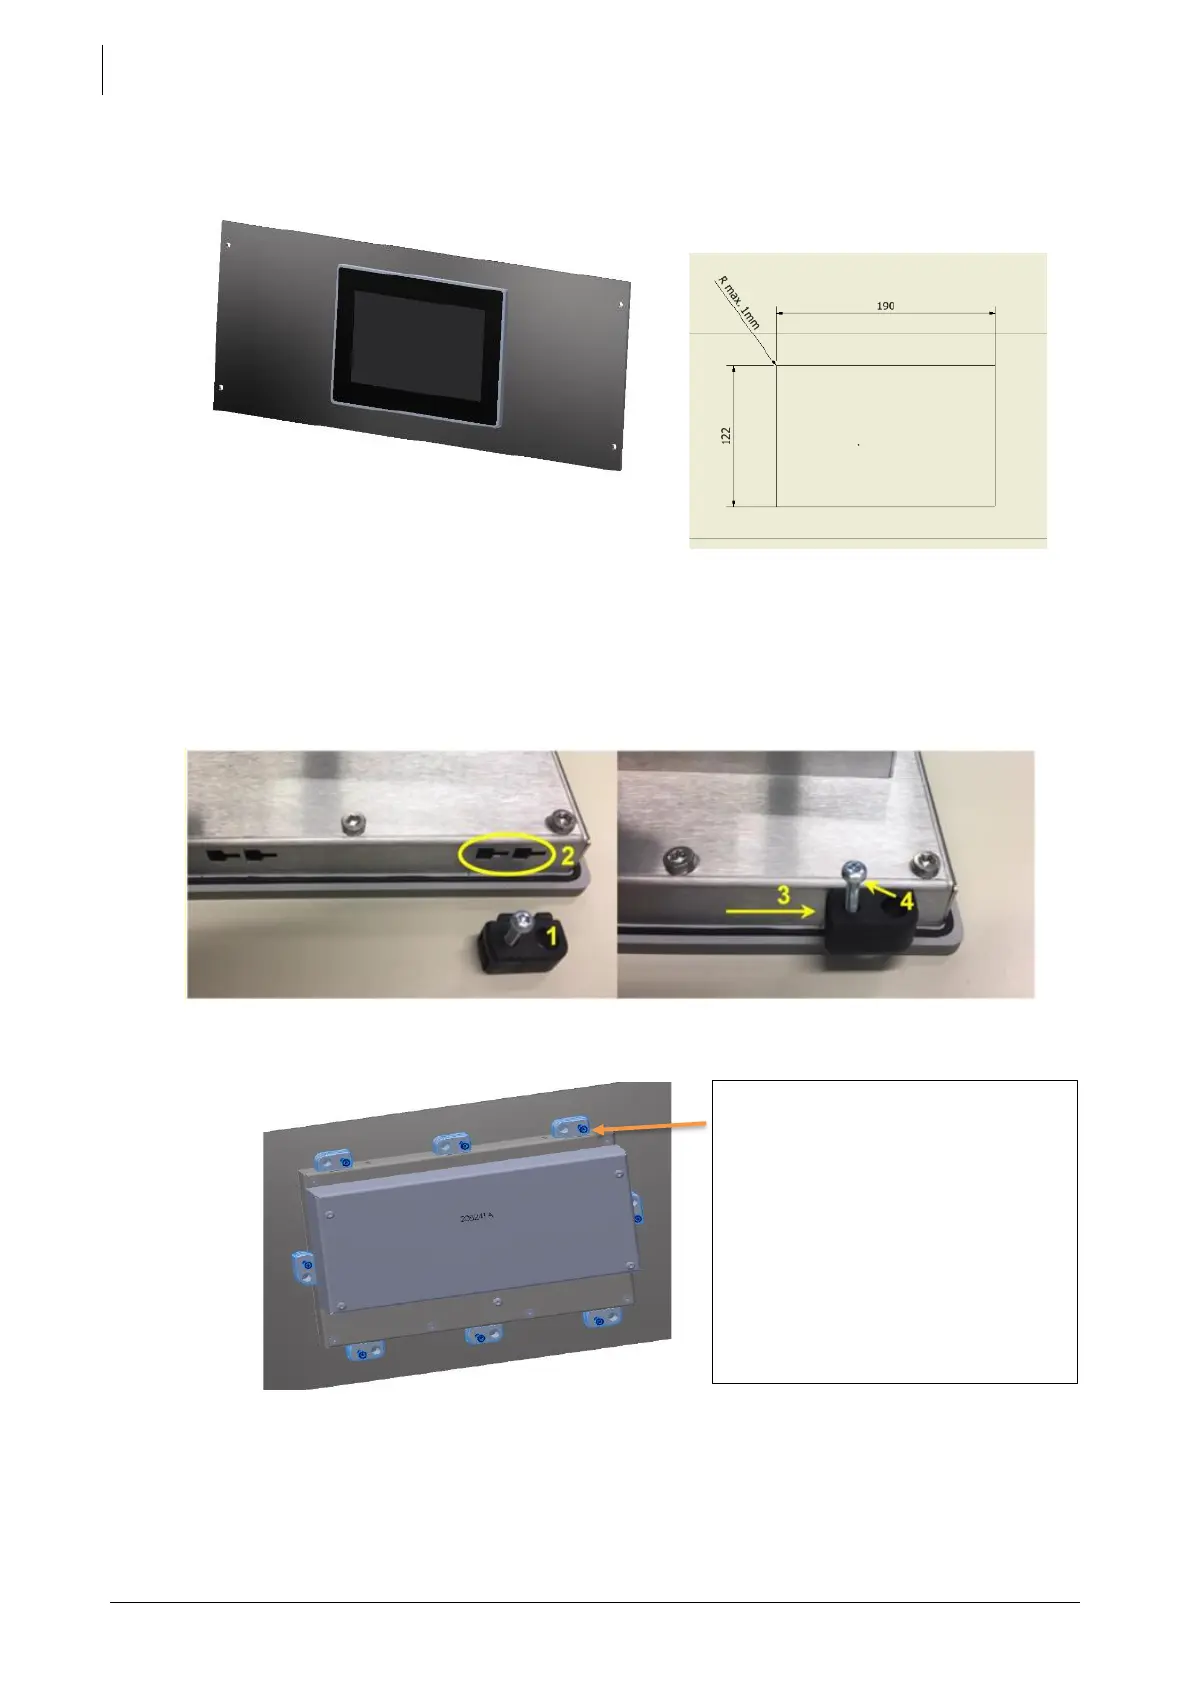
4.4.2.2 Nx-interface panel mounting
The nx-interface can be integrated in a panel. The maximum thickness of the panel cannot exceed
4mm.
The opening cut in the front panel must be 122 x 190mm
with a maximum radius of 1mm in the corners
Mounting Instructions:
1. Insert the device from the front into the cut-out of the panel and push it carefully until it is fully
inserted
Insert the mounting elements (1) into the provided lateral T cut-outs (2) and push them
sideways (3) so that they are locked.
2. For the first mounting elements in a corner, tighten the fixing screw (4)until it presses on the
plate. Tighten the fastening screws to a maximum torque of 0.2 Nm.
3. Repeat procedure 3 for opposite mounting element
4. Repeat procedure 3 for remaining mounting elements