DNX-11 Installation Installing the System Manager Controller
DOC-001-11001 (Rev. 006) 20 DNX Quick Install & Setup Guide
Installing the System Manager Controller
To install an SMC II module into a DNX-11 chassis:
1. Remove the SMC II module and corresponding SMC II rear interface module from the anti-
static bags.
2. Hold the front SMC II module upright (vertically) and slide it into a slot (far left) in the DNX-
11 chassis following the white card guide. It does not matter if you insert the card in the top
or bottom slot.
3. Next, hold the full-size SMC II or SMC IIA rear interface module upright and slide it into the
rear of the DNX-11 chassis following the white card guide (far right). Make sure it is aligned
with the front SMC II module.
4. When both cards are aligned and inserted properly, fasten the thumb screws securely in
both front and rear cards. If done properly, the DNX will reset.
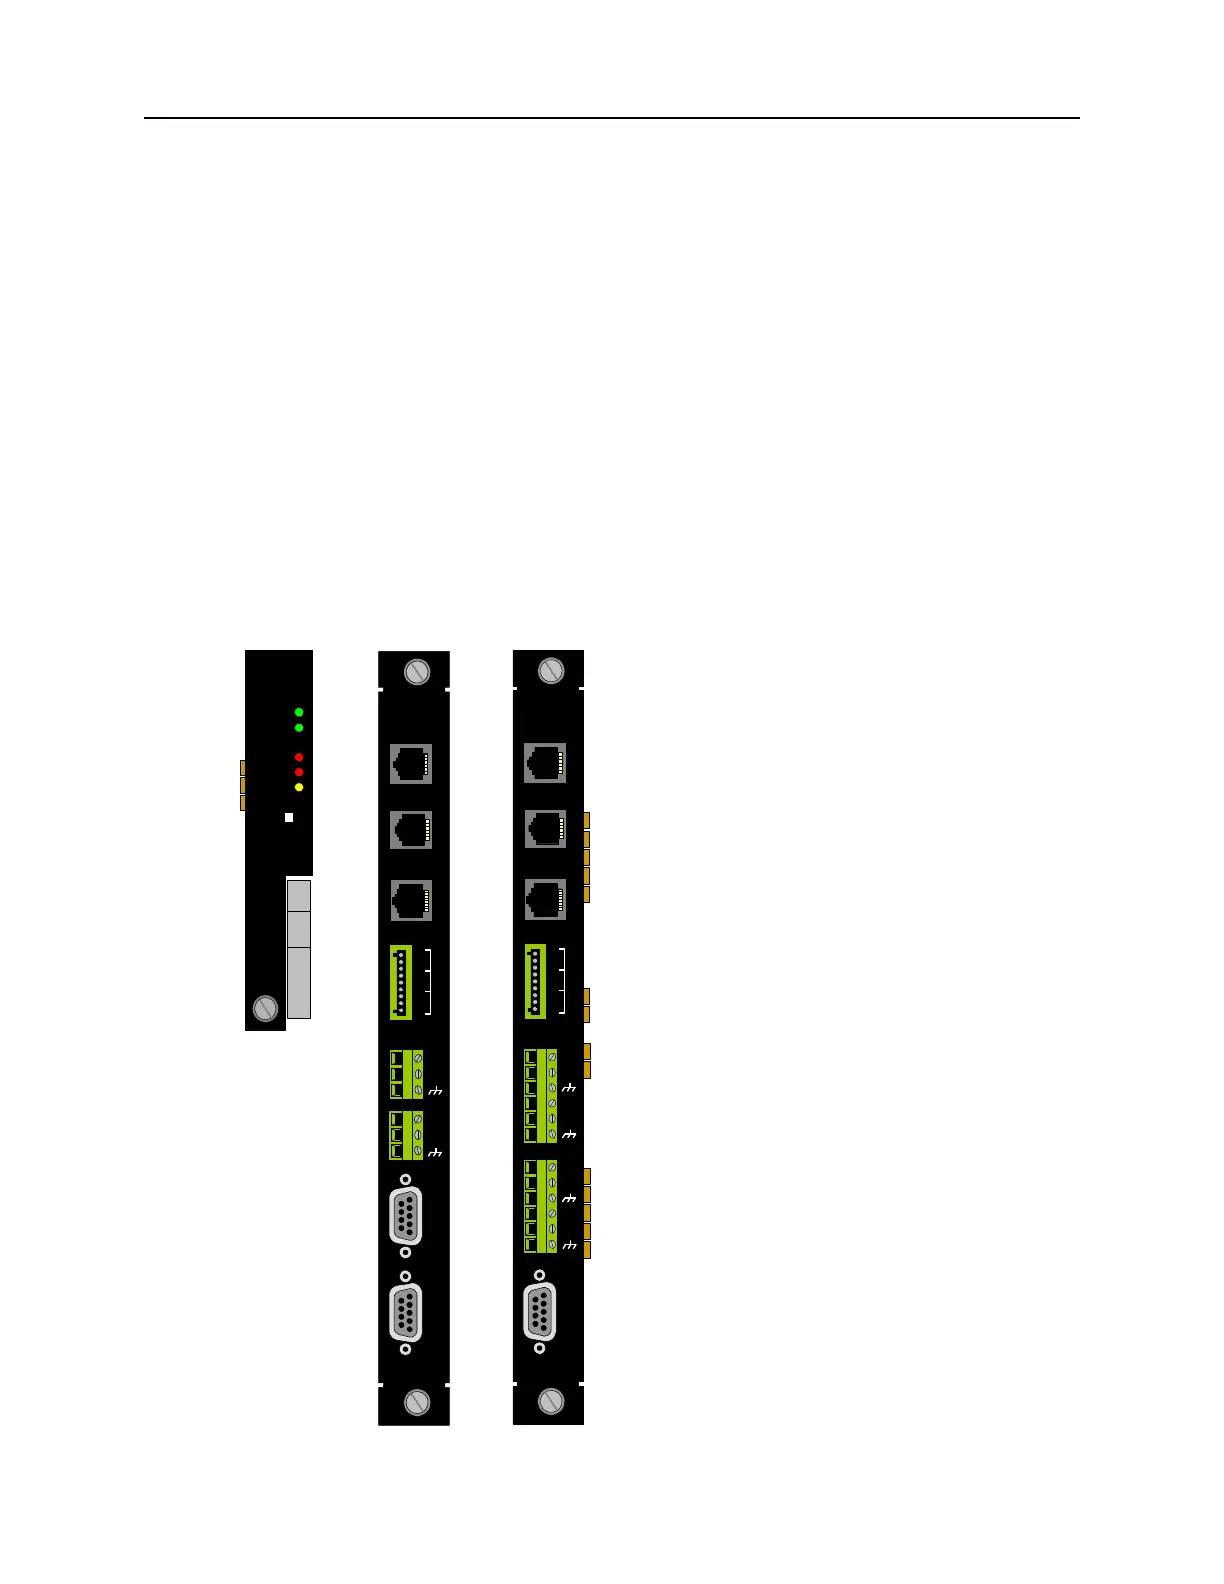
Figure 15: SMC II front and SMC II & SMC IIA rear interface module set.
System
Manager II
READY
LAN
CRITL
MAJOR
MINOR
ACO
Manager
Interface
Station
Clock
X.25
Protect
Swt
A1
A2
B1
B2
Phone Line
Terminal
10 Base T
NC
NO
C
NO
NC
C
NO
NC
C
1
3
2
Alarm
SMC IIA
Mgr I/F
Station Clk
CC
PSX
A1
A2
B1
B2
Phone Line
Terminal
10/100
NC
NO
C
NO
NC
C
NO
NC
C
1
3
2
Alarm
T1/E1
C1
C2
D1
D2