DOC-001-11001 (Rev. 006) vi DNX Quick Install & Setup Guide
Table of Contents
Prior to Installation . . . . . . . . . . . . . . . . . . . . . . . . . . . . . . . . . . . . . . . . . 1
Inspect Shipment. . . . . . . . . . . . . . . . . . . . . . . . . . . . . . . . . . . . . . . . . . . . . . . . . . . . 1
To Inspect Equipment: . . . . . . . . . . . . . . . . . . . . . . . . . . . . . . . . . . . . . . . . . . . . . 1
Site Preparations. . . . . . . . . . . . . . . . . . . . . . . . . . . . . . . . . . . . . . . . . . . . . . . . . . . . 2
Required Tools and Cables . . . . . . . . . . . . . . . . . . . . . . . . . . . . . . . . . . . . . . . . . 2
Site Environmental Recommendations. . . . . . . . . . . . . . . . . . . . . . . . . . . . . . . . . 2
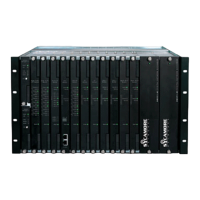
DNX-11 Installation . . . . . . . . . . . . . . . . . . . . . . . . . . . . . . . . . . . . . . . . . 3
Rack Mounting. . . . . . . . . . . . . . . . . . . . . . . . . . . . . . . . . . . . . . . . . . . . . . . . . . . . . . 3
19” EIA Flush Rack Mounting . . . . . . . . . . . . . . . . . . . . . . . . . . . . . . . . . . . . . . . . 3
23” EIA Flush Rack Mounting . . . . . . . . . . . . . . . . . . . . . . . . . . . . . . . . . . . . . . . . 4
23” EIA Center Rack Mounting . . . . . . . . . . . . . . . . . . . . . . . . . . . . . . . . . . . . . . . 5
19” Telco Flush Rack Mounting . . . . . . . . . . . . . . . . . . . . . . . . . . . . . . . . . . . . . . 6
23” Telco Flush Rack Mounting . . . . . . . . . . . . . . . . . . . . . . . . . . . . . . . . . . . . . . 7
23” Telco Center Rack Mounting . . . . . . . . . . . . . . . . . . . . . . . . . . . . . . . . . . . . . 8
Proper Grounding . . . . . . . . . . . . . . . . . . . . . . . . . . . . . . . . . . . . . . . . . . . . . . . . . . . 9
Grounding via Rack Mount . . . . . . . . . . . . . . . . . . . . . . . . . . . . . . . . . . . . . . . . . . 9
Grounding via Grounding Strap . . . . . . . . . . . . . . . . . . . . . . . . . . . . . . . . . . . . . . 10
Installing DNX-11 Power Supply Module(s). . . . . . . . . . . . . . . . . . . . . . . . . . . . . . . . 11
Internal Fuse/Wattage Requirements . . . . . . . . . . . . . . . . . . . . . . . . . . . . . . . . . . 11
DNX-11 AC Power. . . . . . . . . . . . . . . . . . . . . . . . . . . . . . . . . . . . . . . . . . . . . . . . . . . 12
AC Power Requirements . . . . . . . . . . . . . . . . . . . . . . . . . . . . . . . . . . . . . . . . . . . 12
AC Power Fuses. . . . . . . . . . . . . . . . . . . . . . . . . . . . . . . . . . . . . . . . . . . . . . . . . . 12
Connecting AC Power to a DNX-11 . . . . . . . . . . . . . . . . . . . . . . . . . . . . . . . . . . . 13
DNX-11 DC Power . . . . . . . . . . . . . . . . . . . . . . . . . . . . . . . . . . . . . . . . . . . . . . . . . . 14
DC Power Requirements . . . . . . . . . . . . . . . . . . . . . . . . . . . . . . . . . . . . . . . . . . . 14
DC Power Fuses. . . . . . . . . . . . . . . . . . . . . . . . . . . . . . . . . . . . . . . . . . . . . . . . . . 14
Connecting DC Power (-48VDC) to a DNX-11 . . . . . . . . . . . . . . . . . . . . . . . . . . . 15
Connecting the Talk Battery or Signal Battery . . . . . . . . . . . . . . . . . . . . . . . . . . . 17
Talk Battery & Signal Battery Fuses . . . . . . . . . . . . . . . . . . . . . . . . . . . . . . . . . . . 19
Installing the System Manager Controller . . . . . . . . . . . . . . . . . . . . . . . . . . . . . . . . . 20
To install an SMC II module into a DNX-11 chassis: . . . . . . . . . . . . . . . . . . . . . . 20
SMC II Module Jumper Configuration . . . . . . . . . . . . . . . . . . . . . . . . . . . . . . . . . . . . 21
Revision 0 and Revision 1 SMC II Modules . . . . . . . . . . . . . . . . . . . . . . . . . . . . . 21
Revision 0 and Revision 1 SMC II Modules - Jumper Placement. . . . . . . . . . . . . 22
Revision 2 SMC II Modules. . . . . . . . . . . . . . . . . . . . . . . . . . . . . . . . . . . . . . . . . . 23
Revision 2 SMC II Modules - Jumper Placement . . . . . . . . . . . . . . . . . . . . . . . . . 24
Installing Application & Interface Modules . . . . . . . . . . . . . . . . . . . . . . 25
To install application and interface modules into a DNX-11 chassis: . . . . . . . . . . 25
Connecting External Clocking . . . . . . . . . . . . . . . . . . . . . . . . . . . . . . . . 26