DNX-11 Installation SMC II Module Jumper Configuration
DOC-001-11001 (Rev. 006)
24 DNX Quick Install & Setup Guide
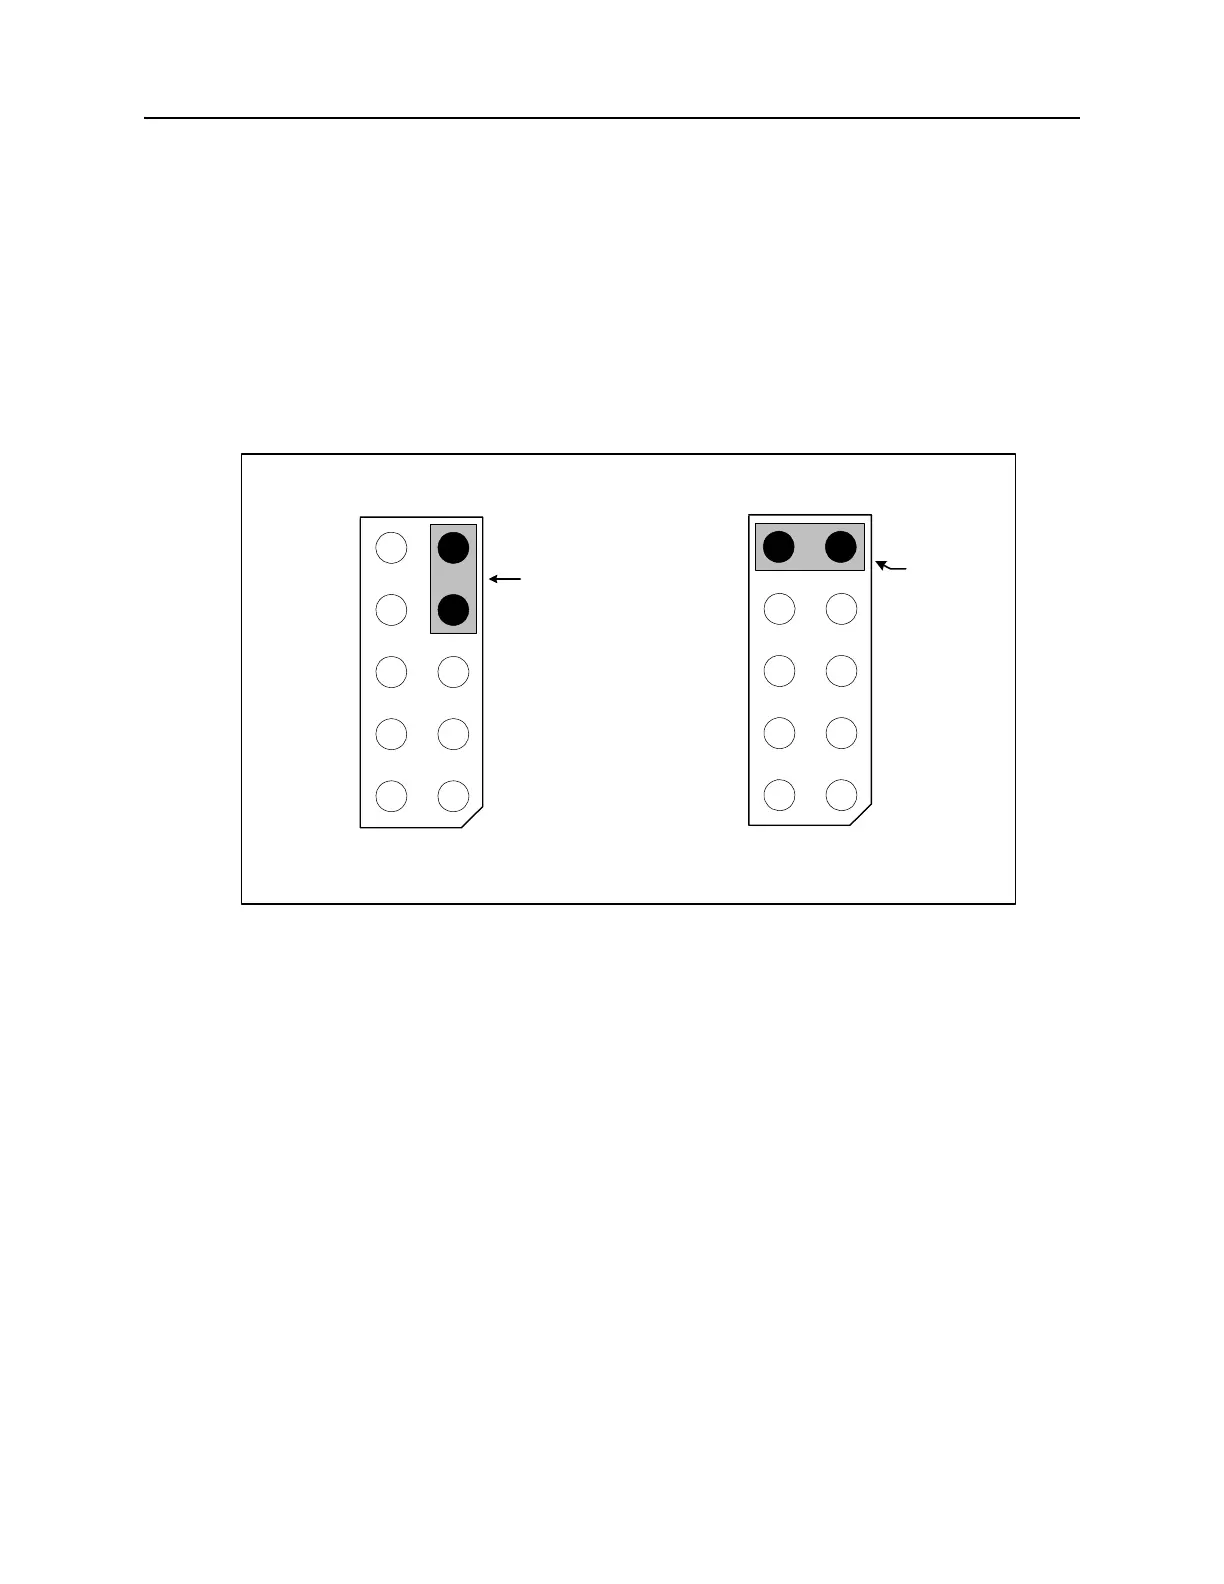
Revision 2 SMC II Modules - Jumper Placement
For DNX-11/-4 standalone applications, a jumper is not necessary, however, SMC II modules
are shipped with a spare jumper shunt across inactive pins (such as pins 7 and 9) in order to
facilitate later DNX-88 application upgrades if desired. For DNX-88 applications (Nests 2
through 8), the jumper shunt should be placed across pins 9 and 10 of jumper block
J3. Refer
to Figure 19 for placement.
Figure 19: Revision 2 SMC II Module - Jumper Shunt Placement.
The SMC II card is designed to be used in the DNX-11 and the DNX-88 expansion node. A
jumper on the SMC II front card is used to set up the DNX for either use, since the SMC II reacts
differently depending upon its environment. The position of the jumper determines the type of
nest in which the SMC II will be installed. When using the DNX-11 standalone environment, the
SMC II front card does not require a jumper. When using the DNX-88 expansion node environ-
ment, the SMC II front card requires two jumpers when used as a nest manager.
J3
4
6
8
10
2
Spare Shunt
(Not Required)
DNX-11/4 (Standalone Nest) DNX-88 (Nests 2 through 8)
9
1
7
5
3
Required
Shunt
DB
FC
WD
J3
4
6
8
2
1
7
5
3
DB
FC
WD
10
9