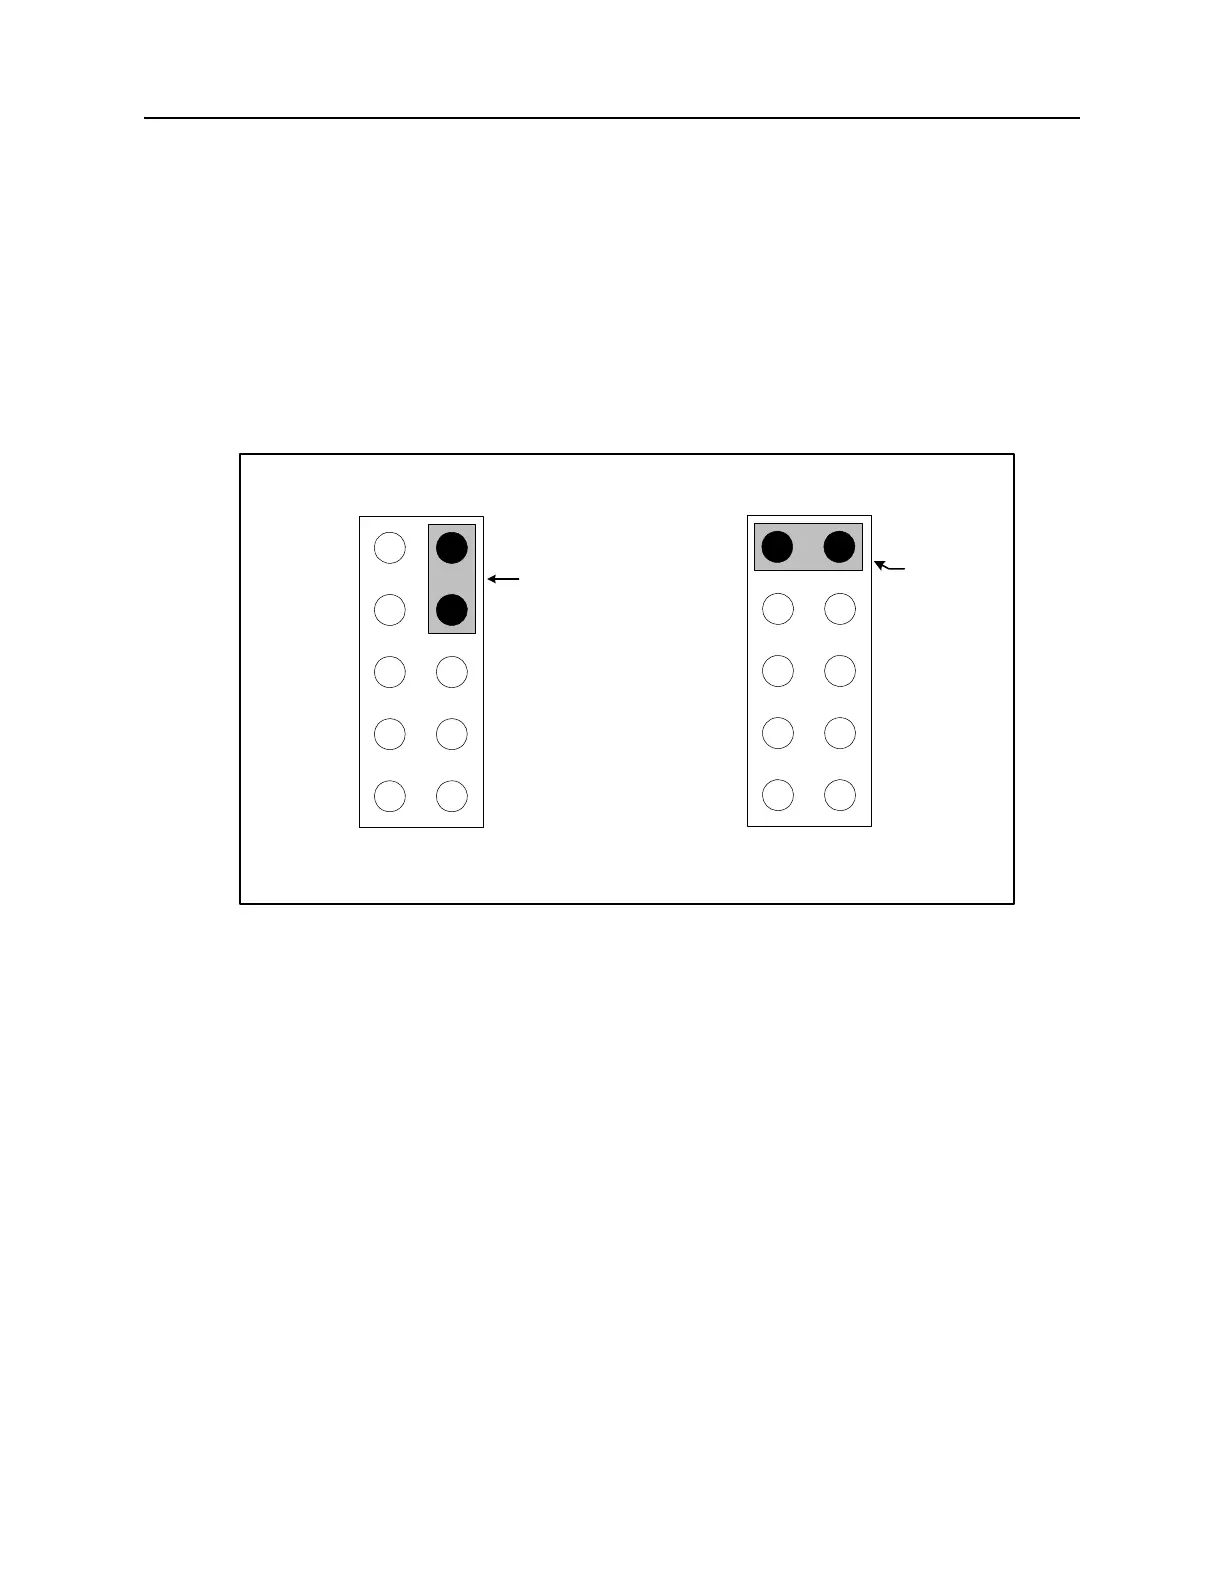
DNX-11 Installation SMC II Module Jumper Configuration
DOC-001-11001 (Rev. 006) 22 DNX Quick Install & Setup Guide
Revision 0 and Revision 1 SMC II Modules - Jumper Placement
For DNX-11/-4 standalone applications, a jumper is not necessary, however, SMC II modules
are shipped with a spare jumper shunt across inactive pins (such as pins 7 and 9) in order to
facilitate later DNX-88 application upgrades if desired. For DNX-88 applications (Nests 2
through 8), the jumper shunt should be placed across pins 9 and 10 of jumper block J5. Refer
to Figure 17 for placement.
Figure 17: Revision 0 and Revision 1 SMC II Module - Jumper Shunt Placement.
J5
4
6
8
10
2
Spare Shunt
(Not Required)
DNX-11/4 (Standalone Nest) DNX-88 (Nests 2 through 8)
9
1
7
5
3
Required
Shunt
DB
FC
WD
J5
4
6
8
2
1
7
5
3
DB
FC
WD
10
9