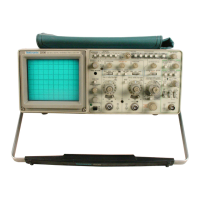
Adjustment Procedure— 2230 Service
EXTERNAL Z-AXIS, PROBE ADJUST,
EXTERNAL CLOCK, AND X-Y PLOTTER
Equipment Required (see Table 4-1):
Leveled Sine-Wave Generator (Item 2)
Pulse Generator (Item 5)
Two 50 Q BNC Cables (Item 8)
BNC T-Connector (Item 11)
50 ft BNC Termination (Item 12)
BNC Male-to-Tip Plug (Item 17)
10X Probe (Proveded with Instrument)
INITIAL CONTROL SETTINGS PROCEDURE STEPS
Vertical
1. Check External Z-Axis Operation
Channel 1 POSITION Midrange
a. Connect the leveled sine-wave generator output via
VERTICAL MODE
CH 1
a 50 Q cable and a T-connector to the CH 1 OR X input
X-Y
Off (button out)
connector. Then connect a 50 SI cable and a 50 SI termina-
BW LIMIT
Off (button out)
tion from the T-connector to the EXT Z AXIS INPUT con-
CH 1 VOLTS/DIV
1 V
nector on the rear panel.
CH 1 VOLTS/DIV Variable
CAL detent
Channel 1 AC-GND-DC DC
b. Set the generator to produce a 5 V, 50 kHz signal.
Horizontal
POSITION
Midrange
c. CHECK—For noticeable intensity modulation. The
HORIZONTAL MODE A
positive part ol the sine wave should be of lower intensity
A SEC/DIV
20 ms
than the negative part.
SEC/DIV Variable
CAL detent
XI0 Magnifier
Off (knob in)
d. Disconnect the test equipment from the instrument.
A TRIGGER
VAR HOLDOFF
NORM
Mode
P-P AUTO
2. Check Probe Adjust Operation
SLOPE OUT
LEVEL
Midrange
a. Set:
HF REJECT OFF
CH 1 VOLTS/DIV 10 mV
A&B INT
VERT MODE
A SOURCE
INT
A SEC/DIV 0.5 ms
Storage
b. Connect the 10X Probe to the CH 1 OR X input
STORE/NON STORE
NON STORE (button out)
connector and insert the probe tip into the PROBE
SAVE/CONTINUE
CONTINUE (button out)
ADJUST jack on the instrument front panel. If necessary,
PRETRIG/POST TRIG
POST TRIG (button out)
adjust the probe compensation for a flat-topped square-
ROLL/SCAN
SCAN (button out) wave display.
1K/4K
4K (button out)
POSITION CURS/
POSITION CURS
SELECT WAVEFORM
(button in) c. CHECK—Display amplitude is 4.75 to 5.25 divisions.
WAVEFORM
WAVEFORM
REFERENCE/
REFERENCE
MENU SELECT
(button in)
d. Disconnect the probe from the instrument.
5-32

 Loading...