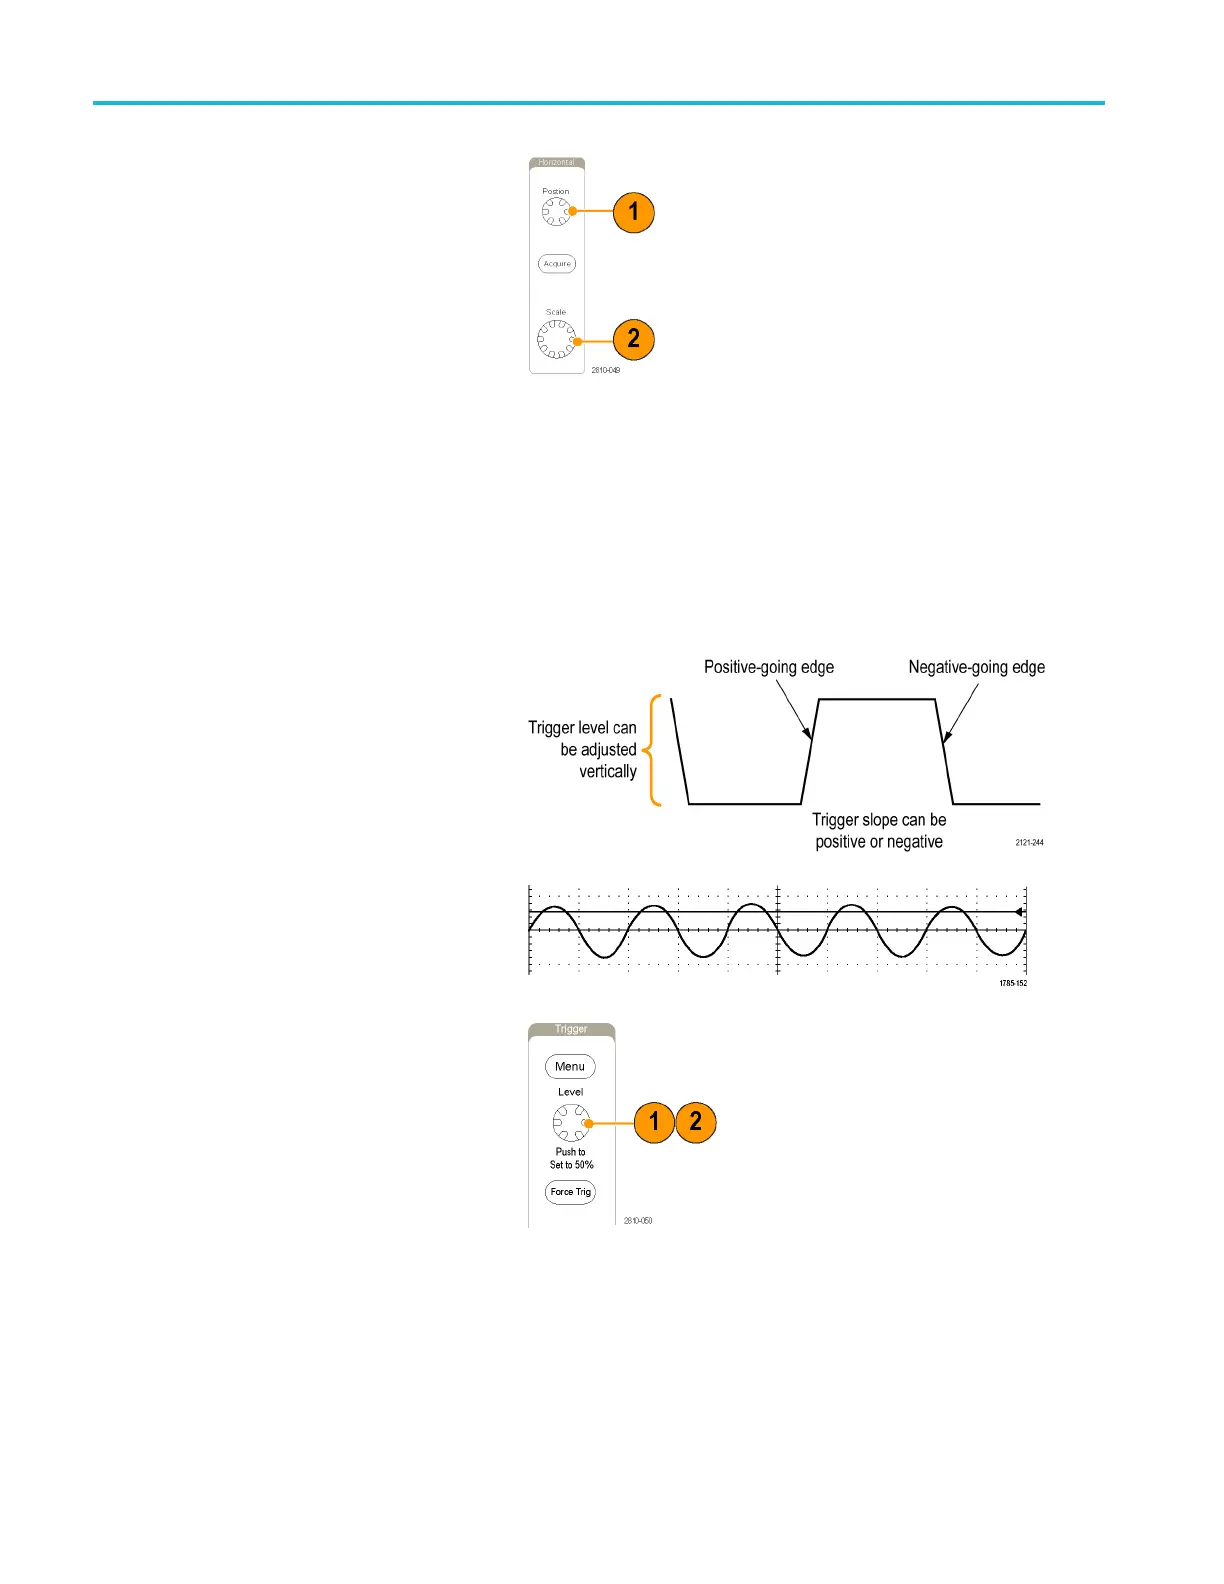
Trigger Setup
1. Adjust the position (delay) time by
rotating the Horizontal Position knob.
2. Turn horizontal SCALE to acquire the
detail that y
ou need around the position
(delay) expansion point.
The part of the record that occurs before the trigger is the pretrigger portion. The part that occurs after the trigger is the
posttrigger portion. Pretrigger data can help you troubleshoot. For example, to find the cause of an unwanted glitch in
your test circuit, you can trigger on the glitch and make the pretrigger period large enough to capture data before the
glitch. By analyzing what happens before the glitch, you may uncover information that helps you find the source of the
glitch. Alternatively, to see what is happening in your system because of the trigger event, make the posttrigger period
large enough to capture data after the trigger.
Slope and Level
The slope control determines whether the
instrument fi nds the trigger point on the rising
or the falling edge of a signal.
The level control determines where on that
edge the trigger point occurs.
The oscilloscope provides a long horizontal
bar or bars across the graticule to temporarily
show the trigger level.
1. Turn the Trigger Level knob on the front
panel
to adjust the trigger level without
going to a menu.
2. Push
the Trigger Level knob to quickly
set the trigger level to the midpoint of the
waveform.
78 MSO4000B and DPO 4000B Series Oscilloscopes User Manual
 Loading...