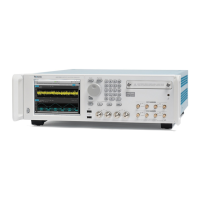
GPS7 GPS Synchronization and Timecode modu le
SOURCE. Use the
left (◄)orright(►) arrow button to select the timecode
source from the following choices. The default value is Disable.
Disable: Disa
bles the timecode function for the selected Black output.
Local (DST): Uses the local time of day with Daylight Saving Time offset
as the timec
ode.
Local (No DST): Uses the local time of day without Daylight Saving Time
offset as th
e timecode.
UTC: Uses Coordinated Universal Ti me as the timecode.
Program Time: Uses the program time counter as the timecode.
NOTE. In addition to enabling the timecode source, at least one line must be
specifie
d and enabled to carry VITC using the VITC submenu below.
OFFSET. Use this menu item to set an offset for the selected black output, relative
to the s
elected timecode sourc e. You can enter a time offset of up to ±23:59:59:29
(maximum frame value depends on the frame rate of the video signal). Press the
ENTER button, and then use the left (◄)orright(►) arrow button to select a
digit in the offset value to change. An underline character appears under the
selected offset digit.
After you select an offset digit, use the up (▲)ordown(▼) arrow button to
change the value of the digit. Repeat for each digit as required for your offset.
Press the ENTER to confirm the offset change.
NOT
E. The Offset adjustment allows you to enter a time zone correction of up to
±23:59 hours. However, the ST309 standard only implements codes for time zones
in the range of -12 to +13 hours. Therefore, when the GPS7 module is set to use
ST309 data as the Time of Day source, it is recommended that the combined
programmed offset from time zone and DST be restricted to the range of -12
to +13 hours.
30 DROP. Use the left (◄)orright(►) arrow button to Enable or Disable the 30
Drop Frame mode. Most applications will prefer drop-frame compensation VITC
on NTSC, but if needed, it can be disabled by this menu. This menu selection
appears only when NTSC or NTSC-J is set as the signal format for the selected
BLACK output.
VITC. Use this menu item to insert the same VITC signal on 1 or 2 lines of the
vertical interval. Select VITC 1 for one line and VITC 2 for the second line.
Select the VITC output you want to configure, and then press the ENTER button
to enter the VITC submenu for the selected output. (See page 3-129.)
3–128 TG8000 Multiformat Test Signal Generator User Manual

 Loading...


