GPS7 GPS Synchronization and Timecode modu le
ENABLE. Use the
left (◄)orright(►)arrowbuttontoturnON or OFF the
Alarm Time function.
SETUP. Press the ENTER button, and then use the left (◄)orright(►) arrow
button to select a digit in the Alarm Time schedule to change. An underline
character appears under the selected digit. The date and time digits take the
following form: HH:MM:SS.
After you select a digit, use the up (▲)ordown(▼) arrow button to change
the value of the digit. Repeat for each digit as required. Press the ENTER to
confirm the change.
GPS7 modu le
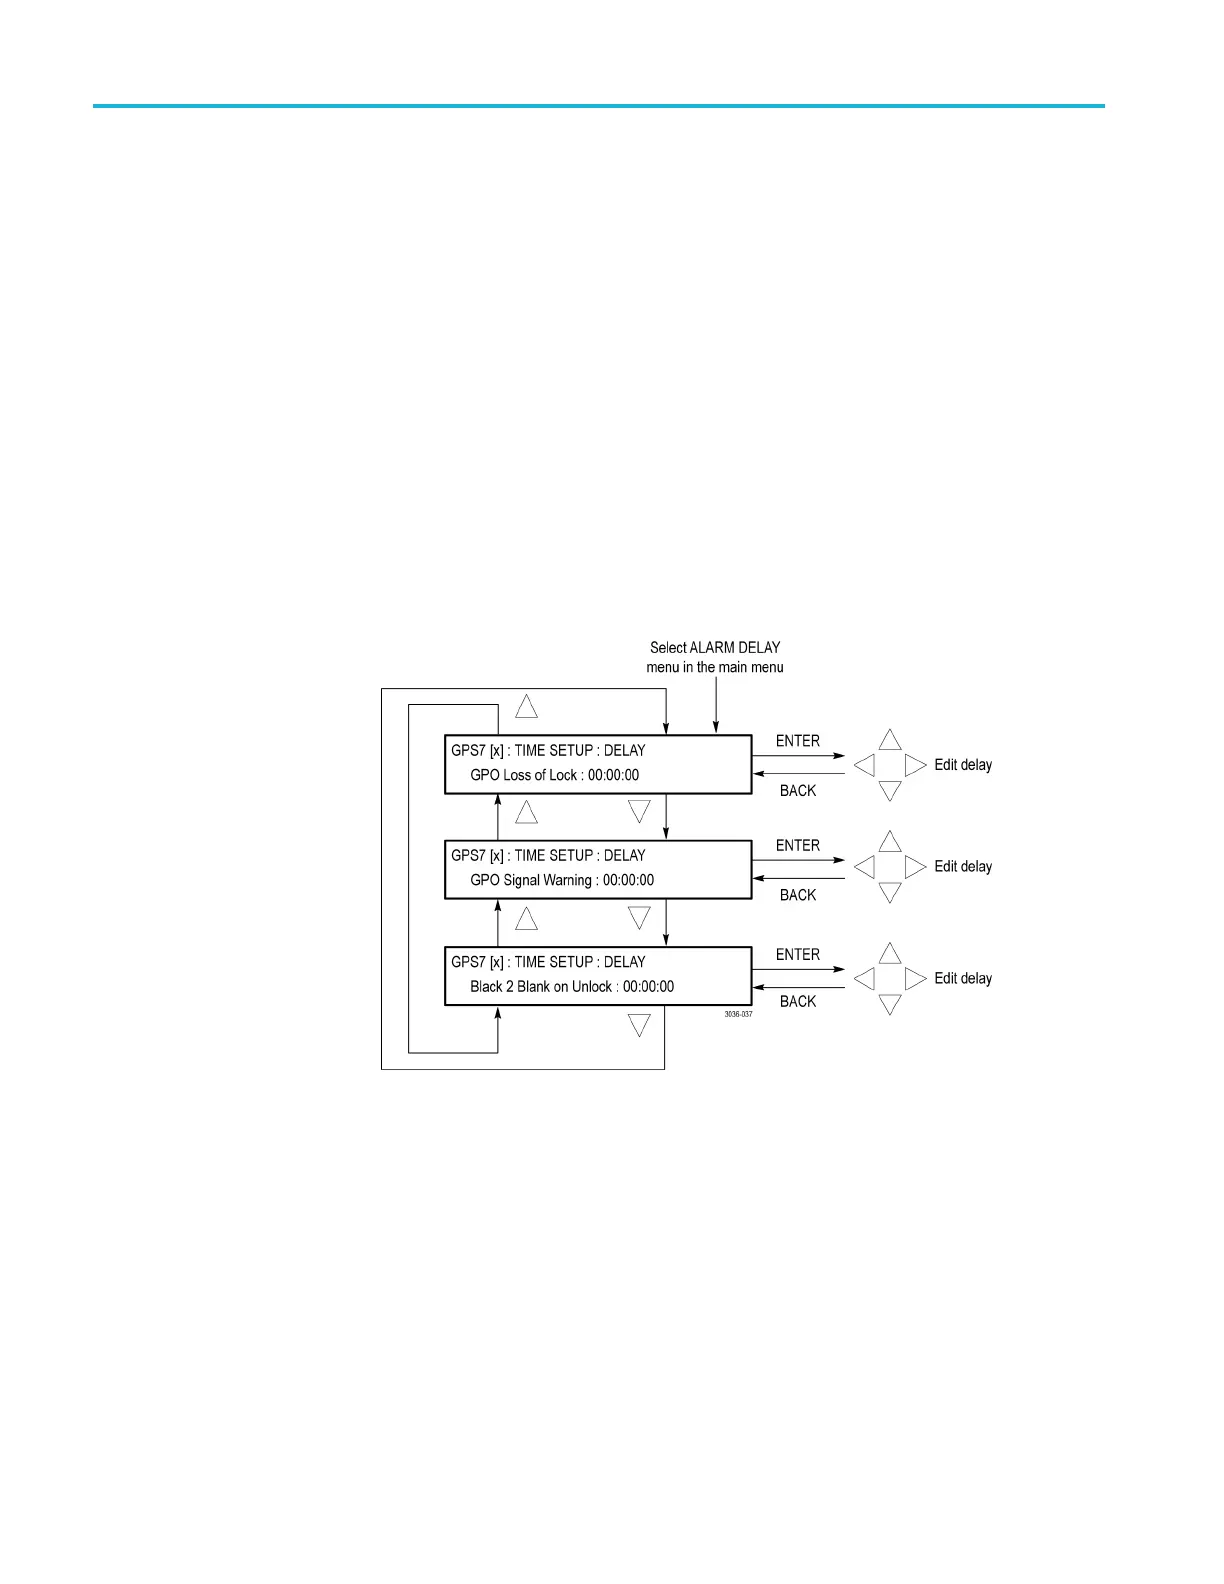
ALARM DELAY submenu
Use this menu to set delays for warning messages. Setting a delay allows short
errors and warnings to be ignored. For example, with the holdover capability, a
short GPS unlock will not cause any disruption in the syncs, so there is no reason
to immediately register an error and trigger an ECO to change. Use the up (▲)or
down (▼) arrow button to change the menu items. The following figure shows
the ALARM DELAY submenu.
Figure 3-71: GPS7 module ALARM DELAY submenu
GPO Loss of Lock. Use this feature to set a delay between the time when loss of
lock is detected and when it is reported on the GPI output. Press the ENTER
button, and then use the left (◄)orright(►) arrow button to select a digit in the
delay time before a GPO loss of lock warning message is displayed. An underline
character appears under the selected digit. The date and time digits take the
following form: HH:MM:SS.
After you select a digit, use the up (▲)ordown(▼) arrow button to change
the value of the digit. Repeat for each digit as required. Press the ENTER to
confirm the change.
3–146 TG8000 Multiformat Test Signal Generator User Manual

 Loading...


