Addressable Fire Panel IRIS - Installation and Programming Manual 33
• ZONE - Number of zone and event for activation.
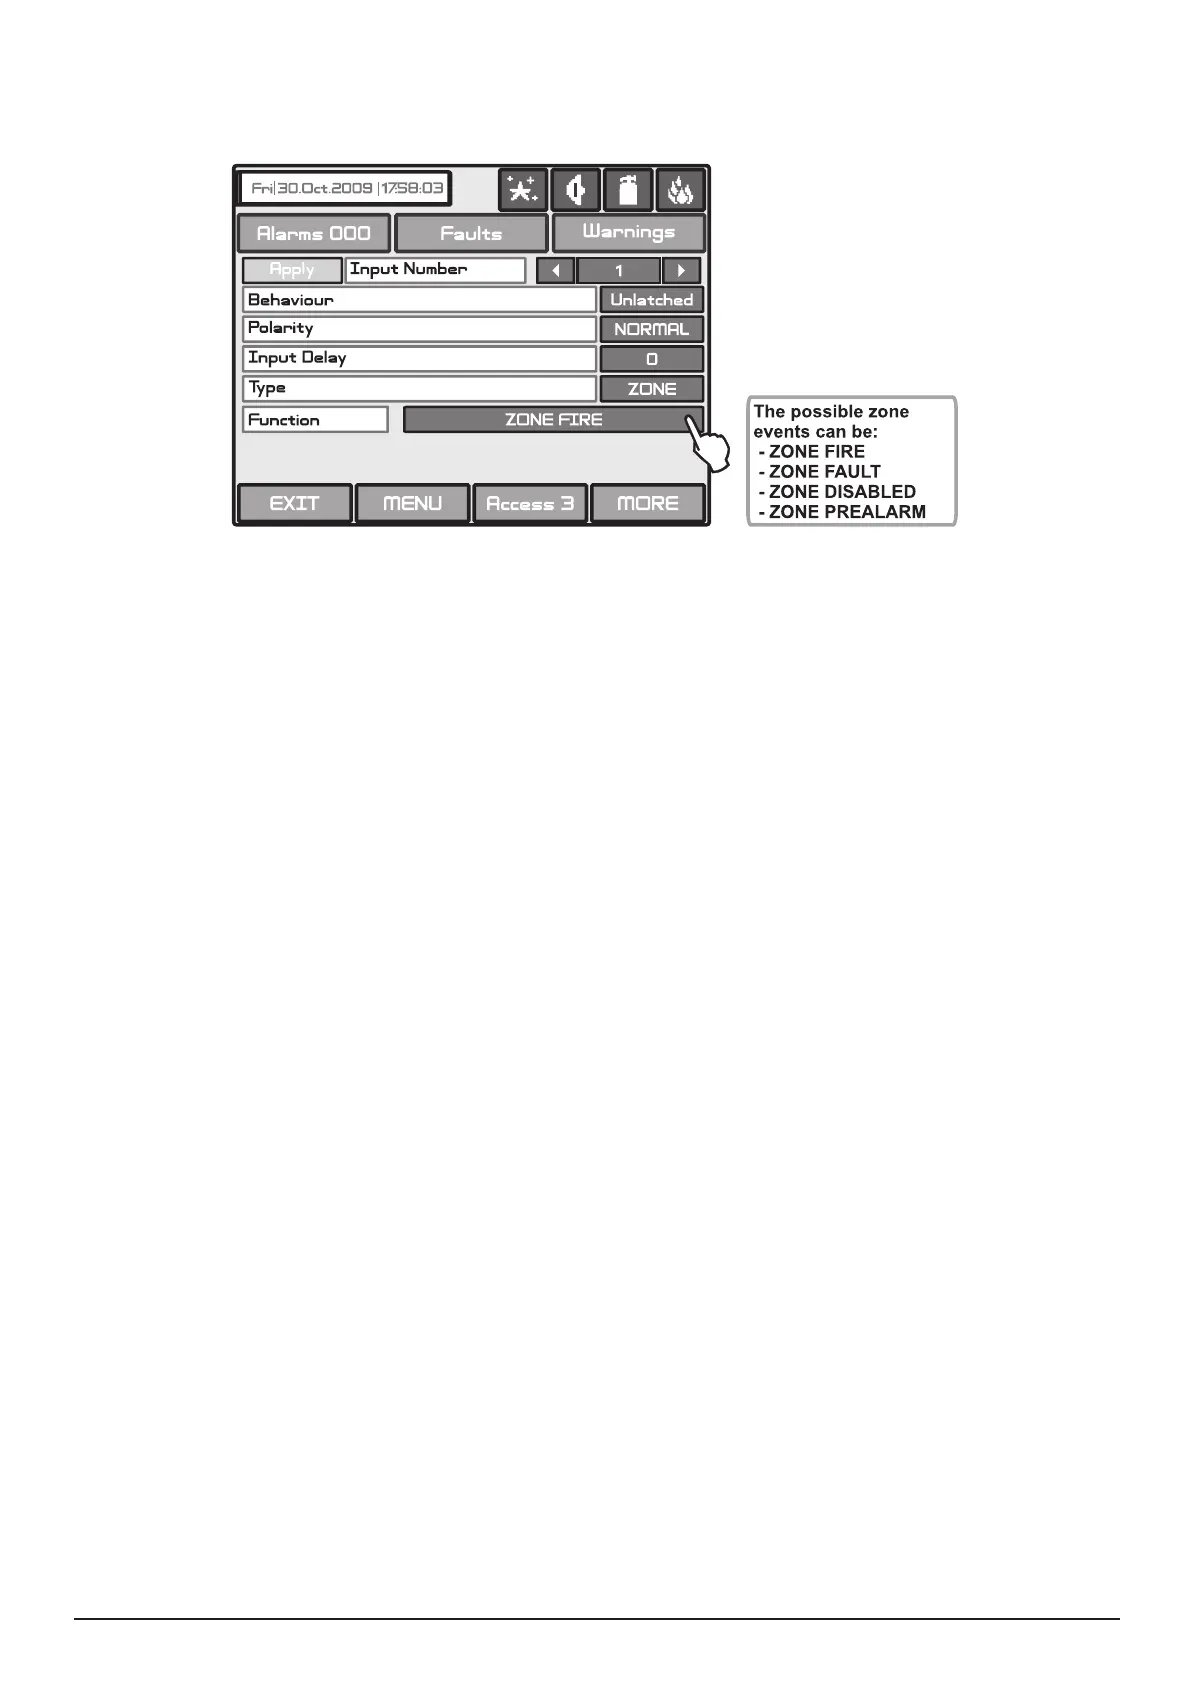
Choosing the Zone type of the input will add a new eld Function - Fig. Screen 16. After choosing this eld
the possible zone events will be displayed on the screen.
Fig. Screen 16 - Menu for zone events introducing.
Choose the MORE button. Set the the zone number, from 1 to 96, in the screen “INPUT Parameters - zone”.
• TIME - Device input activation time. Choose the MORE button. Set the hour, minutes and day of the week when the
input has to be activated, in the screen “INPUT Parameters - time”. Every day of the week could be enabled or disabled
in a separate screen.
• DATE - Device input activation date. Choose the MORE button. Set the year, month and the day when the input has
to be activated, in the screen “INPUT Parameters - date”. Enter.
• ACTION - Device input activation action.
Choosing the Action type of the input will add a new eld Function - Fig. Screen 16. The possible actions are as fol-
lows:
• GENERAL - General status which will activate the input of the device.
Choosing the General type of the input will add a new eld Function - Fig. Screen 16. The possible statuses can be:
• NETWORK - Panel / repeater number and output number, to which the input shall be attached. Choose the MORE
button. Set the parameters in the screen “INPUT Parameters - network”:
- INPUT Number. Enter a number from 1 to 128.
- PANEL/REPITER Number. Enter a number from 1 to 32.
All changed parameters are conrmed and saved by pressing the APPLY button in the upper left corner of the
screen.