8 Addressable Fire Panel IRIS - Installation and Programming Manual
2. INSTALLATION
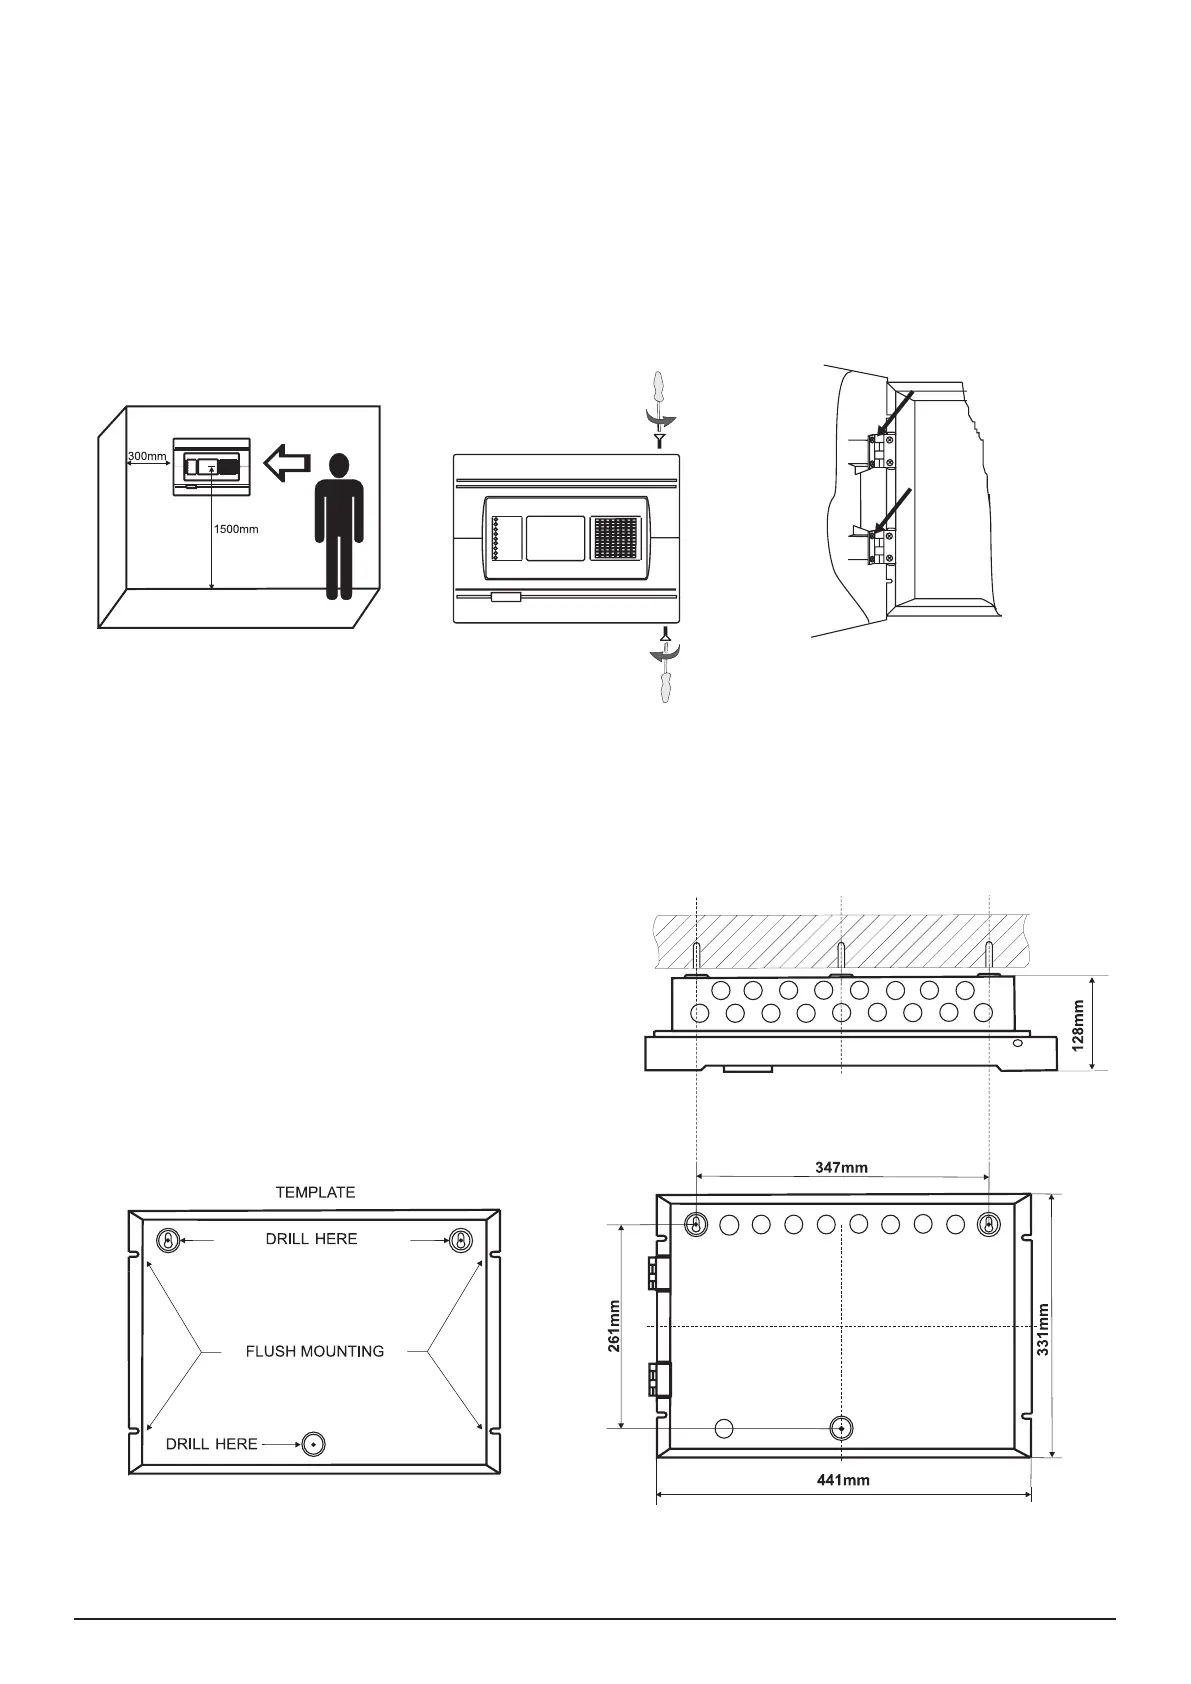
2.1 Mounting
• The panel must be installed in a clean dry place and must not be subjected to impact or vibrations (Figure 1). It must
be situated far form heating appliances. The temperature must be within -5ºС and + 50ºC. The re panel is not water-
proof!
• Unscrew the two secret bolts situated above and under the box cover - see Figure 2.
• Remove the front cover as rst disconnect the at-cable for panel indication. After that unscrew the hinge bolts on the
side of the front panel - Figure 3. (Note: You can unscrew and the hinge bolts on the side of the metal box. The special
here is the presence of two plastic pads situated under the hinges. The pads have to be returned back under the hinges
at closing the front cover.)
• Choose inlets for the cables, and put plastic taps on those ones which you will not use.
Figure 1 Figure 2 Figure 3
• Use the template in the set to x the mounting holes of
the metal box on the wall - see Figure 4.
• Drill holes (suitable for anchors Ø6mm) on the wall and
x the metal box - see Fig 5.
• Route the external cables onto the back box, make off
connection glands etc., BUT DO NOT make any con-
nections at this stage. ENTER THE MAINS CABLE
THROUGH ITS OWN CABLE ENTRY POINT AND KEEP
MAINS WIRING AWAY FROM SYSTEM AND OTHER
LOW VOLTAGE WIRING.
• Connect the mains supply and earth to the power sup-
ply terminal (see Figure 17) BUT DO NOT apply the main
electrical supply at this stage.
• Position the battery in an upright position and x the
metal clamp - Figure 10.
Figure 4 Figure 5