Preparation for
Use
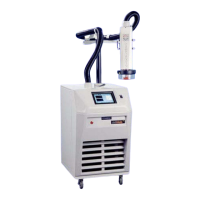
TP04100A Interface
8
Applications
2-1 7.2.2 T-type Sensors: Disc Style
vs.
Spring Style
Two T-type (CopperIConstantan) thermocouple assemblies are available for the system: a disc style and
a
spring style.
The
disc style assembly
features a circular sensor element to contact the DUT underside (see Drawing 4714,
at end of Section 2).
The
spring style assembly
features a narrow rectangular sensor element mounted on a spring to contact the
DUT underside (see Drawing 4322, at end of Section 2).
The disc style tends to contact a larger DUT surface area than the spring style and is more responsive than
the spring style (approximately 2x to 3x faster): it should be used if test speed and device throughput are
critical.
The spring style, however, is more rugged than the disc style, and if spring style response time is adequate
for the application, then the spring style may be a better choice.
2-1 7.2.3 T-type Sensor: Disc Style (Supplied)
To interface the factory supplied T-type disc style thermocouple, follow these steps in accordance with
Section 2-1 7.2.1, "Sensor Interface Guidelines:"
1.
Install the sensor element on the DUT test socket to contact the DUT when inserted in the socket.
See Drawing 4714 (at end of Section 2) and follow the concepts therein to modify the test socket
.
2. Plug the connector on the other end of the thermocouple wiring into the "DUT
T"
port on the
System Front Panel (see Figure 2-9).
If the interface steps above are not consistent with your test specimen application, then see the alternative
thermocouple to DUT attachment techniques in Section 2-17.3.
2-1 7.2.4 T-type Sensor: Spring Style (Optional)
To interface the optional T-type spring style thermocouple, follow these steps in accordance with Section 2-
17.2.1. "Sensor Interface Guidelines:"
1. Install the sensor element on the DUT test socket to contact the DUT when inserted in the socket.
See Drawing 4322 (at end of Section 2) and follow the concepts therein to modify the test socket
.
2. Plug the connector on the other end of the thermocouple wiring into the "DUT
T"
port on the
System Front Panel (see Figure 2-9).
If the interface steps above are not consistent with your test specimen application, then see the alternative
thermocouple to DUT attachment techniques in Section 2-17.3.
Page
2-33
Artisan Technology Group - Quality Instrumentation ... Guaranteed | (888) 88-SOURCE | www.artisantg.com
 Loading...