PAK 200
Manual 0-5057 4-5 OP-
4.05 System Operation
This section contains operating information which is
specific to the power supply.
WARNING
F r e q u e n t l y r e v i e w t h e s a f e -
t y p r e c a u t i o n s i n S e c t i o n 1 .
Disconnect primary power at the source
before assembling or disassembling
power supply, torch parts, or torch and
leads assemblies, or adding coolant.
It is not enough to simply move the ON/OFF
switch on the unit to OFF position when cut-
ting operations have been completed. Always
open the power supply disconnect switch
five minutes after the last cut is made.
1. Connect system to primary input power.
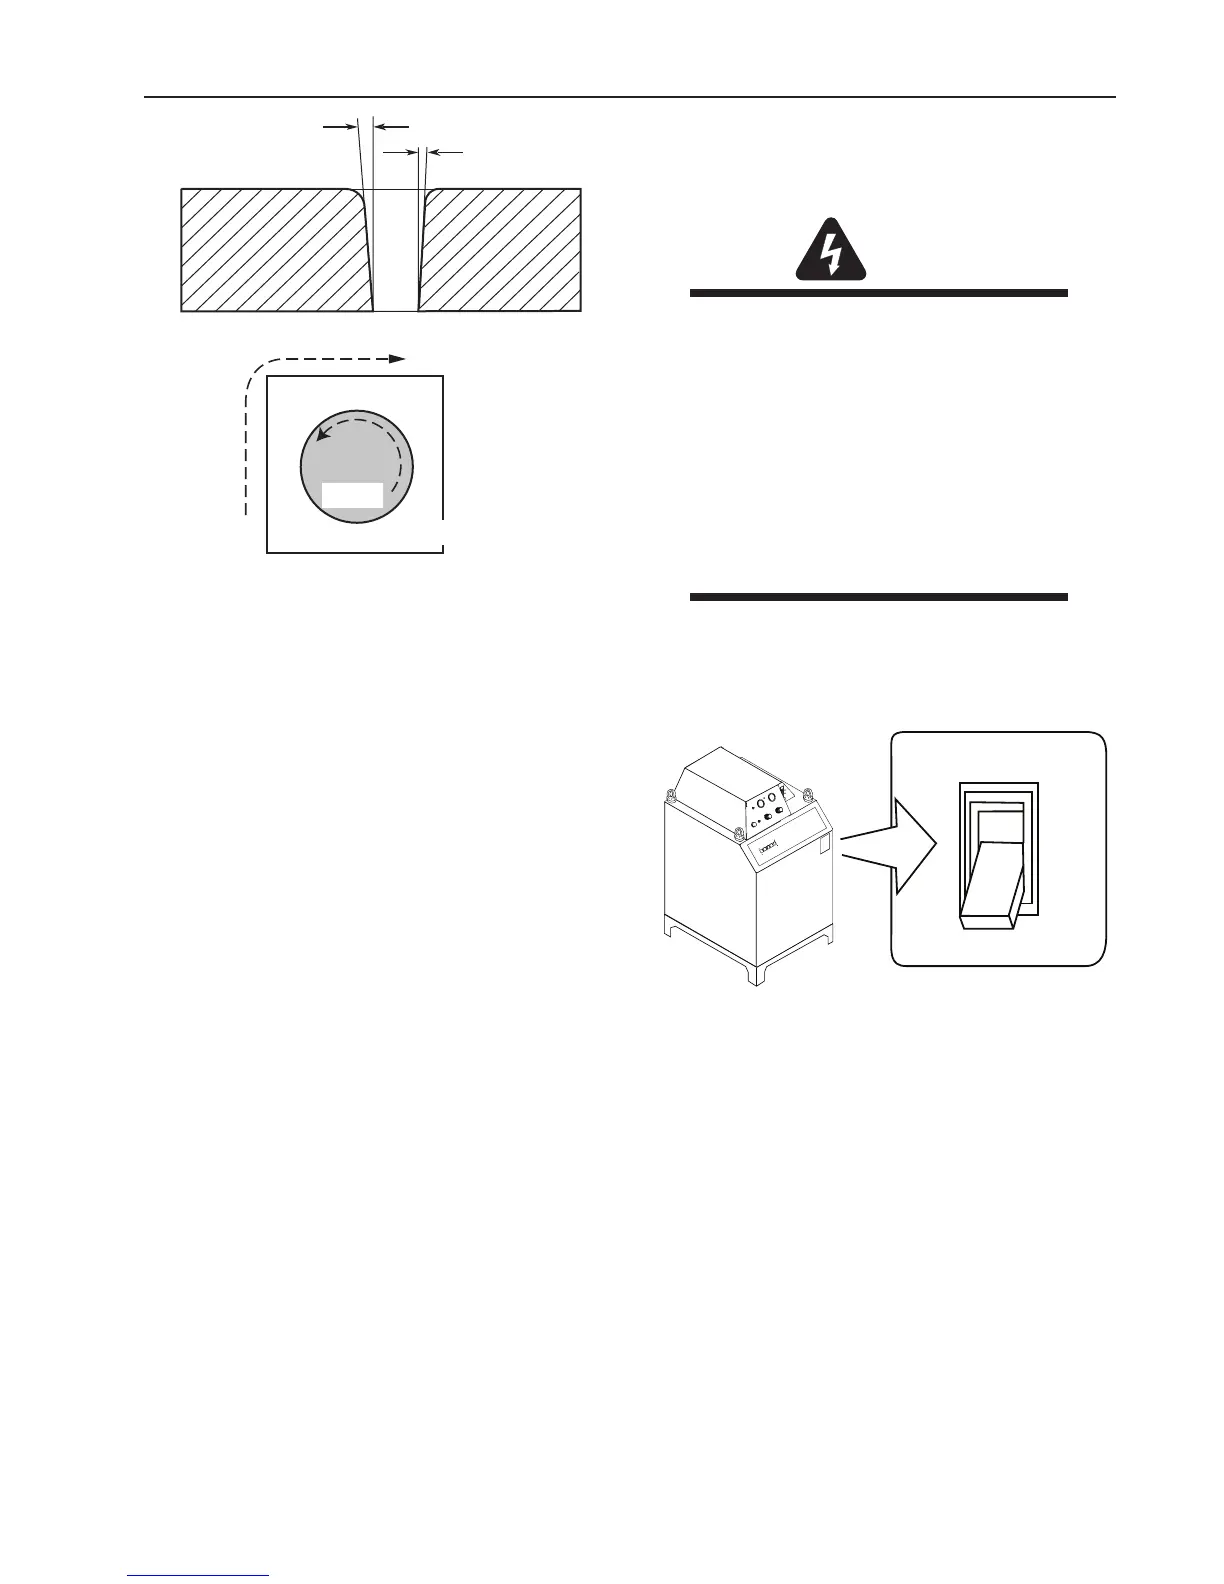
2. Turn ON/OFF switch to ON (up) position. AC Lamp
turns ON. Fan and coolant pump turn on. There is a
start-up purge of gas through the system.
POWER
ON
OFF
O
I
OFF
O
Art # A-04842
Right Side
Cut Angle
Left Side
Cut Angle
A-00512
Scrap
Clockwise
Counter-
Clockwise
Art # A-04182
Workpiece
Scrap
Swirl Effect on Side Characteristics Of Cut
To make a square - edged cut along an inside diameter
of a circle, the torch should move counterclockwise
around the circle. To keep the square edge along an
outside diameter cut, the torch should travel in a clock-
wise direction.