Engine Maintenance
95
4. Remove the CYCLE-SENTRY module from
the option board to prevent the Auto Start
system from preheating and cranking the
engine.
5. Place the Diesel/Electric switch in the Diesel
position. Place the CYCLE-SENTRY switch
(if so equipped) in the Cont Run position.
6. Place the On/Off switches in the On position
and press the
ON key to energize the fuel
solenoid and the fuel pump.
7. The engine should be close to the top dead
center position with the plunger port in the
pump closed. No fuel should flow from the
drip tube.
8. Turn the engine backwards past the injection
timing mark until fuel flows from the drip
tube.
9. Slowly rotate the engine in the direction of
rotation while watching the drip tube. When
the fuel flow slows to approximately one drip
every 10 to 15 seconds, check the timing
marks. They should be lined up.
10. If the timing marks did not line up, a shim or
shims will have to be added or subtracted
from the injection pump. Adding shims will
retard the injection timing, subtracting shims
will advance the timing. Increasing or
decreasing shim thickness by 0.004 in.
(0.1 mm) will change the timing by 1 degree.
11. After shims have been added or subtracted,
recheck the timing.
12. When the injection pump has been correctly
timed to the engine, remove the pump and put
a light coat of silicone gasket sealer on the
shim pack and the pump, or dip the new shims
in lacquer thinner to activate the sealer.
13. Reinstall the pump, and torque the nuts to
18 to 20 ft-lb (24 to 27 N•m).
14. Reinstall the delivery valve spring. Torque the
delivery valve holder to 30 ft-lb (41 N•m).
15. Reinstall the injection lines, bleed the air from
the nozzles, and test run the engine.
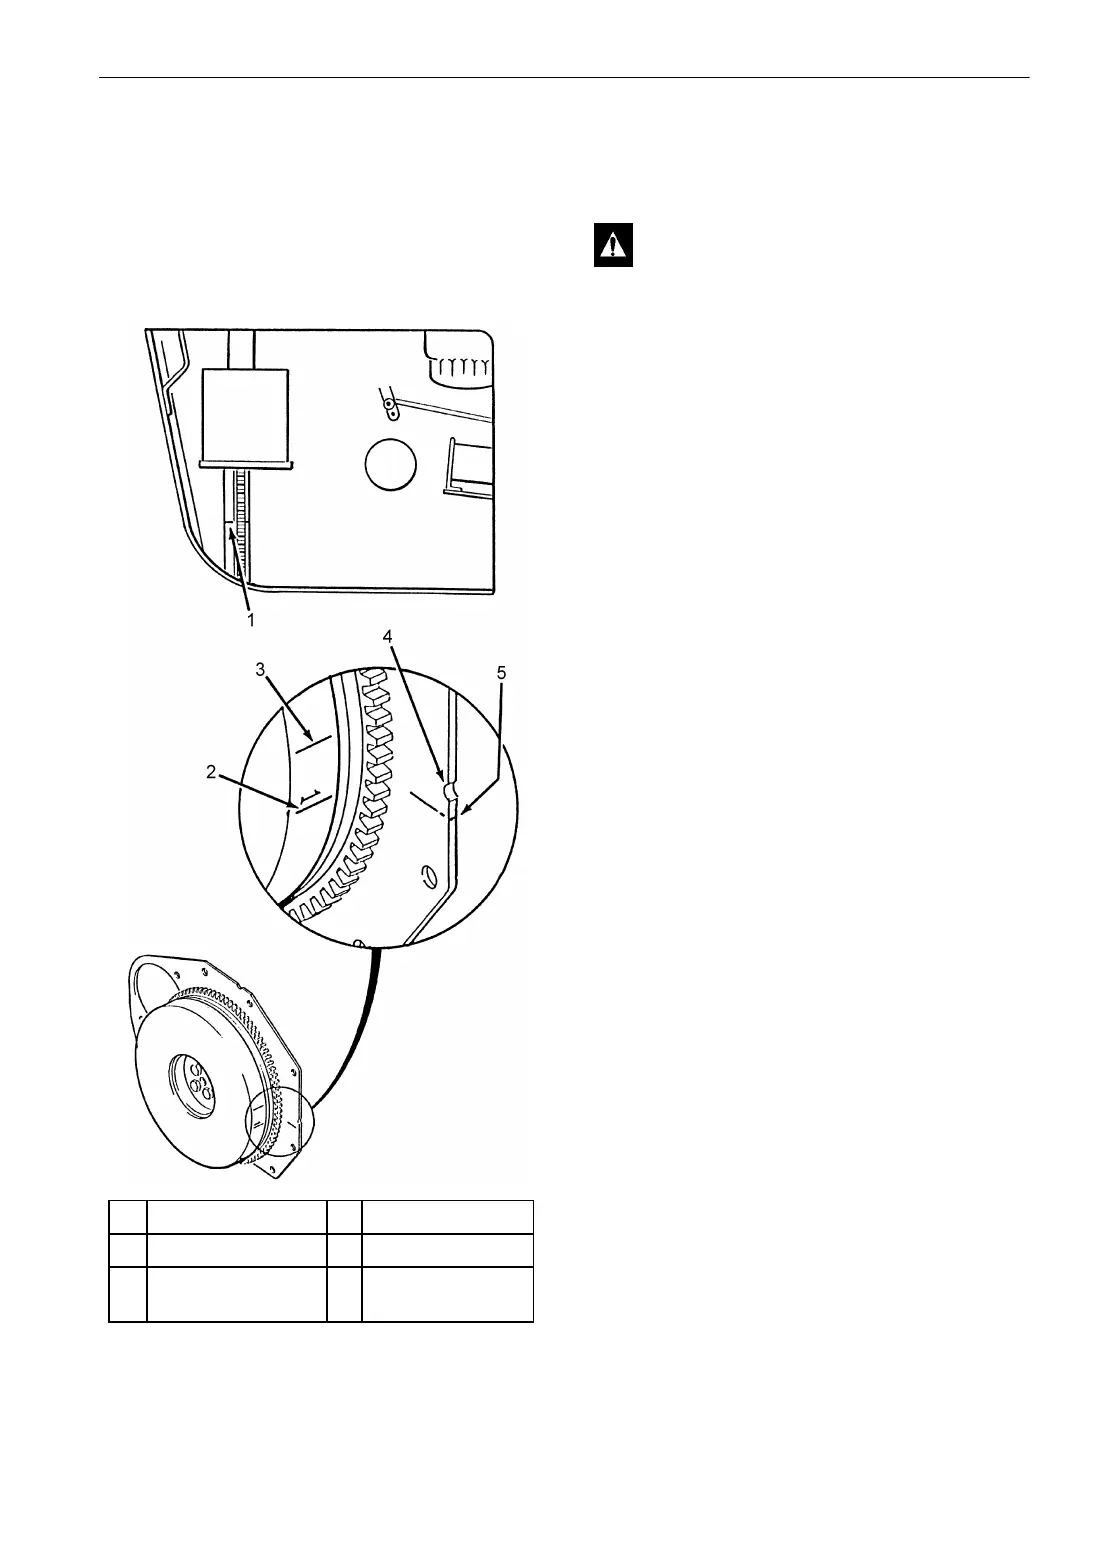
1. Timing Mark 4. Round Notch
2. TDC Mark 5. File V-Notch Here
3. Injection Timing
Mark
Figure 48: Timing Marks
AEA637
CAUTION: Loosen the injection line at
the injection nozzle for the number 2
cylinder to prevent any possibility of the
engine firing.