Engine Maintenance
99
Belts
Belts should be regularly inspected during unit
pretrip inspections for wear, scuffing or cracking,
and belt tension. Belts that are too loose will
whip, and belts that are too tight put too much
strain on the belt fibers and bearings.
NOTE: Do not attempt to remove or install belts
without loosening adjustments. Belts that are
installed by prying will fail prematurely due to
internal cord damage.
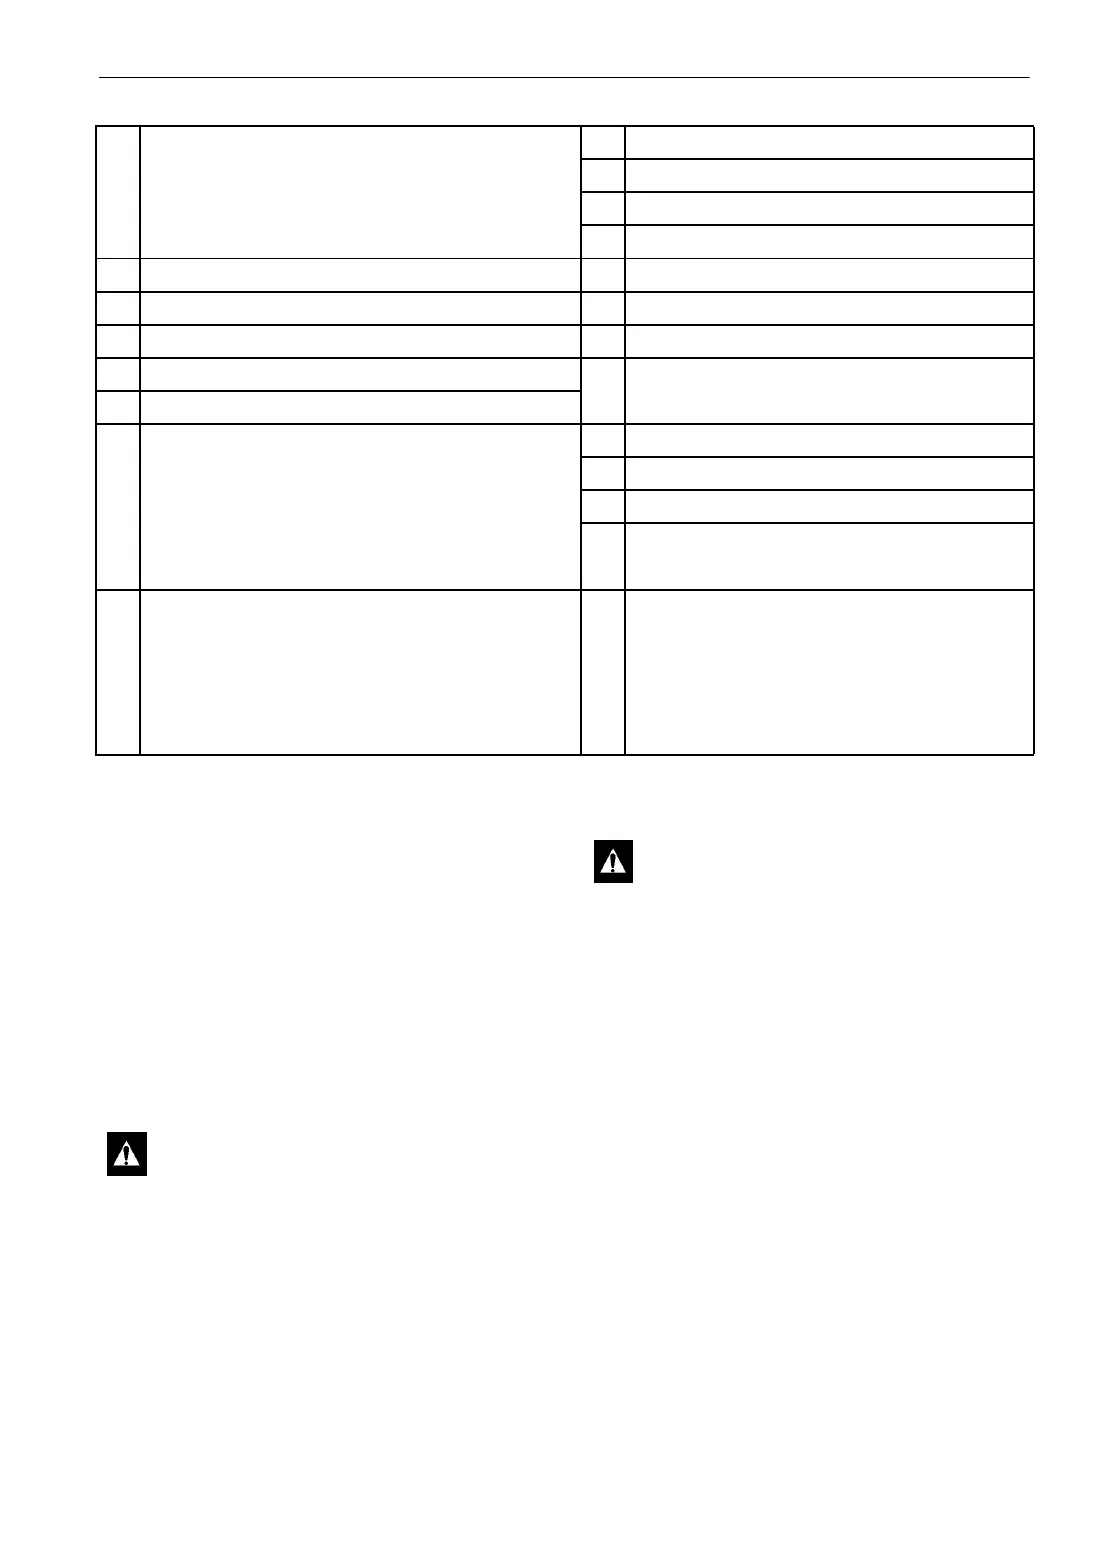
1. Restraining Bracket (91-8363)
Bracket Screw (55-3486)
Belleville Washer (55-7123)
Nut (55-2559)
9. Vibration Mount (91-2281)
10. Engine Screw (55-2914)
11. Engine Screw (55-4794)
12. Special Washer (55-3594)
2. Nut (55-2166) 13. Special Washer (55-5871)
3. Belleville Washer (55-7123) 14. Mount Screw (55-3048)
4. Vibration Mount (91-3908) 15. Flatwasher (55-2641)
5. Engine Mount (roadside) (91-2277) 16. Wear Plate Mount (99-9449)
6. Engine Mount (curbside) (91-2278) Wear Plate Rivet (55-3044)
7. Engine Mount (upper) (91-2279) 17. Engine Screw (55-5888)
Screw (socket head, 10 x 1.5, 25 mm lg) (55-5957) 18. Belleville Washer (55-7122)
Screw (socket head, 10 x 1.25, 20 mm lg) (55-6216) 19. Vibration Engine Mount (set of two) (99-4820)
Screw (hex head, 10 x 1.25, 20 mm lg) (55-5695) 20. Nut (55-2640)
Belleville Washer (55-7122) Thread (Blue) Sealer (203-400)
8. Engine Mount (front) (91-2280)
Mount Screw (55-3048)
Flatwasher (55-2641)
Belleville Washer (55-7122)
Nut (55-4955)
List of Components for “Engine Mounting Components”
CAUTION: Do not attempt to adjust belts
with the unit running.
CAUTION: This unit is equipped with
Auto Start. It will start automatically if the
ON key is pressed while the On/Off
switches are in the On position. Units with
the CYCLE-SENTRY option start
automatically in both the
CYCLE-SENTRY mode and the
Continuous Run mode. Make sure to press
the
OFF key or place an On/Off switch in
the Off position before performing any
maintenance or repair procedures.