17-7
dummyheaddummyhead
GEAR CASE (COUNTER ROTATION)
GEAR CASE/EXTENSION SEPARATOR
(XXCA type) REMOVAL/INSTALLATION
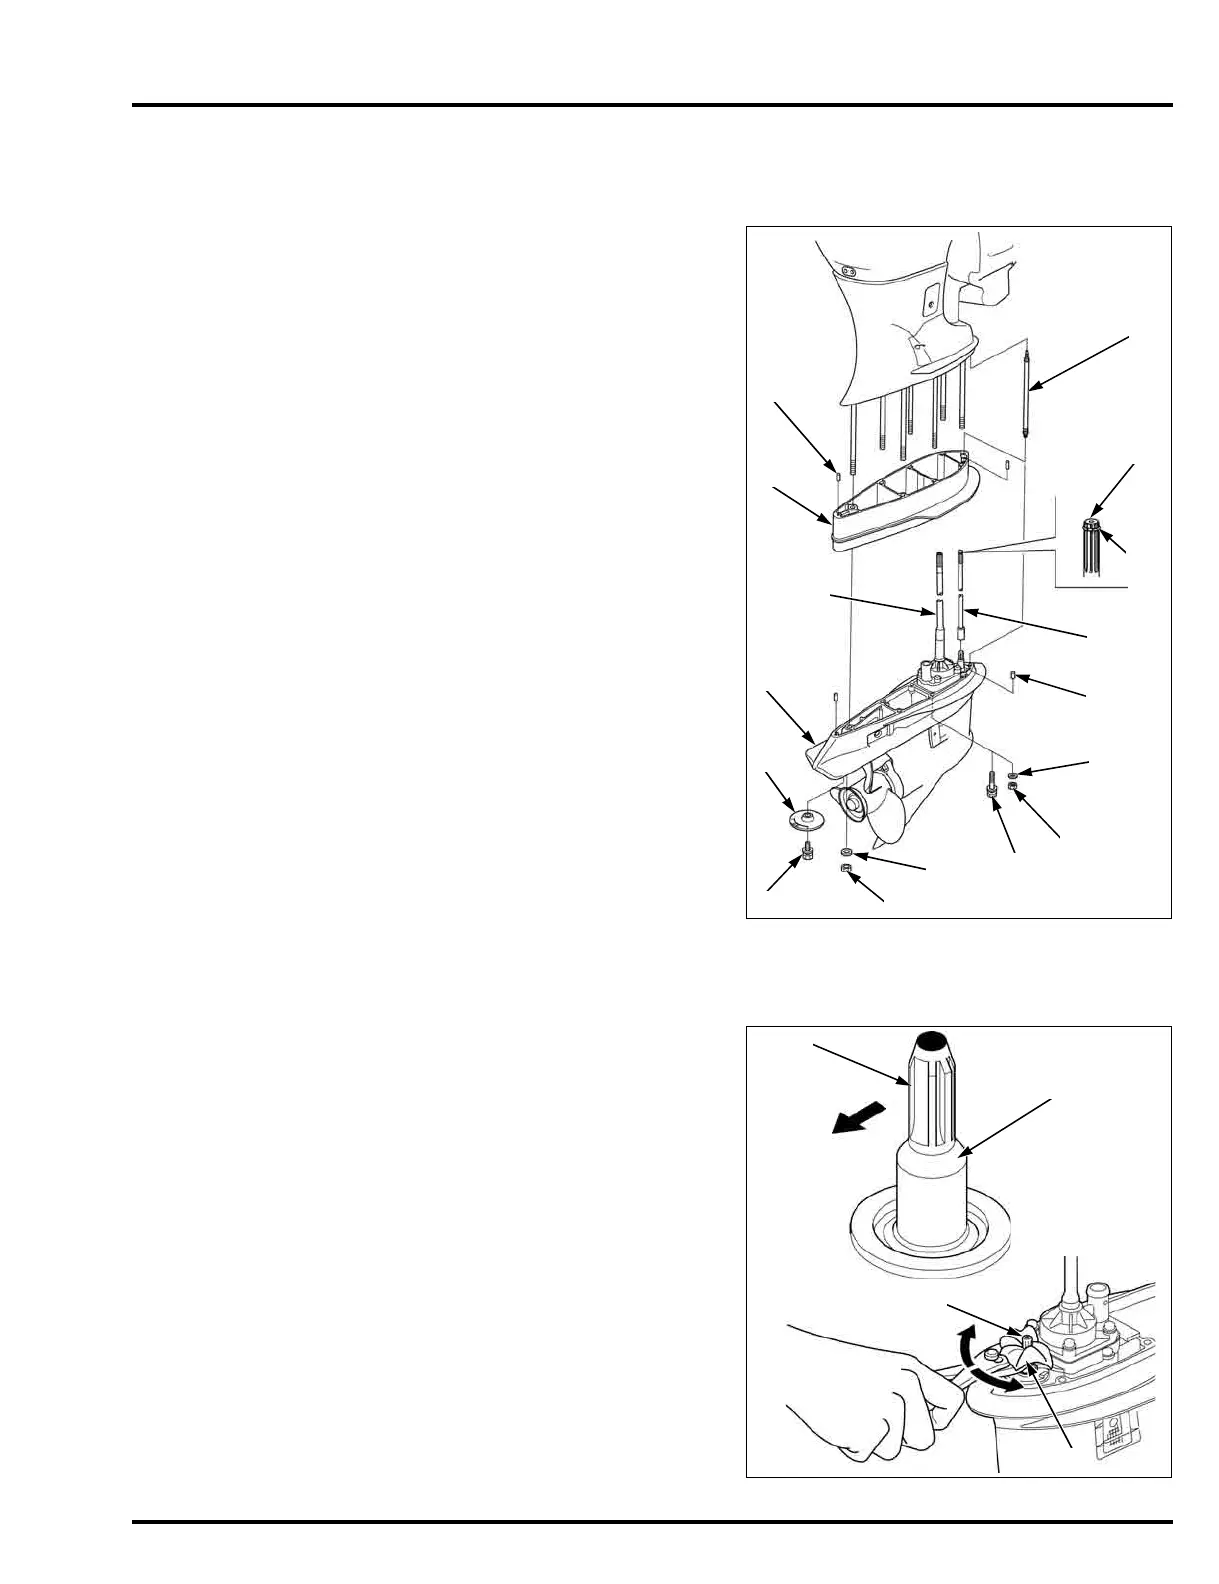
REMOVAL
Set the remote control lever in the "N" (Neutral)
position.
Tilt up the motor to the uppermost position.
Remove the bolt/washer (10 x 32 mm) [1], and gear
case cover [2].
Remove the gear case nut (12 mm) [3] and washer (12
mm) [4].
Hold the gear case [5] and remove the six bolt/washers
(10 x 47 mm) [6] from the gear case.
Hold the gear case and remove the six nuts (10 mm) [7]
and six washer (10 mm) [8] from the gear case.
• When loosening the stud bolt, tighten it and check
that the length from the bolt head to the extension
case surface is within specification.
– XCA type: (page 17-45)
– XXCA type: (page 17-46)
Disconnect the speedometer tube [9] from the gear
case.
Remove the gear case by sliding the vertical shaft [10]
down.
Disconnect the speedometer tube, and remove the
extension separator [11].
Remove the shift rod A [12] and two dowel pins [13].
• Joint clip [14] is fitted to the shift shaft A securely, so
it is hard to remove the shift rod A [15].
Take care not to apply excessive force to the shift
rod A.
Remove the two dowel pins [16] from the extension
separator.
After removing the gear case, tilt down the motor to the
lowermost position.
INSTALLATION
Set the remote control lever in the "N" (Neutral)
position.
Check that the cutout [1] of the spline faces the cruising
direction [2] (this position is "N" (Neutral)).
If the cutout of the spline is not in the direction shown,
protect the spline with a shop towel [3] and turn the shift
rod [4] right or left with a wrench until the cutout faces
toward the specified direction.
XCA type:
XXCA type:
XCA type:
XXCA type:
XXCA type:
[9]
[15]
[14]
[12]
[13]
[8]
[7]
[6]
[4]
[3]
[1]
[2]
[5]
[10]
[11]
[16]