10-4
dummyheaddummyhead
OTHER ELECTRICAL
ELECTRIC PARTS CASE REMOVAL/
INSTALLATION
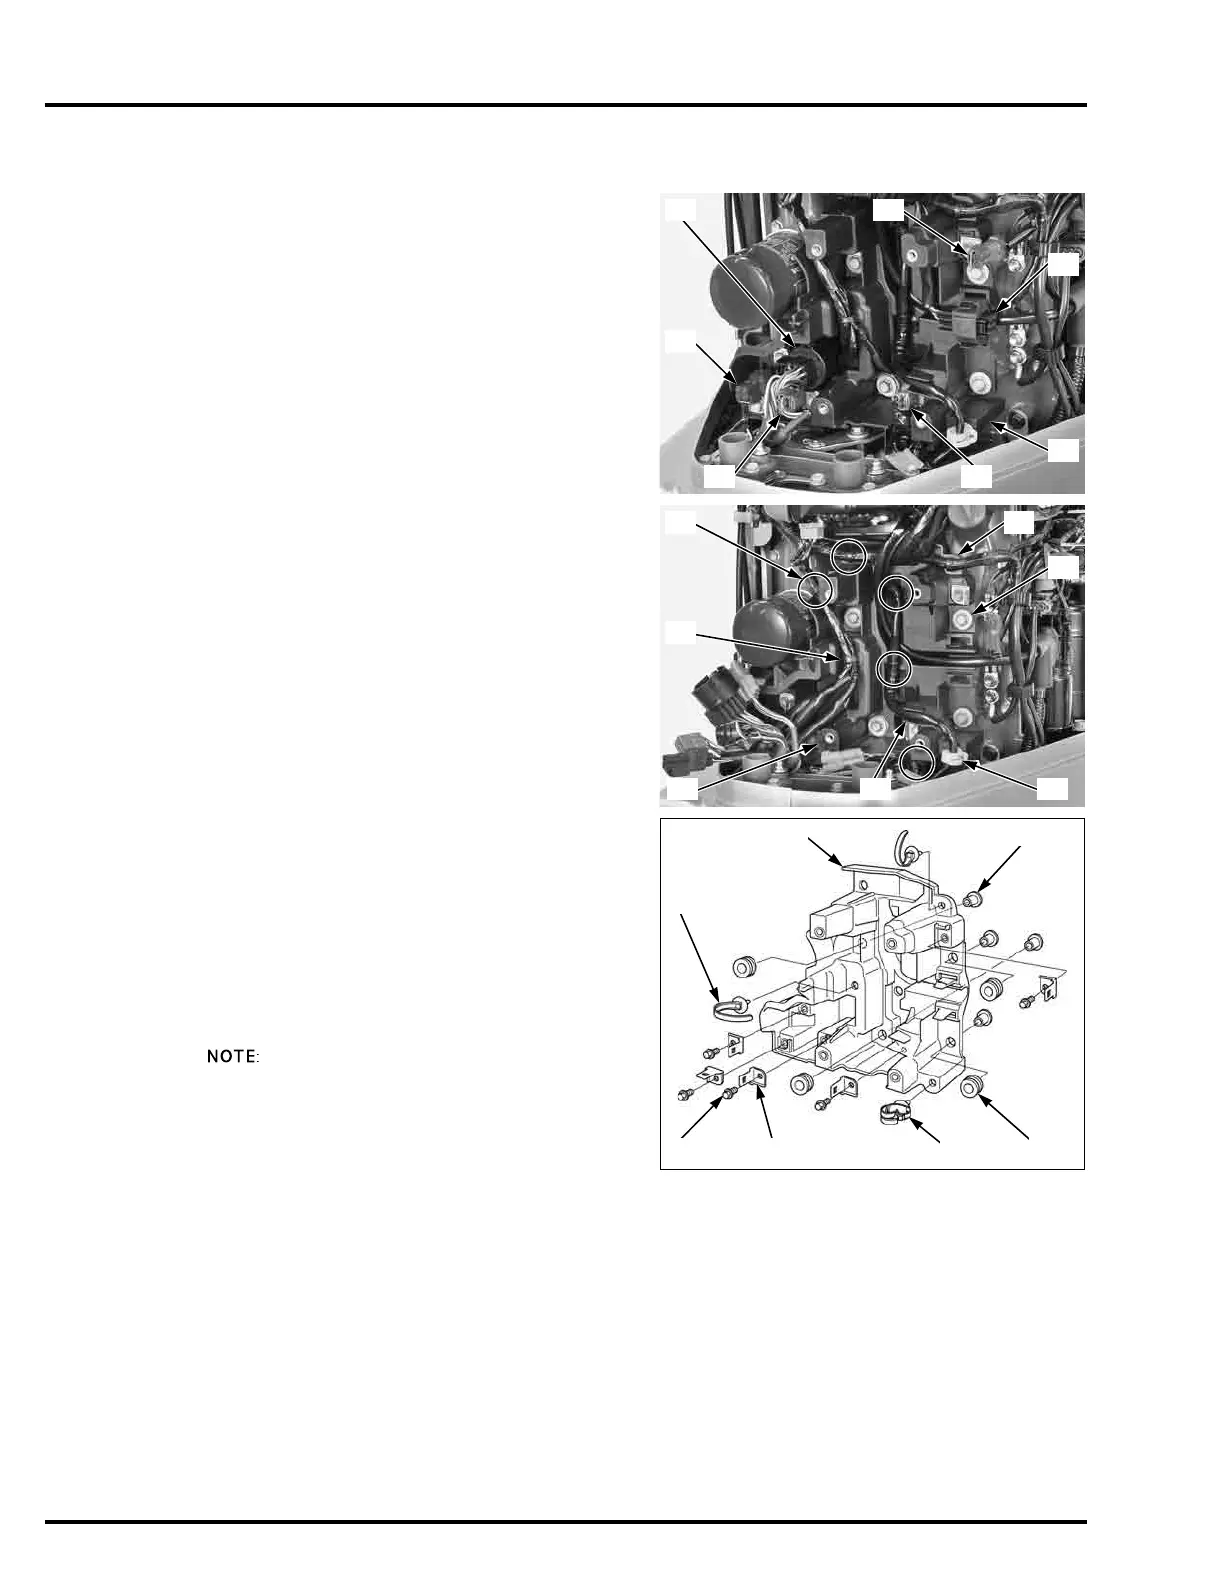
Remove the fuse/relay junction box (page 10-3).
Remove the DLC [1], tach pulse 2P connector [2] and
interface 6P connector [3] from the electric parts case
[4].
Disconnect the switch panel wire harness 14P
connector [5], indicator wire harness 6P connector [6]
and neutral switch 2P connector [7].
Release the starter cable 1 (+) [1] from the wire harness
clip [2].
Remove the main wire harness from the two harness
band clips [3]
Remove the four bolt/washers (6 x 26 mm) [4], the five
harness band clips [5] and the electric parts case [6].
Remove the following parts from the electric parts case
[1]:
– Connector holder mounting bolts (6 x 10 mm) [2]
(five)
– Connector holders [3] (five)
– Collars [4] (four)
– Grommets [5] (four)
– Wire harness clip [6]
– Harness band clips [7] (two)
Installation is in the reverse order of removal.
• Route the wire harness properly (page 2-19).
TORQUE:
Connector holder mounting bolt:
5.0 N·m (0.51 kgf·m, 3.7 lbf·ft)
 Loading...