Calibration
44
Excavator Indicate System P/N: 1022461-01
Calibration
Before calibrating the sensors, note the following:
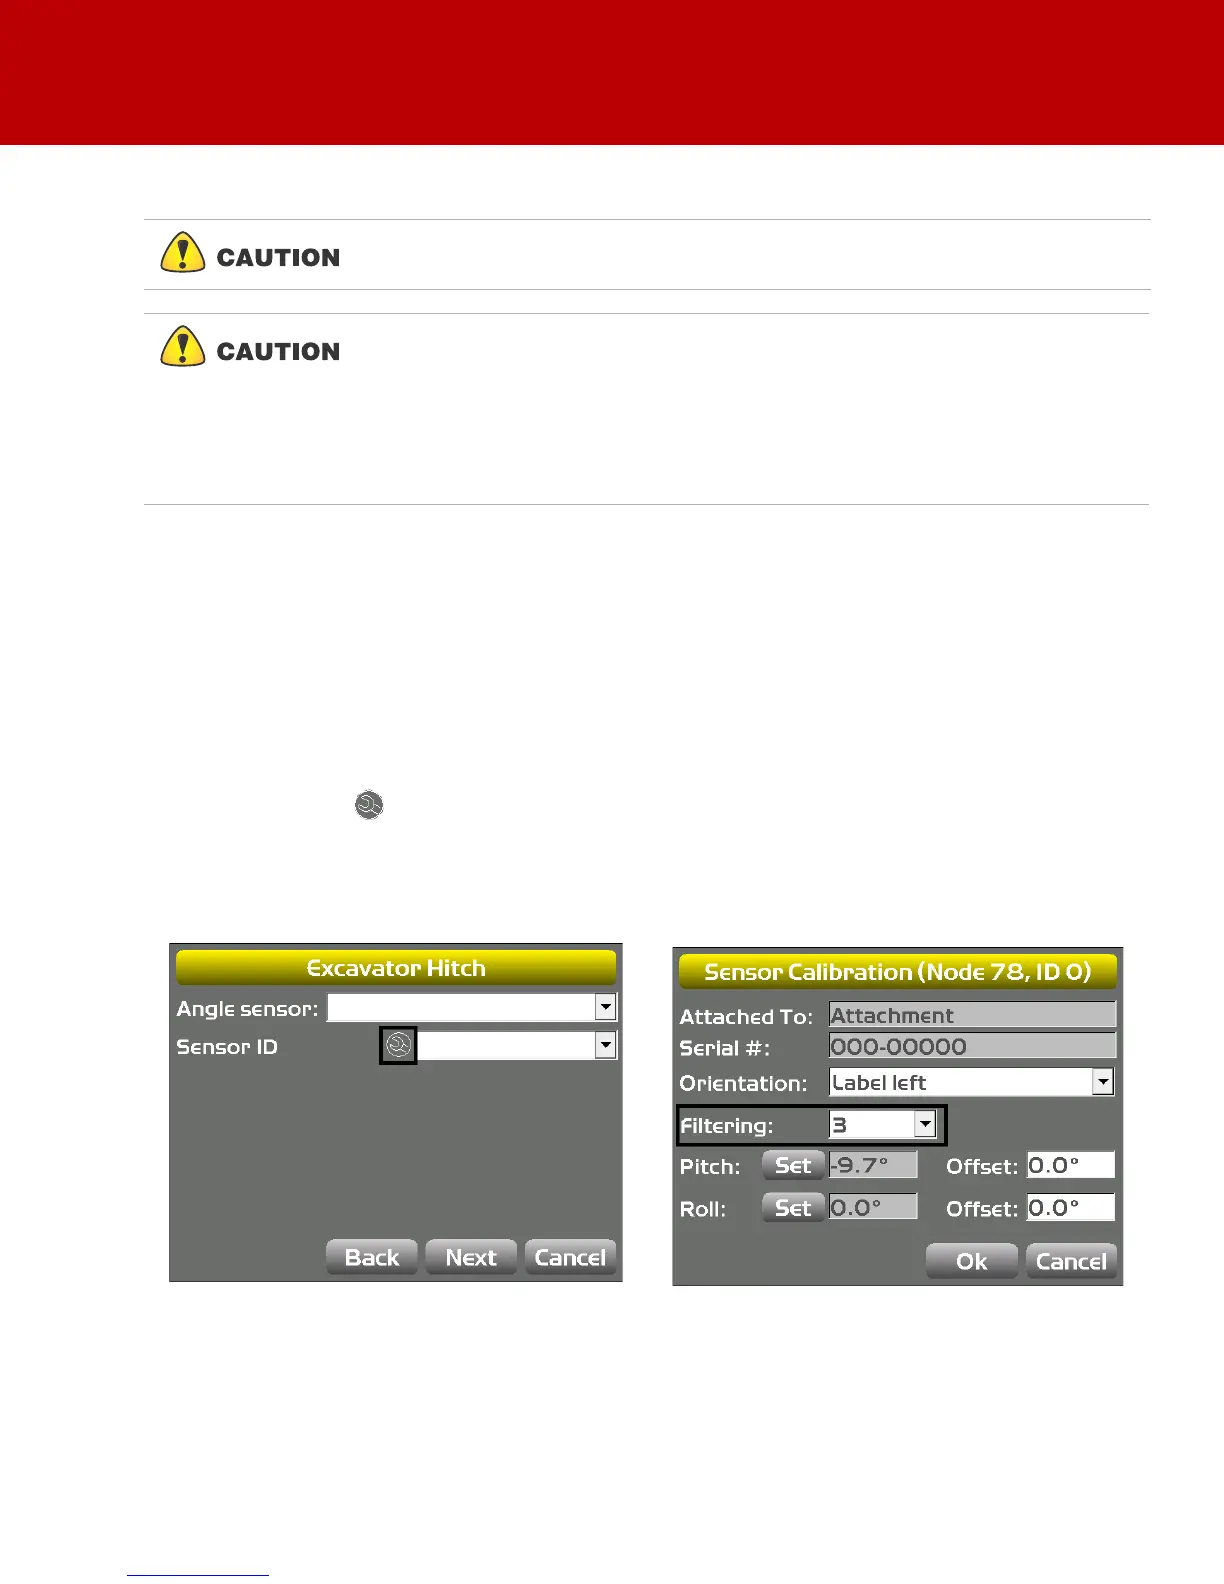
Sensor Filtering
The filter level for each sensor can be changed depending on the application and operator’s choice. A
value of 4 (heavy filtering) will dampen sensor reaction, while a value of 1 (light filtering) will cause faster
sensor reaction.
1. On the GX Series display, tap the Power ButtonControlMachine setup. Select the applicable
machine file and tap Edit. Tap Next to navigate to the Excavator Frame/Sensors screen,
Excavator Stick screen, or the Excavator Hitch screen.
2. Tap the Wrench icon next to Sensor ID (Figure 58).
3. Select a filtering level and tap OK (Figure 58).
4. Navigate through the remaining steps of Machine Setup, then save the file and exit 3D-MC.
Figure 58: Set Filtering Level
If using the DogBone mounting option, worn joints in the DogBone linkage will
cause decreased accuracy.
The best practice is to perform the machine calibrations as ordered in this
manual. Performing the calibrations out of order will not affect system
performance.
There are two exceptions to this rule when using a DogBone sensor:
a. You must calibrate the stick sensor before calibrating the DogBone sensor.
b. When using a tilt bucket sensor you must calibrate the attachment/DogBone
sensor before calibrating the tilt bucket sensor.