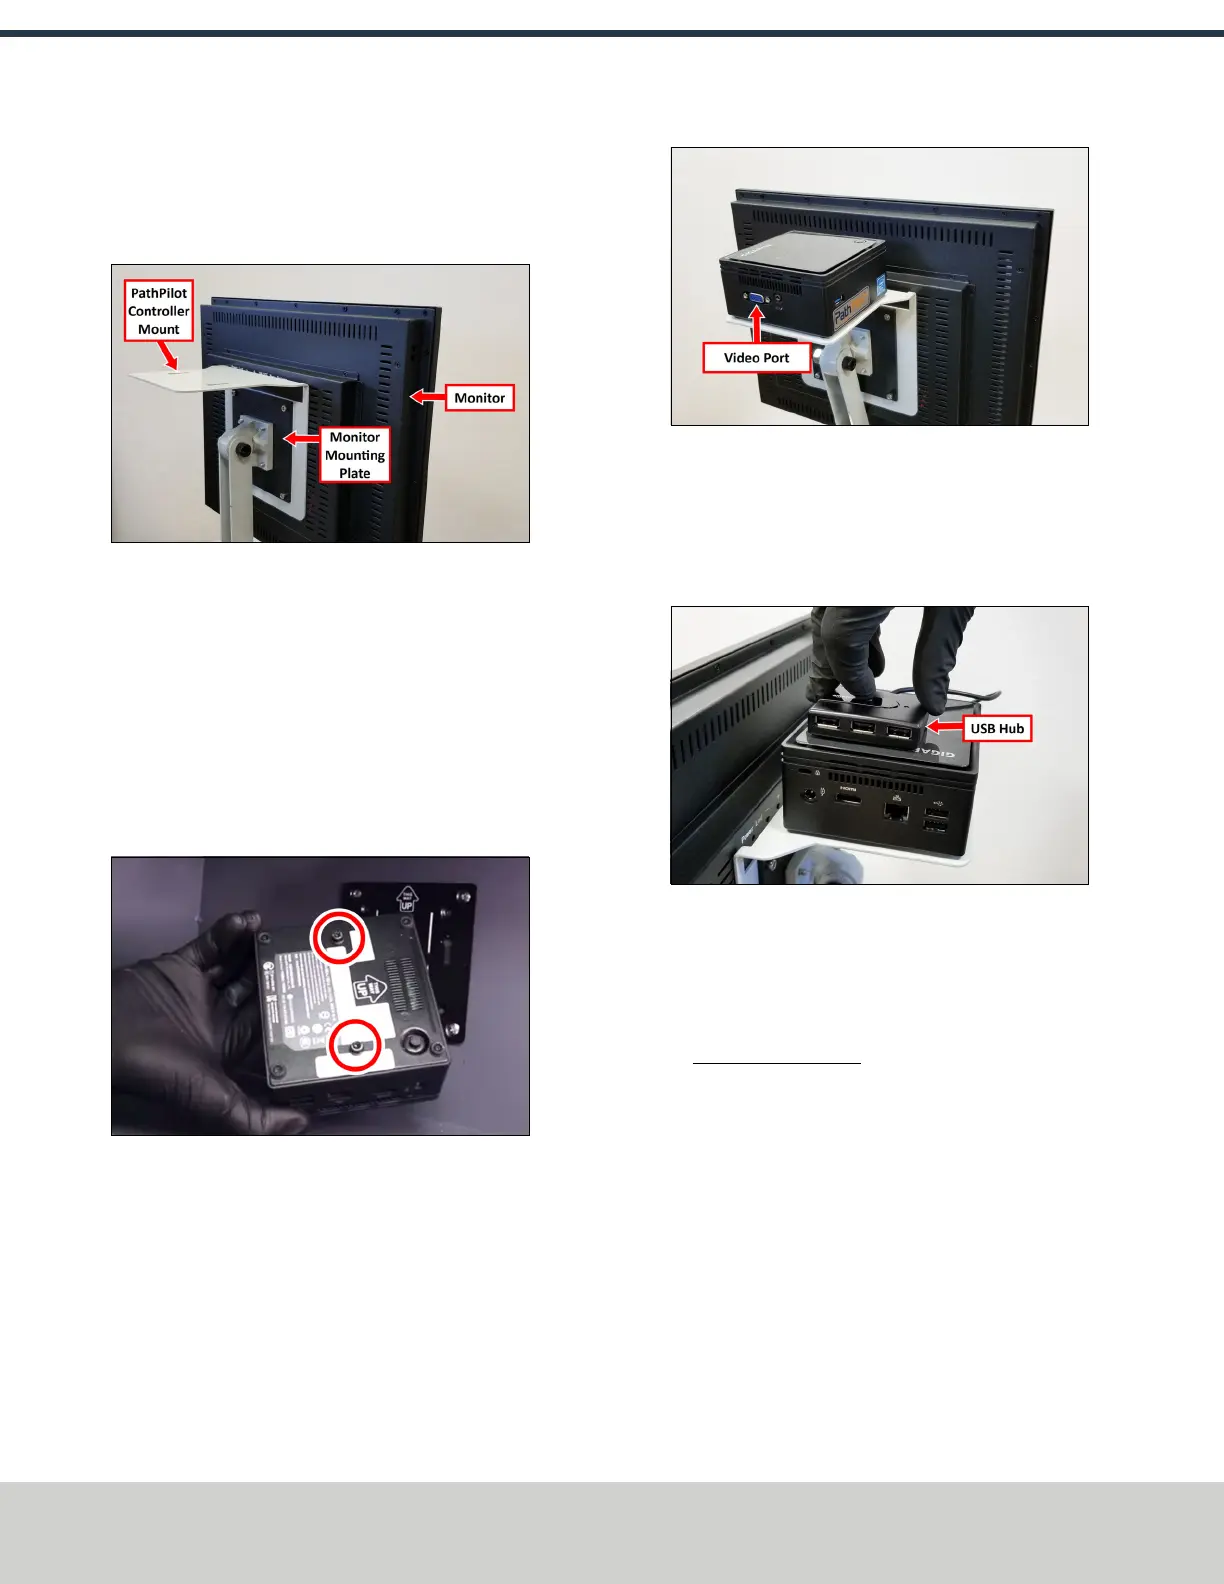
2. Attach the monitor, PathPilot Controller Vesa Mount, and
monitor mounting plate together with four M4 × 12 mm
socket head cap screws (provided with the PathPilot
Controller Vesa Mount).
Figure 4-21: PathPilot controller mount attached to
the back of the monitor.
3. Adjust the position of the monitor and the keyboard tray
with an 8 mm hex wrench and a 16 mm wrench. Once
complete, securely tighten the pivot screws.
Install the PathPilot Controller
The PathPilot controller attaches to the top of the PathPilot
Controller Vesa Mount and behind the monitor.
1. Put two standoffs into the Brix PathPilot Controller and
tighten them by hand.
Figure 4-22: Installing the standoffs on the Brix
PathPilot Controller.
2. Attach the Brix PathPilot Controller to its mount by
sliding the standoffs through the key slots. Verify that
the controller is oriented so that the monitor's video port
is facing away from the monitor.
Figure 4-23: Brix PathPilot Controller attached to its
mount.
3. Attach the 4-port USB hub (provided in the machine
owner's kit) to the top of the Brix PathPilot Controller
with double-sided tape (provided with the controller
mount).
Figure 4-24: USBhub attached to the mount
assembly.
4. Connect the USB hub's cord to any open USB port on the
Brix PathPilot Controller.
5. Connect all USB accessories to the USB hub:
l Jog Shuttle (PN 30616) (Optional)
l Keyboard
l Mouse
l Monitor
6. Connect the monitor's video cable to the PathPilot
controller.
7. Connect the loose end of the video cable to the monitor.
©Tormach® 2021
Specifications subject to change without notice.
Page 32 UM10753: 8L Operator's Manual (Version 0321B)
For the most recent version, see tormach.com/support
4: INSTALLATION