RemovingtheMasterBoom
ManifoldValve
1.Removeangeclampsandgasketsthatsecure
themanifoldforthemaster-boomvalve(Figure
114)tothemaster-boombypassvalve,agitation
valve,and90°angedelbow(attheendofthe
hosefortheowmeter).
Note:Retaintheangeclampsandgaskets
forinstallationinInstallingtheMasterBoom
ManifoldValve(page84).
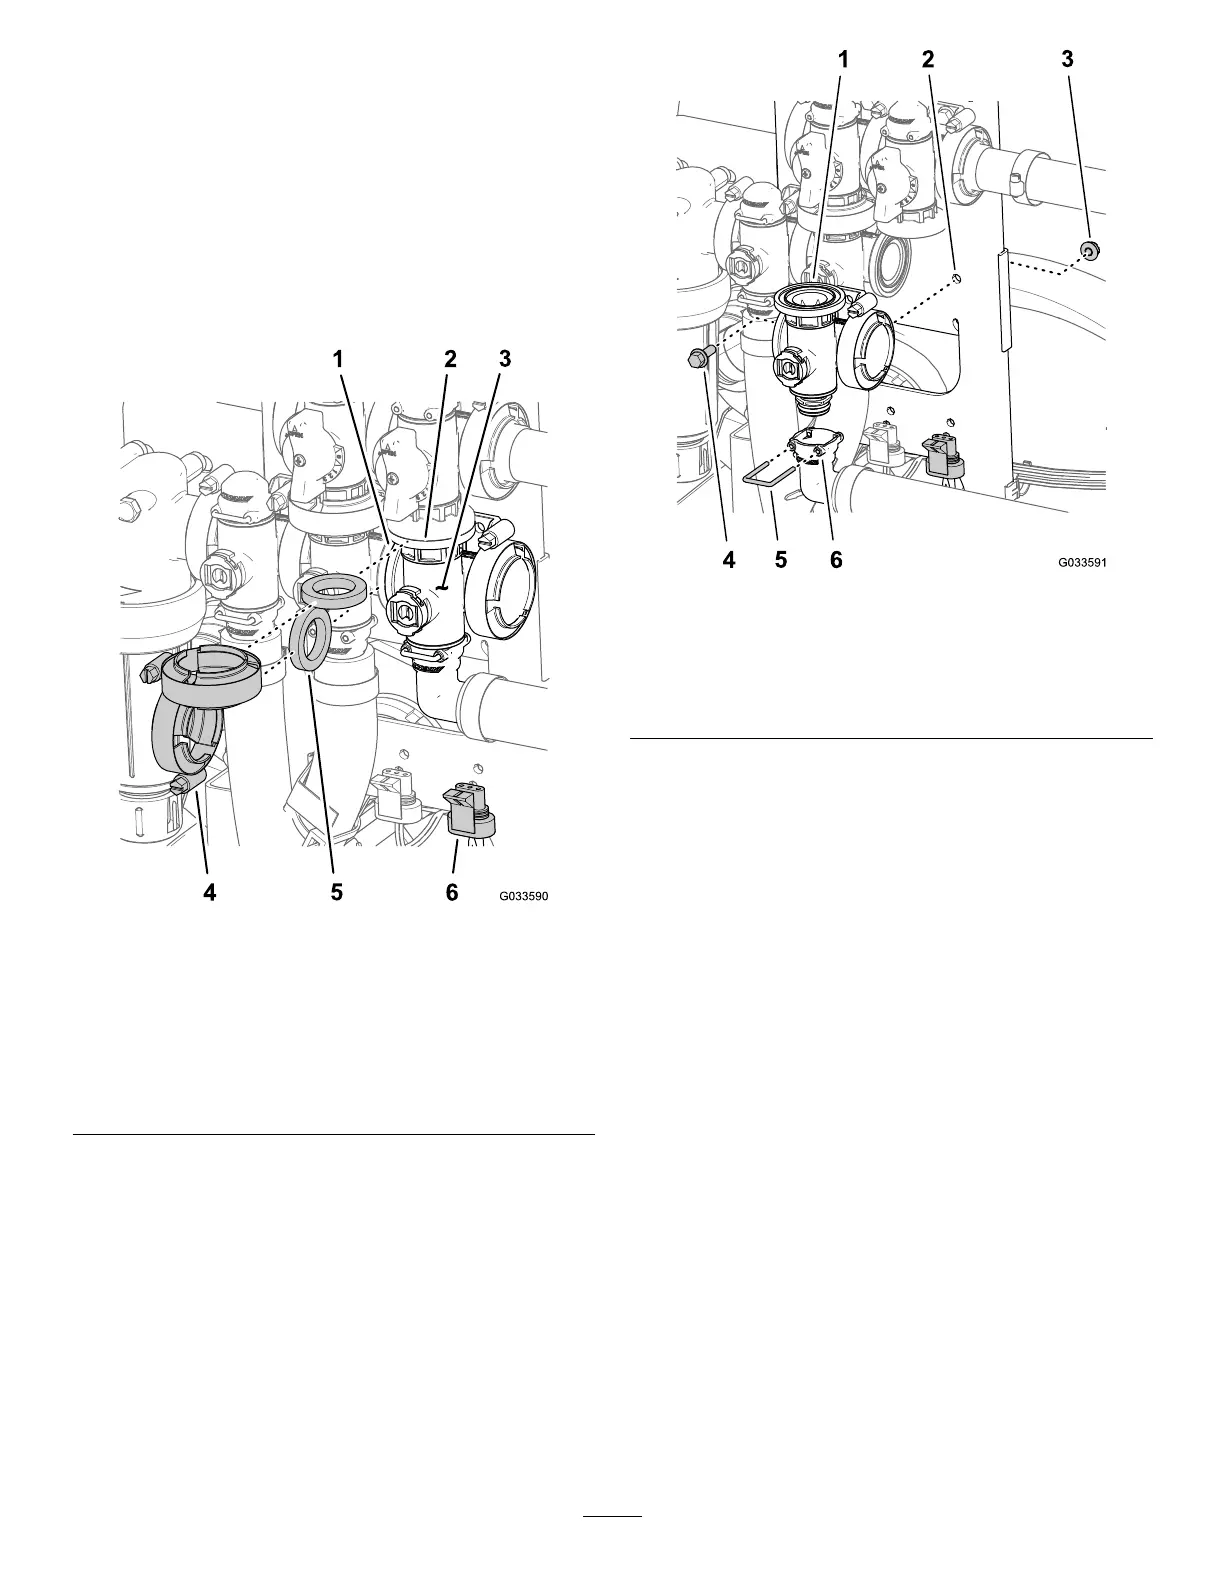
g033590
Figure114
1.Flange(agitation-valve)
4.Flangeclamp
2.Flange
(bypass—master-boom
valve)
5.Gasket
3.Manifold(master-boom
valve)
6.3-pinconnector(valve
actuator—master-boom
valve)
2.Removetheretainerthatsecurethe90°
outletttingtothemanifoldcouplingforthe
master-boomvalve(Figure115).
g033591
Figure115
1.Manifold(master-boom
valve)
4.Flange-headbolt(1/4x
3/4inch)
2.Valvemount5.Retainer
3.Flangelocknut(1/4inch)6.Socket(90°outlettting)
3.Removetheange-headbolt(1/4x3/4inch)
andangelocknut(1/4inch)thatsecurethe
master-boomvalvetothevalvemountand
removethevalvemanifoldfromthemachine
(Figure115).
Note:Retaintheange-headbolt,ange
locknut,andretainerforinstallationinInstalling
theMasterBoomManifoldValve(page84).
79