2. Setting up Network Server
68 Network Administration Guide — Setting up NetWare Print Server
3. Select the printer drivers to be installed in the “Printer Driv-
ers” list at each OS tab, and click [Continue].
• The Information dialog box appears.
4. Click [OK].
• It takes about 60 seconds to complete the creation of the NDPS Printer
object.
5. Double-click the NDPS Printer object that you created.
• The NDPS Printer dialog box appears.
6. Click [NDPS Remote Printer Management].
7. Check the “Install to workstation in this container” and click
[Update].
8. Click [OK] to close the NDPS Printer dialog box.
Setting up NDPS Using TOSHIBA NDPS Gateway
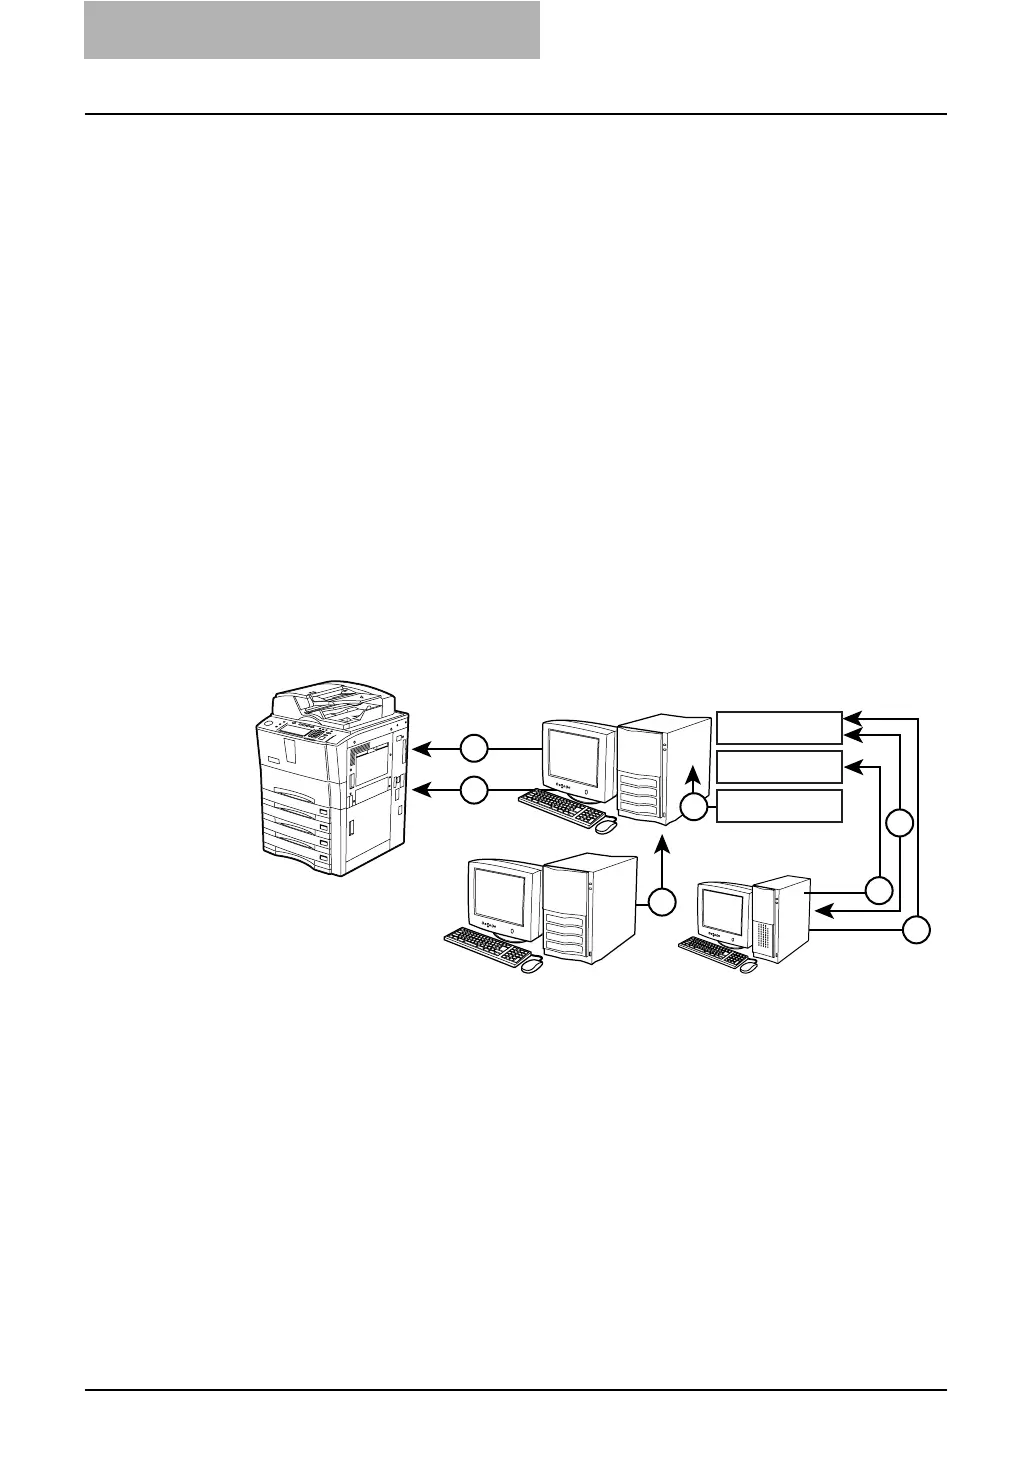
The TOSHIBA NDPS Gateway mechanism employs several components, notably the
NDPS Manager, NDPS Broker, and NDPS Printer Agent. The following figure illustrates
the communication flow between these objects.
1. The NetWare printer can be discovered in two ways:
• The printer is automatically discovered by the TOSHIBA NDPS Gateway.
You add it manually to the NDPS Manager, which resides on the same Net-
Ware file server as the TOSHIBA NDPS Gateway.
2. When an end-user attempts to add a NDPS printer, the client
queries the NDPS Brokers to identify all available NDPS
printers.
3. The NDPS Broker responds with a list of NDPS Printer
Agents. The user selects a Printer Agent and the TOSHIBA
NDPS Gateway downloads the appropriate driver to the
user’s desktop.
NetWare File Server
End UserAdministrator
1
1
6
NDPS Broker
Printer Agent
NDPS Manager
5
2
3
4

 Loading...


